How-to: The Bus Pirate, Universal Serial Interface

UPDATE: New firmware with JTAG and more

We’re always excited to get a new chip or SIM card to interface, but our enthusiasm is often dampened by the prototyping process. Interfacing any chip usually means breadboarding a circuit, writing code, and hauling out the programmer; maybe even a prototyping PCB.

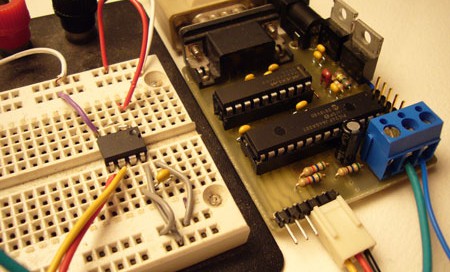
A few years ago we built the first ‘Bus Pirate’, a universal bus interface that talks to most chips from a PC serial terminal. Several standard serial protocols are supported at 3.3-5volts, including I2C, SPI, and asynchronous serial. Additional ‘raw’ 2- and 3- wire libraries can interface almost any proprietary serial protocols. Since this has been such a useful tool for us, we cleaned up the code, documented the design, and released it here with specs, schematic, and source code.

Continue reading “How-to: The Bus Pirate, Universal Serial Interface”

Adjustable Breadboard Power Supply

psboard

This looks like a great addition to your breadboard. [Nerdz] wanted a power supply that was easily portable and adjustable. He built a custom board that plugs directly into the breadboard’s power rails. It has a pot attached to the ground of a 7805 voltage regulator so the output can be adjusted from 5V to just under the supply voltage. Anything that makes a breadboard less of a rats nest is definitely a good thing.

Business Card AVR Board Updated

bcard

Evil Mad Scientist Laboratories has updated their business card AVR breakout boards to version 1.1. We suspect the changes will probably make them even more popular. The boards are designed for the ATmegaXX8 family of microcontrollers. The center has all 28 pins labeled while either end has a prototyping area. An in-system programming header is also provided. For the new version, both prototyping areas have been increased to accommodate DIP14 packages. The holes for the microcontroller are now larger so that they can hold a ZIF socket. Finally, the power and ground traces have been expanded. We’ve always like the versatility of these boards, as demonstrated in the Tennis for Two project, and can’t help wondering if these updates were made to facilitate another project.

Design For Manufacture

sparkfun

SparkFun has posted an excellent guide to the many different issues you could run into when you finally decide to get a circuit board professionally produced. We assume that most of you aren’t running a professional design firm and will appreciate these tips gleaned from years of experience. They provided a rule list, Eagle DRC, and CAM file to help you get it right the first time. The end goal is designing a board that won’t be prone to manufacturing errors. The tutorial starts by covering trace width and spacing. They recommend avoiding anything less than 10mil traces with 10mil spacing. For planes, they increase the isolation to 12mil to avoid the planes pouring onto a trace. They also talk about annular rings, tenting, labeling, and generating the appropriate gerber and drill files. SparkFun isn’t completely infallible though, and manages to produce a coaster from time to time.

SparkFun naturally followed up this strict tutorial with a guide to unorthodox header hole placement. If you want to learn more about Eagle, have a look at [Ian]’s overview of Eagle 5 and Ruin & Wesen’s layout videos.

Wireless Arduino Programming With ZigBee


ZigBee is a low-power communication system using digital radios. It’s intended to be easier to work with than Bluetooth. Adafruit recently added an adapter board for Digi’s XBee product line and has put together a great how-to to show the devices potential. Using two XBee radios and adapters you can wirelessly program an Arduino board. This would be great if your Arduino was installed in an inaccessible area or maybe it’s over 100feet away from where you’re working. The radios do serial communication just fine. What the how-to covers is getting the reset line working so the Arduino can restart automatically after you program it. Once the radio pair is configured properly, it will pass the RTS line state directly from one device to the other.

Tesla Turbines For Fun And Profit

[youtube=http://ca.youtube.com/watch?v=aoRh8T_VX-Y]

[Rick] has been building Tesla turbines in various ways and posting his projects to youtube. For those who are unfamiliar, a tesla turbine is a fanless turbine that uses a smooth central disk spun by friction from a gas or fluid. Since the turbine itself has no protrusions, it is extremely stable. There are lots of other benefits, which can be explored on the Wikipedia page. [Rick], as you can see from the video above has found several uses for them, from Halloween props, to generators for lights, to an automated shake flashlight shaker, you can even watch him rev one up to destruction. Though most of these are at relatively low speeds, he has shown that he can make one from CD spindles that is stable enough to reach 10,000 RPM. [Rick] admits that all they really do is spin fast and make cool noises, but they do that pretty well.

Update: Moments after this was published, we found an instructable by [Rick] on how to build a blender using a tesla turbine.