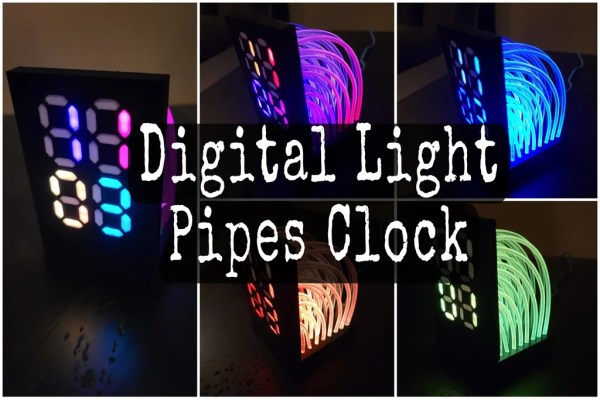
Digital Light Pipes Clock various view of seven-segment display using illuminated light-pipes

LED Clock Has Its Pipes On Display

For most hackers and makers, building a clock is a rite of passage. Few, though, will be as unusual and engaging as this design by [TerraG2].

By combining addressable LEDs, light pipes and 7-segment displays, [TerraG2] has built a timepiece that looks great and will surely be a great conversation starter as well. It’s packed full of features such as automatic brightness control, an accelerometer controlled user interface, and WiFi to make sure it’s always accurate.

partial rear view of the clock showing illuminated light pipes
Partial rear view of the clock showing illuminated light pipes

The decision to leave the light pipes visible behind the main display really makes the project stand out from other clock builds, and the methods [TerraG2] has used to achieve this look will no doubt be transferable to a host of other projects.

The LEDs are courtesy of a standard 8×8 RGB matrix, with a custom 3D-printed shroud to hold the light pipes in place and a clever connector at the other end to illuminate the segments. With two LEDs per segment, seven segments per digit, and four digits, there’s even room for some extra features down the line if you can think of a use for those eight spare LEDs.

The brain of the project is an ESP8266 D1 with an MPU6050 inertial measurement unit (IMU) to detect when it’s flipped over to change the color scheme.

Full documentation is on Github, and a video of the clock in use is after the break.

Light pipes have been used to great effect in some other clock projects we’ve seen, such as this modern Nixie clock and this “clock of clocks”, as well as in this light organ that we showed recently.
Continue reading “LED Clock Has Its Pipes On Display” →

You Can Build A Giant 7-Segment Display Of Your Very Own

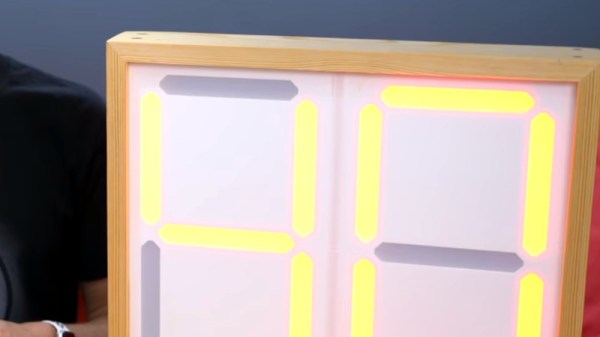
Sometimes you need to display a number nice and large, making it easily readable at a good distance. [Lewis] has just the thing for that: a big expandable 7-segment display.

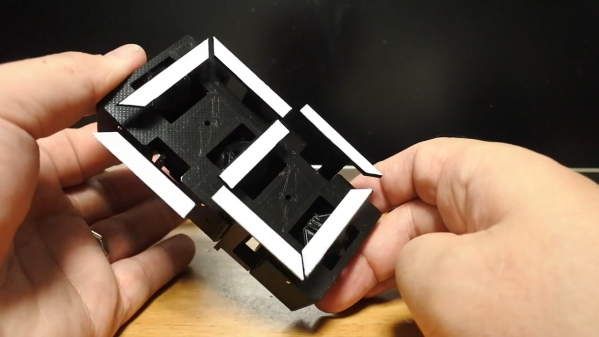
The build is modular, allowing it to be extended from 2 to 10 digits and beyond. The digits themselves are made of 3D-printed parts assembled onto acrylic. These can then be ganged up in a wooden frame for displaying larger numbers with more digits. Individual elements are lit by addressable LEDs, and the project can be built using an Arduino Nano or an ESP8266 for control. The latter opens up possibilities for controlling the screen over WiFi, which could prove useful.

[Lewis] has built his own version for a local swim club, where it will be used as a laptimer. Other applications could be as a scoreboard in various sports, or to confuse your neighbours by displaying random numbers in your front yard.

We’ve seen a similar build from [Ivan Miranda] that served well as a workshop clock, too. Video after the break.

Continue reading “You Can Build A Giant 7-Segment Display Of Your Very Own” →

SMT Part Counter Aims To Ease Taking Inventory

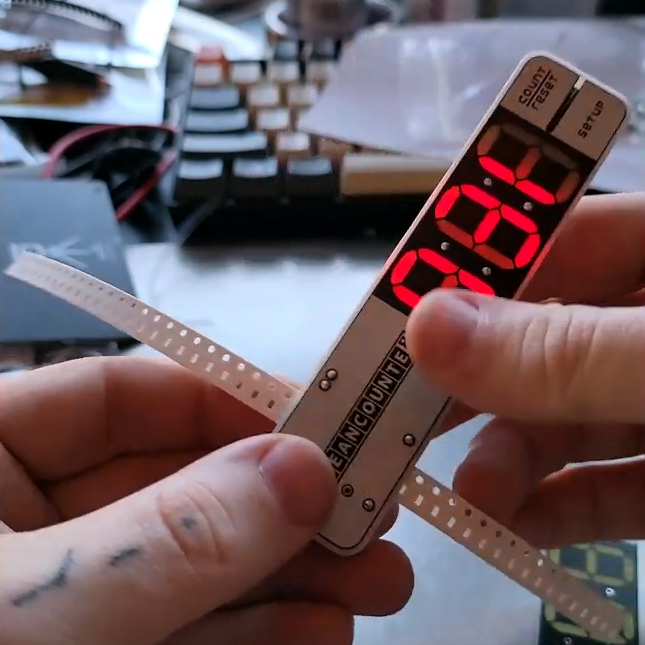
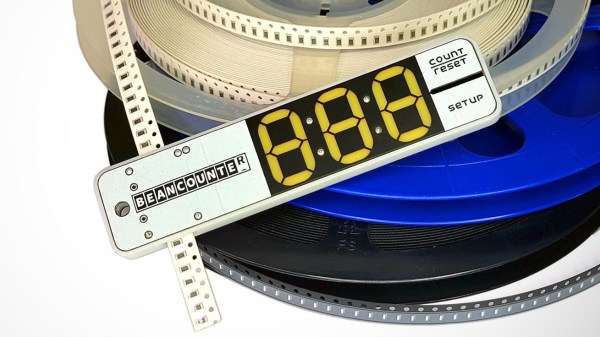
[Nick Poole] has an interesting idea for a new tool, one that has the simple goal of making accurate part counts of SMT reels as easy as pulling tape through a device. That device is the BeanCounter, an upcoming small handheld unit of his own design that counts parts as quickly as one can pull tape through a slot. The device is powered by a CR2032 cell and and works with 8 mm wide tapes up to 2 mm in height, which [Nick] says covers most 0805 or smaller sized parts, as well as things like SOT-23 transistors.

Why would one want to make such a task easier? Two compelling reasons for such a tool include: taking inventory of parts on partial reels or cut tape, and creating segments that contain a known number of parts.

The first is handy for obvious reasons, and the second is useful for things like creating kits. In fact, the usefulness of this tool for creating tape segments of fixed length is perhaps not obvious to anyone who hasn’t done it by hand. Sure, one can measure SMT tape with a ruler or a reference mark to yield a segment containing a fixed number of parts, but that involves a lot of handling and doesn’t scale up very well. In fact, the hassle of cutting tape segments accurately and repeatedly is a common pain point, so making the job easier has value.

If you looked at the photos and suspected that the big, 7-segment numeric display is done with clever PCB fabrication options (making segments by shining LEDs through PCB layers, a trick we always like to see) you’re not alone. After all, [Nick] has a lot of experience in getting clever with board fabrication, and eagle-eyed readers may even suspect that the reset and setup buttons on the edge of the tool are created by using flex PCB segments as switches. Want the nitty-gritty details? Visit the GitHub repository for the project and see it all for yourself at the CAD level.

Remoticon 2021 // Joey Castillo Teaches Old LCDs New Tricks

Segmented liquid crystal displays are considered quite an old and archaic display technology these days. They’re perhaps most familiar to us from their use in calculators and watches, where they still find regular application. [Joey Castillo] decided that he could get more out of these displays with a little tinkering, and rocked up to Remoticon 2021 to share his findings.

[Joey’s] talk is a great way to learn the skills needed to reverse engineer a typical segment LCD.
[Joey] got his start hacking on these displays via his Sensor Watch project –  a board swap for the venerable Casio F-91W wristwatch, with the project now available on CrowdSupply. It kits out the 33-year-old watch design with a modern, low-power ARM Cortex M0+ microcontroller running at 32 MHz that completely revolutionizes what the watch can do. Most importantly, however, it repurposes the watches original segmented monochrome LCD.

Segment LCDs are usually small monochrome devices made out of glass, that have the benefit of using very little power in their operation. They come with a fixed layout, which cannot be changed – so they’re often designed specifically for a given purpose. A calculator will have segments laid out to display numbers, often in the usual 7-segment fashion, while a watch may add dedicated segments for displaying things like “AM,” “PM,” or “ALARM.” Continue reading “Remoticon 2021 // Joey Castillo Teaches Old LCDs New Tricks” →

Mechanical 7-segment display

A One-Servo Mechanical Seven-Segment Display

The seven-segment display may be a bit prosaic after all these years, but that doesn’t mean there aren’t ways to spice it up. Coming up with a mechanical version of the typical photon-based display is a popular project, of which we’ve seen plenty of examples over the years. But this seven-segment display is quite a mechanical treat, and a unique way to flip through the digits.

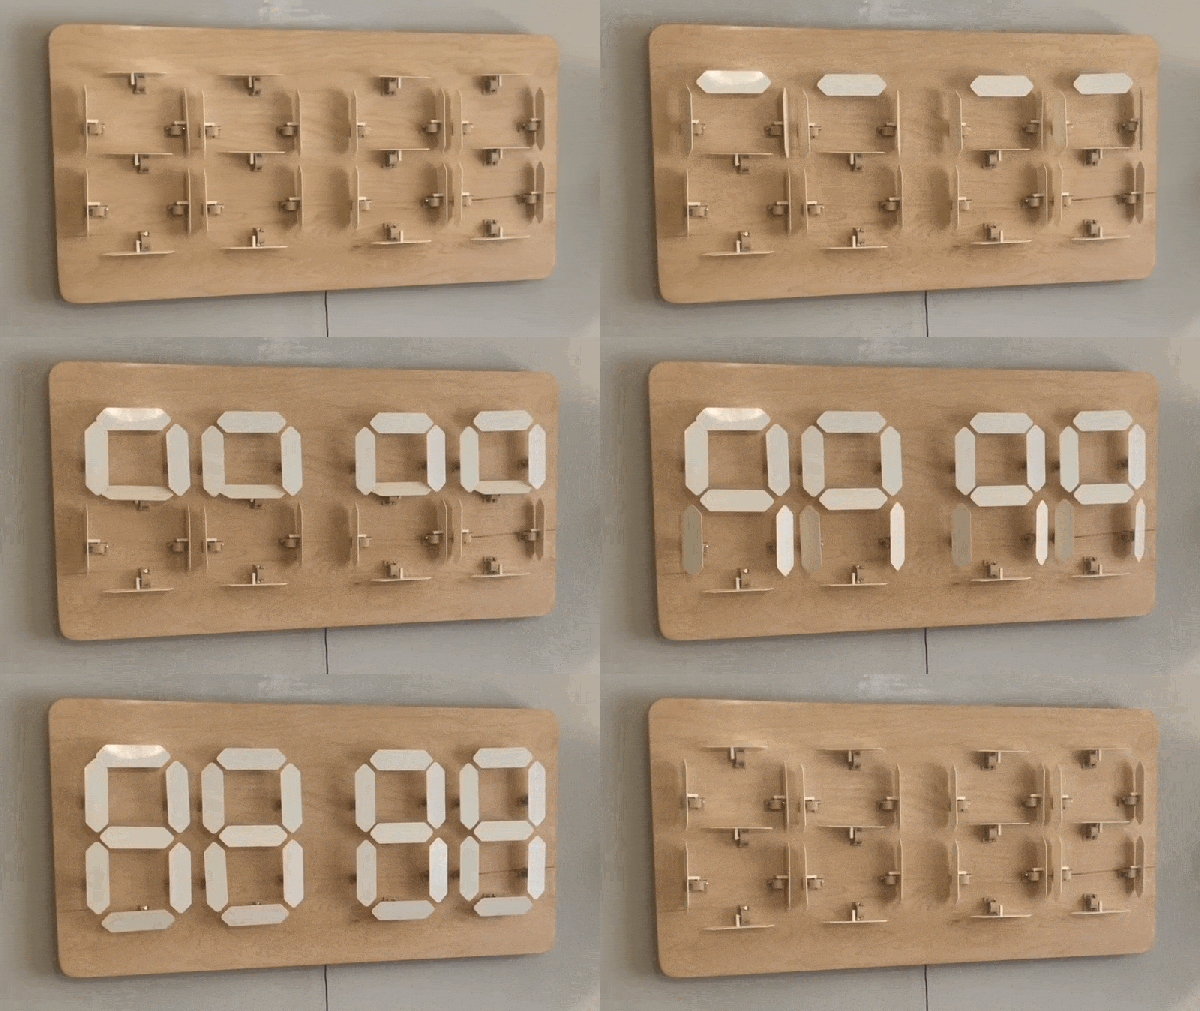
With most mechanical displays, we’re used to seeing the state of each segment changed with some kind of actuator, like a solenoid or servo. [Shinsaku Hiura] decided on a sleeker design using a 3D-printed barrel carrying one cam for each segment. Each hinged segment is attached to an arm that acts as a follower, riding on its cam and flipping on or off in a set pattern. Which digit is displayed depends on the position of the barrel, which is controlled with a single servo and a pair of gears. It trades mechanical complexity for electrical simplicity and overall elegance, and as you can see from the video below, it’s pretty snappy.

We think the best part of this build is figuring out the shape of the cams. We wonder how they compare to the cam profiles in [Greg Zumwalt]’s mechanical display; it uses two separate discs with grooves, but the principle is pretty much the same.

Continue reading “A One-Servo Mechanical Seven-Segment Display” →

A Whole Lot Of Stepper Motors Make The Most Graceful 7-Segment Displays

Over the years we’ve seen many takes on the 7-segment display. Among the most interesting are the mechanical versions of what is most often an LED-based item. This week’s offering is from [John Burd], who published a very odd video showing off the clock he made. But look beyond YouTuber antics and you’ll see the stepper motors he used to turn the segments are dripping with graceful beauty. (Video, embedded below.)

Okay if you want to hear [Charlie Sheen] say “Raspberry P-eye”, this is the video for you. [John] used Cameo to get the (former?) star to talk about what was used to build the clock. Like we said, the video is weird. Let’s embrace that right away and then never talk about it again.

The thing is, the build is such a good idea. [John] went with some stepper motors you can source relatively cheaply from Ali Express and the like. Typically they’re around a buck or two each and have a couple of wings for screw mounting brackets. This builds on the segment displays we’ve seen that use hobby servos by allowing you finer control of how the segments move. Sure, the 90° rotation isn’t all that much to work with, but it will be much smoother and you can get fancy with the kinematics you choose. The only place we see room for improvement is the alignment of the segments when they are turned “off” as you can see the center segment in the video thumbnail below is not quite level. Maybe a linkage mechanism would allow for a hing mechanism that aligns more accurately while hiding the servos themselves behind the mounting plate? It’s in your hands now!

In the demo video you’ll also find some interesting test rigs built to proof out the project. One just endurance tests the mechanism, but the other two envision water-actuated segments. One pumps a hollow, transparent segment with colored liquid. The other tried to use water droplets sprayed in the air to illuminate laser segments. Both are cool and we’d like to see more of the oddball approaches which remind us of the ferrofluid clock.

Continue reading “A Whole Lot Of Stepper Motors Make The Most Graceful 7-Segment Displays” →

Mechanical 7-Segment Display Uses A Single Motor

Seven-segment displays have been around for a long time, and there is a seemingly endless number of ways to build them. The latest of is a mechanical seven-segment from a master of 3D printed mechanisms, [gzumwalt], and can use a single motor to cycle through all ten possible numbers.

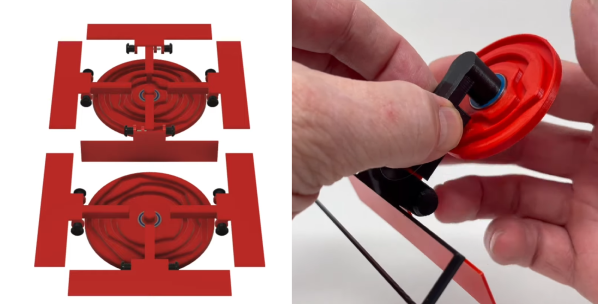
The trick lies in a synchronized pair of rotating discs, one for the top four segments and another for the bottom three segments. Each disc has a series of concentric cam slots to drive followers that flip the red segments in and out of view. The display can cycle through all ten states in a single rotation of the discs, so the cam paths are divided in 36° increments. [gzumwalt] has shown us a completed physical version, but judging by CAD design and working prototype of a single segment, we are pretty confident it will. While it’s not shown in the design, we suspect it will be driven by a stepper motors and synchronized with a belt or intermediate gear.

Another 3D printed mechanical display we’ve seen recently is a DIY flip dot, array, which uses the same electromagnet system as the commercial versions. [gzumwalt] has a gift for designing fascinating mechanical automatons around a single motor, including an edge avoiding robot and a magnetic fridge crawler.

Continue reading “Mechanical 7-Segment Display Uses A Single Motor” →