Garage Door Controller Gets The IoT Treatment

[TheStaticTurtle] built a custom controller for automating his garage doors. He wanted to retain the original physical button and RF remote control interfaces while adding a more modern wireless control accessible from his internet connected devices. Upgrading an old system is often a convoluted process of trial and error, and he had to discard a couple of prototype versions which didn’t pan out as planned. But luckily, the third time was the charm.

The original door-closer logic was pretty straightforward. Press a button and the door moves. If it’s not going in the desired direction, press the button once again to stop the motor, and then press it a third time to reverse direction. With help from the user manual diagrams and a bit of reverse-engineering, he was able to get a handle on how to plan out his add-on controller to interface with the old system.

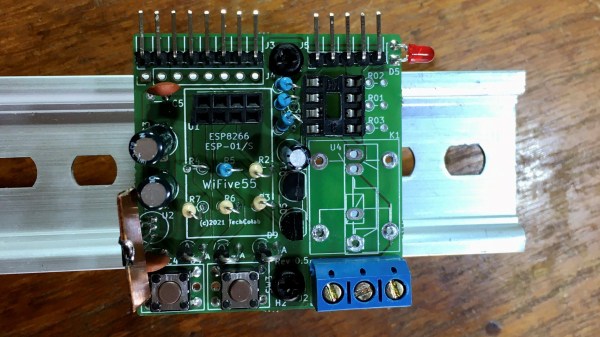
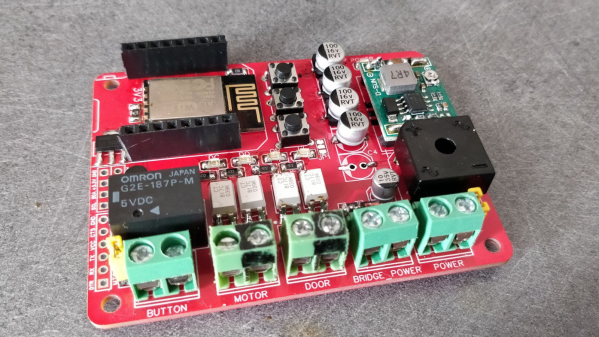
There are many micro-controller options available these days when you want to add IoT to a project, but [TheStaticTurtle] decided to use the old faithful ESP8266 as the brains of his new controller. For his add-on board to work, he needed to detect the direction in which the motor was turning, and detect the limit switches when the door reached end of travel in either direction. Finally, he needed a relay contact in parallel with the activation button to send commands remotely.

To sense if the motor was moving in the “open” or “close” direction, he used a pair of back-to-back opto-couplers in parallel with the motor terminals. He connected another pair of opto-couplers across the two end-limit switches which indicated when the door was fully open or closed, and shut off the motor supply. Finally, a GPIO from the ESP8266 actuates a relay to send the door open and close commands. The boards were designed in EasyEDA and with a quick turnaround from China, he was able to assemble, test and debug his boards pretty quickly.

The code was written using the Arduino IDE and connects the ESP8266 to the MQTT server running on his home automation computer. The end result is a nice dashboard with three icons for open, close and stop, accessible from all the devices connected to his home network. A 3D printed enclosure attaches outside the original control box to keep things tidy. Using hot melt glue as light pipes for the status LED’s is a pretty nifty hack. If you are interested in taking a deeper look at the project, [TheStaticTurtle] has posted all resources on his Github repository.

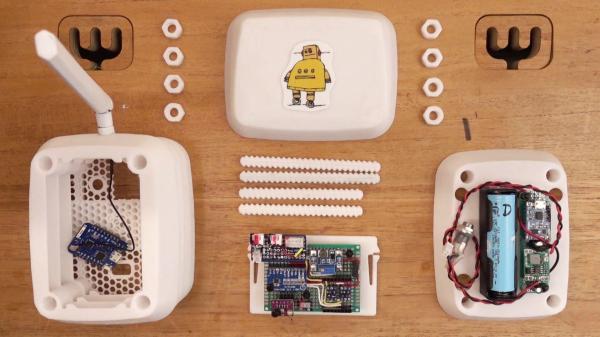
Parts of the automated soil moisture monitoring station

Solar Stevenson Screen For Smart Sprinkler

It’s not infrequent that we see the combination of moisture sensors and water pumps to automate plant maintenance. Each one has a unique take on the idea, though, and solves problems in ways that could be useful for other applications as well. [Emiliano Valencia] approached the project with a few notable technologies worth gleaning, and did a nice writeup of his “Autonomous Solar Powered Irrigation Monitoring Station” (named Steve Waters as less of a mouthful).

Of particular interest was [Emiliano]’s solution for 3D printing a threaded rod; lay it flat and shave off the top and bottom. You didn’t need the whole thread anyway, did you? Despite the relatively limited number of GPIO pins on the ESP8266, the station has three analog sensors via an ADS1115 ADC to I2C, a BME280 for temperature, pressure, and humidity (also on the I2C bus), and two MOSFETs for controlling valves. For power, a solar cell on top of the enclosure charges an 18650 cell. Communication over wireless goes to Thingspeak, where a nice dashboard displays everything you could want. The whole idea of the Stevenson Screen is clever as well, and while this one is 3D printed, it seems any kind of stacking container could be modified to serve the same purpose and achieve any size by stacking more units. We’re skeptical about bugs getting in the electronics, though.

We recently saw an ESP32-based capacitive moisture sensor on a single PCB sending via MQTT, and we’ve seen [Emiliano] produce other high quality content etching PCBs with a vinyl cutter.

Antique Map Of Paris With Modern Tech

There’s plenty to love about antiques, from cars, furniture, to art. While it might be a little bit of survivorship bias, it’s easy to appreciate these older things for superior quality materials, craftsmanship, or even simplicity. They are missing out on all of our modern technology, though, so performing “restomods” on classics is a popular activity nowadays. This antique map of Paris, for example, is made of a beautiful hardwood but has been enhanced by some modern amenities as well.

At first the creator of this project, [Marc], just wanted to give it some ambient lighting, but it eventually progressed over the course of two years to have a series of Neopixels hidden behind it that illuminate according to the current sun and moon positions. The Neopixels get their instructions from an ESP8266 which calculates these positions using code [Marc] wrote himself based on the current date. Due to the limitations of the ESP8266 it’s not particularly precise, but it gets the job done to great effect.

To improve on the accuracy, [Marc] notes that an ESP32 could be used instead, but we can give the ESP8266 a pass for now since the whole project is an excellent art installation even if it is slightly off on its calculations. If you need higher accuracy for tracking celestial objects, you can always grab a Raspberry Pi too.

18650 Brings ESP8266 WiFi Repeater Along For The Ride

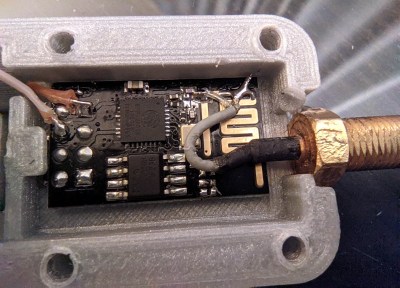
We’re truly fortunate to have so many incredible open source projects floating around on the Internet, since there’s almost always some prior art you can lean on. By combining bits and pieces from different projects, you can often save yourself a huge amount of time and effort. It’s just a matter of figuring out how all the pieces fit together, like in this clever mash-up by [bethiboothi] that takes advantage of the fact that the popular TP4056 lithium-ion battery charger module happens to be almost the exact same size of the ESP-01.

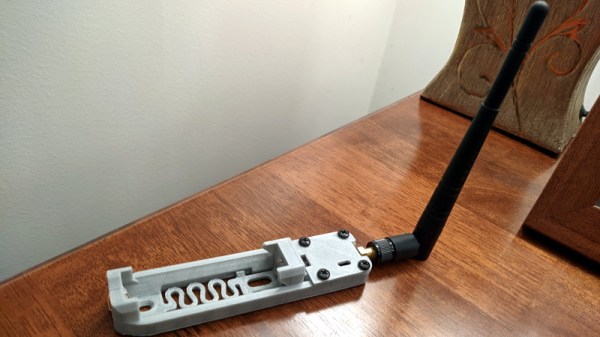
By taking a 3D printed design intended to attach a TP4056 module to the end of an 18650 cell and combining it with an ESP8266 firmware that turns the powerful microcontroller into a WiFi repeater, [bethiboothi] ended up with a portable network node that reportedly lasts up to three days on a charge. The observed range was good even with the built-in PCB antenna, but hacking on an external can get you out a little farther if you need it.

While it doesn’t appear that [bethiboothi] is using it currently, the esp_wifi_repeater firmware does have an automatic mesh mode which seems like it would be a fantastic fit for this design. Putting together an impromptu mesh WiFi network with a bunch of cheap battery powered nodes would be an excellent way to get network connectivity at an outdoor hacker camp, assuming the ESP’s CPU can keep up with the demand.

Networked Nightlights Glow Together

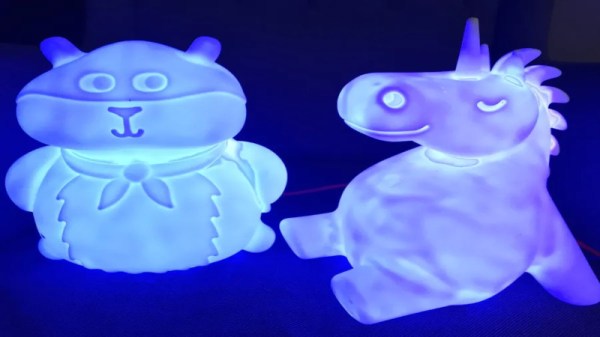
Nightlights are a great way to calm children who may be afraid of the dark, as well as to avoid stubbing your toe on furniture in the hallway. However, in this day and age of connected everything, they can do so much more. [Andy] came up with a great way to do just that, creating an advanced networked solution to suit his needs.

[Andy’s] nightlight serves not just in the usual fashion, but also as an indicator for his children. Depending on the time of day, the colour changes, indicating whether it’s time for bed, or also, if it’s too early to get out of bed in the morning and start watching cartoons. Each nightlight around the house runs on an ESP8266, which lights up using a set of WS2812B LEDs. The ESP8266 decides on colour values based on commands from a basic webserver running on a Raspberry Pi, updated every minute. This gives [Andy] the flexibility to make changes in one place, that then automatically roll out across the Nightlight Network (TM).

It’s a fun way of teaching the kids not to ruin a good Saturday sleep in, as well as serving as a fun colourful nightlight, too. Of course, luxury smart nightlights are becoming a thing, as this teardown of a Bluetooth unit shows. If you’ve built your own, be sure to drop us a line!

Smart Lid Spies On Sourdough Starter, Sends Data Wirelessly

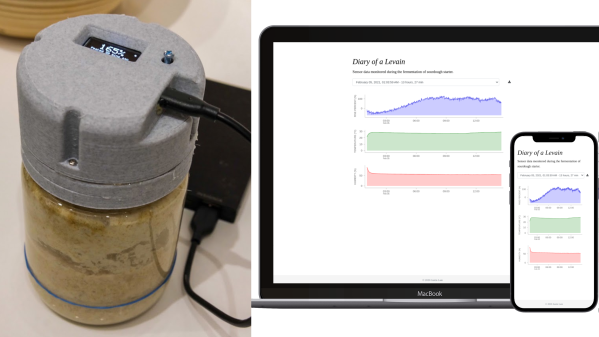
[Justin Lam] created a wonderfully-detailed writeup of his Smart Sourdough Lid project, which was created out of a desire to get better data on the progress and health of his sourdough starters, and to do so more efficiently. The result is a tidy, one-piece lid that constantly measures temperature, humidity, and height of the starter in the jar. Data is sent wirelessly for analysis, but there is also a handy OLED display on the top of the lid that shows immediately useful data like how much the starter has peaked, and how much time has passed since it did so.

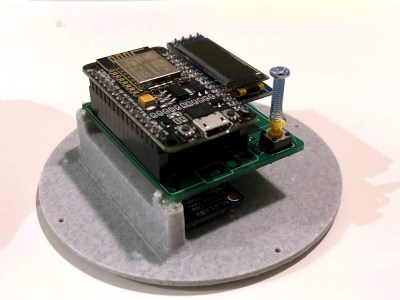
The PCB was optimized for size, and not designed with mounting in mind, so a hot-glued machine screw serves as a “button extender”. Issues like this can happen when enclosures are designed after the fact; it’s something to which we can all relate.

We really like how focused the design is, and the level of detail [Justin] goes into to explain his design decisions and describe how well they worked out. This isn’t [Justin]’s first kick at the can when it comes to getting data on his sourdough, after all. We remember his earlier work using computer vision to analyze sourdough starters, and he used what he learned to inform this new design; the smart lid is easier to use and handles data much more efficiently.

The project’s GitHub repository has all the information needed to build your own. The lid is ESP8266-based and integrates a VL6180X time-of-flight (ToF) distance sensor, DHT22 to sense temperature and humidity, and a small SSD1306 OLED display for data. A small custom PCB keeps the modules tidy, and a 3D-printed custom enclosure makes it one tidy package.

[Justin] also analyzes the results he obtained and talks about what they mean in the last part of his writeup, so if you’re into baking and interested in his findings, be sure to give that a look.

A Smart Way To Wire Smart Switches

Smart switches are fun, letting you control lights and appliances in your home over the web or even by voice if you’re so inclined. However, they can make day-to-day living more frustrating if they’re not set up properly with regards to your existing light switches. Thankfully, with some simple wiring, it’s possible to make everything play nice.

The method is demonstrated here by [MyHomeThings], in which an ESP8266 is used with a relay to create a basic smart switch. However, it’s wired up with a regular light switch in a typical “traveller” multiway switching scheme – just like when you have two traditional light switches controlling the same light at home. To make this work with the ESP8266, though, the microcontroller needs to be able to know the current state of the light. This is done by using a 240V to 3.3V power supply wired up in parallel with the light. When the light is on, the 3.3V supply is on. This supply feeds into a GPIO pin on the ESP8266, letting it know the light’s current state, and allowing it to set its output relay to the correct position as necessary.

This system lets you use smart lighting with traditional switches with less confused flipping, which is a good thing in our book. If you’re using standalone smart bulbs, however, you could consider flashing them with custom firmware to improve functionality. As always, if you’ve got your own neat smart lighting hacks, be sure to let us know!