A Keyboard With No Keys

For as capable as smartphone hardware is, the software running on them can be especially restrictive and cumbersome. Unlike a single-board computer with GPIO running a standard Linux operating system and some intuitive programming language like Python, smartphones are generally walled gardens where programming major overhead, and if a custom program can be run on them at all the user still has to figure out how to interface hardware with a USB-C port. To skip past all of this, [nicolas.ma] built an audio modem that can send keyboard input to a computer with nothing more than a browser.

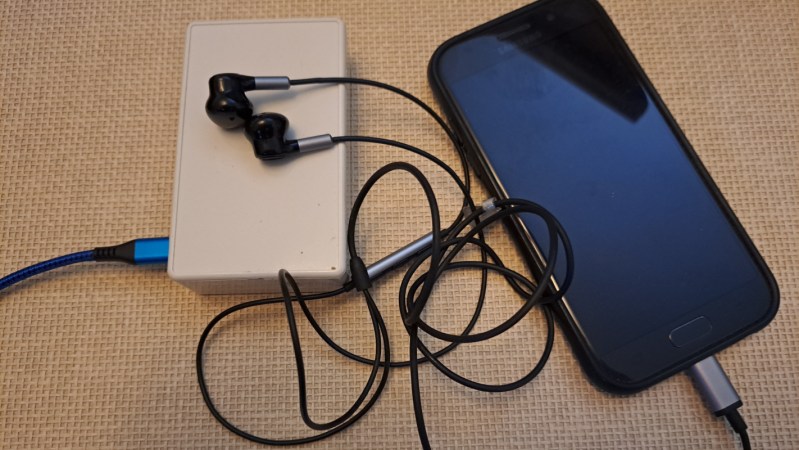
The “keyboard” starts off in a browser running on a standard smartphone. A user can input text into the browser, which then gets converted into a series of audible audio pulses that can be sent to the keyboard. The keyboard itself listens to those pulses, decodes them, and then sends the text through to the computer as a standard USB device thanks to an Arduino Micro at the center. Arduino Micros are excellent choices for keyboard controllers because they have a built-in USB chip.

The protocol used here is designed and built by [nicolas.ma] as well. The words allow for variable length, with the device determining message length, and a word-ending scheme that automatically sends the message to memory when it’s detected that the message is finished. There’s also integrity checking and the ability to check on the link’s state. From hardware to software it’s an impressive build, and for anyone wondering what this might be used for [nicolas.ma] has already built a password manager from itContinue reading “A Keyboard With No Keys”
Using Solar Air Heating To Dry Clothes

About a month ago, [Greenhill Forge] built a few solar panels to collect energy from the sun. Unlike solar photovoltaics, which turn sunlight directly into electricity, these were designed to gather solar thermal energy with air. These types of panels can gather a tremendous amount of energy for a very low cost, and although the first video only went into the theory of their operation, his latest video actually shows us how to use that energy in a practical way.

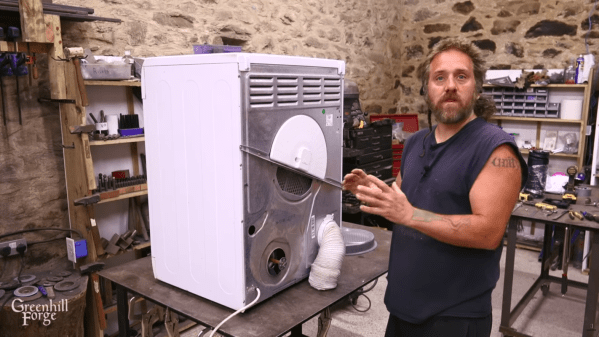
The video starts by building a new solar panel, using upgraded materials and building methods compared to the previous versions which should improve the efficiency. There’s some data analysis of the performance, but at the end of the video [Greenhill Forge] actually hooks one of these up to a clothes dryer to explore its real-world efficacy. This process involves disconnecting the electric heater, removing one of the blower fans, and building a new flange to accept the heated air from the solar panel. A microcontroller keeps an eye on the incoming air temperature and controls a fan to try to hit the target temperature.

After an hour of drying, the test clothing was completely dry, with the only electricity used to turn the drum in the dryer. This is more than an order of magnitude of reduction in the power needed to dry clothes, which is fairly impressive. [Greenhill Forge] also notes that systems like these could augment off-grid systems not only for clothes drying but for home heating, greenhouse heating, or drying out various crops and that they could reduce strain on an electrical system that otherwise relies on resistive heating methods. There are many ways of building these panels, so be sure to check out his first video for ideas. Continue reading “Using Solar Air Heating To Dry Clothes”

Medication Reminder Uses Only One Button

As anyone who takes medicines regularly will attest to, the days have a tendency to blur together, making it hard to remember if you did something like take that day’s dose or not. There are plenty of products available to help keep track of medication reminders but many are overly complicated, so [Jeroen] built this one which keeps simplicity and usability as its core design principle.

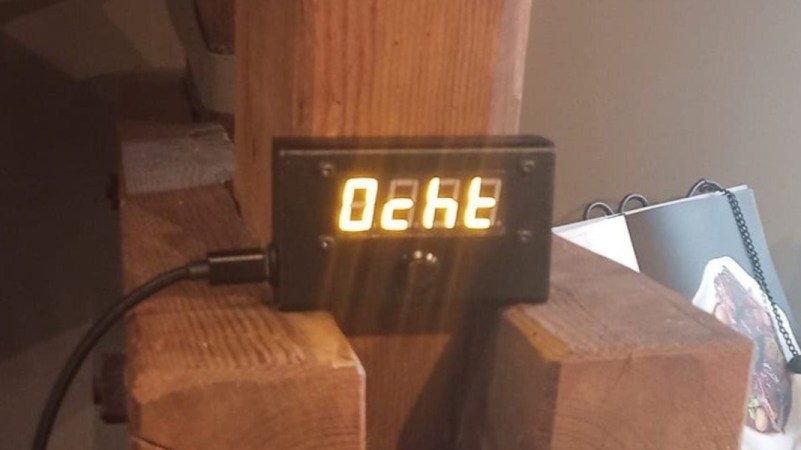
[Jeroen] calls it the MedMinder, and it’s a small, compact, rectangular device with a four-character display meant to sit on a countertop. When it’s time to take a medicine, the display will show that medicine’s four-letter code until the user pushes the single button under the display, signalling that they’ve taken their dose. If many different medications have to be taken at the same time, it displays the first priority until the button is pushed, and then displays whichever one is next after that.

Programming is a little less straightforward, as the medications need to be added to the source code and uploaded to the Arduino that sits at the center of this build, but with the source code available this isn’t too difficult for someone with minimal experience with microcontrollers.

In an idealized world, technology should make our lives simpler or easier, and this small device goes a long way towards helping with that goal. Especially for an important but mundane task that can be surprisingly easy to lose track of. Although we glossed over the accuracy of this device’s clock in this article, we do have a comprehensive guide for selecting the right real-time clock for microcontrollers like this.

Three Arduinos Team Up To Make 80s-Style Computer

Back in the 80s, buying a home computer could easily mean an inflation-adjusted cost of thousands of dollars (or your equivalent currency unit of choice), and all for an 8-bit machine that might not have a hard drive and almost certainly didn’t connect to a network. Here in the future it’s easy to get spoiled by all the computing power and inexpensive devices practically falling into our laps, but using some modern low-cost microcontrollers can connect us to our early computing roots like [Joe]’s latest Arduino-based computer.

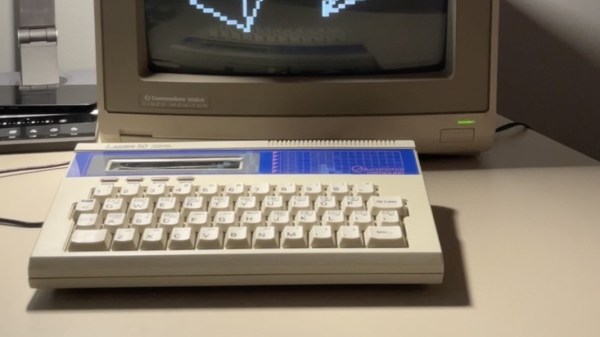
Taking design an engineering cues from computers like the Timex Sinclair 1000, Commodore PET, and TRS-80 MC-10, this computer uses a trio of Arduinos to accomplish what the best computer manufacturers once did with tons of integrated circuits. An Arduino Due handles all of the processing and traditional computing tasks, including a somewhat customized BASIC implementation, while an Uno performs audio processing duties. Taking care of the video processing is the much more capable Arduino Mega, outputting 40×25 monochrome NTSC composite video at 8×8 character resolution. There’s even WiFi courtesy of an ESP32 — certainly an upgrade compared to the source material.

After booting it up, the user gets a Commodore-like experience that replicates the 80s computing era quite well, and is even built inside its own keyboard case just like that era of computers usually were. [Joe] plans to release all three firmware images and the Python script used to get files onto the faux-retro machine, so keep an eye out for that.

In the event that you used rubles instead of dollars to pay for your expensive 8-bit machines back in the 80s, this computer might be more up your alley instead.

Camera Slider: Build Instead Of Buy Goes Awry

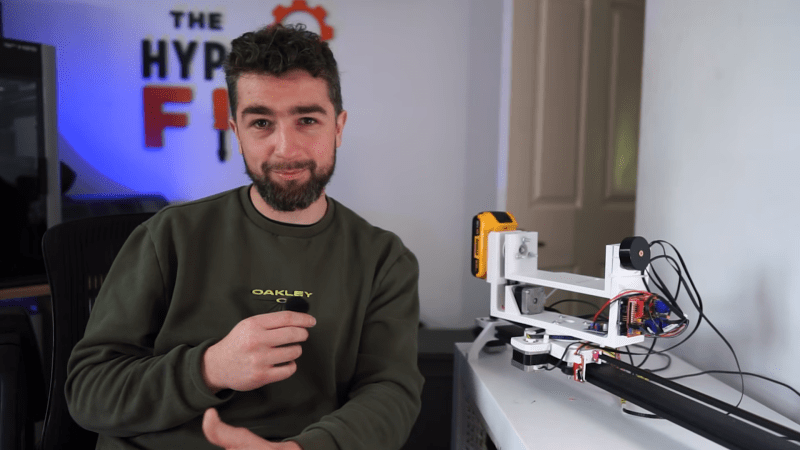
[TheHyperFix] had a problem. He’d spied a brilliant camera slider, but didn’t want to lay out big money to acquire it. The natural solution? Build one! Only, life is seldom so straightforward.

The plan was straightforward – take an old broken 3D printer, and repurpose its parts to make a camera slider instead. The build started with a aluminium extrusion, some V-slot wheels, and a 3D printed platform to hold the camera. Moving the platform was done via a belt drive, using the stepper motors and some software to tell the original printer controller what to do.

Unfortunately, the early experiments failed when the controller blew up under load. An Arduino was subbed in with a CNC shield, which got things back on track, and [TheHyperFix] had a somewhat functional slider with relatively jerky movement. A tough iterative design process ensued to work out problems with bearings and the Arduino’s pulse limit, among others.

As it stands, the slider is semi-functional, but it’s not quite well behaved enough to use for professional shooting. Still, for a first attempt at electronics prototyping, we think [TheHyperFix] did a pretty solid job. It might not be all there yet, but it’s well on the way, and a great deal was learned in the process.

If you’re trying to build a camera slider in a hurry, you might like to try recreating one of the builds we’ve featured before. Video after the break.

Continue reading “Camera Slider: Build Instead Of Buy Goes Awry”

Python Comes To The Arduino Uno Q

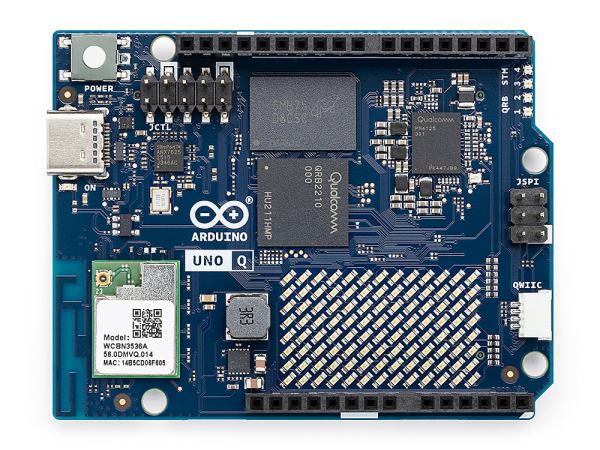
MicroPython is a well-known and easy-to-use way to program microcontrollers in Python. If you’re using an Arduino Uno Q, though, you’re stuck without it. [Natasha] saves the day by bringing us a a subset reimplementation of machine for the Arduino Uno Q.

In the past, microcontrollers were primarily programmed in C, but since MicroPython’s popularity increased over the years, it has become more and more common for introductory microcontroller programming to be in Python. Python, of course, is generally considered more beginner-friendly than C. [Natasha] presumably wanted to teach this way using an Uno Q, but the usual MicroPython APIs weren’t available. And so, in true hacker fashion, they simply made their own library to implement the most important bits of the familiar API. It currently implements a subset of the machine module: Pin, PWM, ADC, I2C, SPI and UART. While not complete, this certainly has potential to make the Uno Q easier to use for those familir with MicroPython.

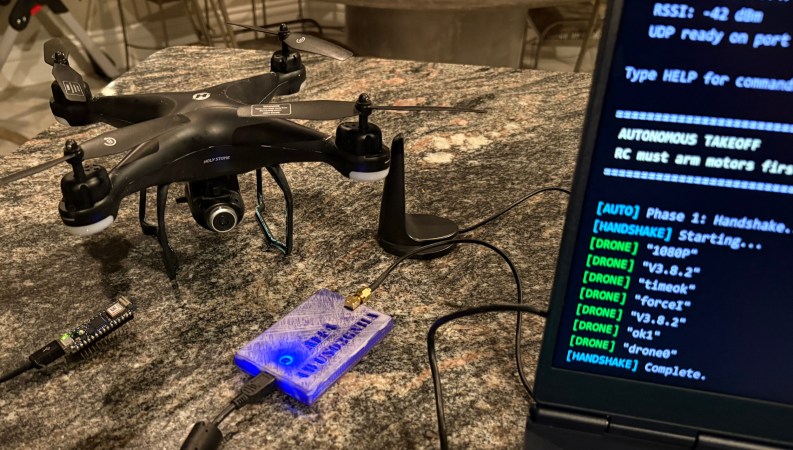
A laptop communicating with the drone via an Arduino

Reverse-Engineering The Holy Stone H120D Drone

There are plenty of drones (and other gadgets) you can buy online that use proprietary control protocols. Of course, reverse-engineering one of these protocols is a hacker community classic. Today, [Zac Turner] shows us how this GPS drone can be autonomously controlled by a simple Arduino program or Python script.

What started as [Zac] sniffing some UDP packets quickly evolved into him decompiling the Android app to figure out what’s going on inside. He talks about how the launch command needs accurate GPS, how there’s several hidden features not used by the Android app, et cetera. And it’s not like it’s just another Linux SoC in there, either. No, there’s a proper Real-Time Operating System (RTOS) running, with a shell and a telnet interface. The list of small curiosities goes on.

After he finished reverse-engineering the protocol, he built some Python scripts, through which you can see the camera feed and control the drone remotely. He also went on to make an Arduino program that can do the latter using an Arduino Nano 33 IoT.