Giant Connect Four Pits You Against The Computer

You can build a Connect Four solver in software, but it won’t be all that much fun. Now apply that same automation to a 15-foot-tall plywood version of the classic board game and you’ve just created a smile-making-machine for everyone within eyesight. Behold the Mono-Purpose Automated Robot Versed In Connnect4 (Marvin) which Ben and Jonathan dreamed up on their way home from Maker Faire last year, and made into their exhibit this year.

On the physical side of things they got really creative in lifting the discs and sorting them into the column chosen by the software brain of the game. A chain travels along one side with fingers every few feet. The fingers travel along the channel, lifting the discs. Those fingers are a couple of bolts, with some metal filler, all epoxied into one solid unit.

At the top of the disc elevator, and at the top position of each column in the gaming board, there are IR reflectance sensors which send feedback to the Arduino that drives the hardware. This proved a major issue during setup the day before the Faire. The reflectance sensors are just blasting out IR and not using a carrier signal. In direct sunlight, the detector was in a constant state of being tripped. After some trial and error, the logic for the sensors was flipped to detect the absence of sunlight by placing black plastic behind that top row of the board and putting duct tape over the IR emittors.

There’s a router and laptop rolled into the system. The Arduino makes an HTTP request to software on the laptop. In addition to determining where the next move should be made, the laptop is connected to a large screen which shows the current state of the gaming board. This is a head-to-head, human versus machine game. The human player drops their discs from the top of the board using a paint roller that hooks into a hole at the center of the disc. This way the player’s disc passes by the sensors, triggering the machine’s next move.

It’s a clever build and due to the sheer size it’s pretty awesome they were able to get it to the Faire from Philadelphia. Don’t miss the video after the break that shows off the fun and excitement of this gaming giant.

Continue reading “Giant Connect Four Pits You Against The Computer”

DIY Puff-Suck Interface Aims For Faster Text Input

Puff and Suck (or Sip and Puff) systems allow people with little to no arm mobility to more easily interact with computers by using a straw-like unit as an input device. [Ana] tells us that the usual way these devices are used to input text involves a screen-based keyboard; a cursor is moved to a letter using some method (joystick, mouse emulator, buttons, or eye tracking) and that letter is selected with a sip or puff into a tube.

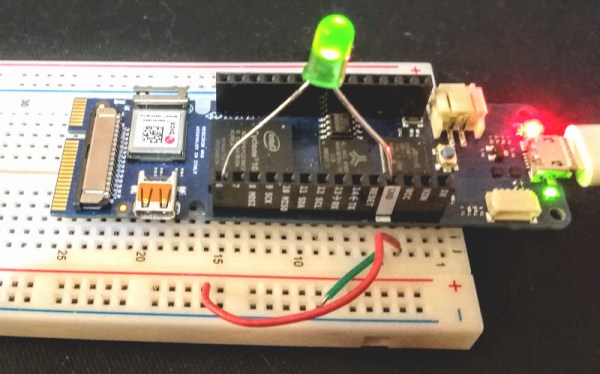
[Ana] saw such systems as effective and intuitive to use, but also limited in speed because there’s only so fast that one can select letters one at a time. That led to trying a new method; one that requires a bit more work on the user’s part, but the reward is faster text entry. The Puff-Suck Interface for Fast Text Input turns a hollow plastic disk and a rubber diaphragm into bipolar pressure switch, able to detect three states: suck, puff, and idle. The unit works by having an IR emitter and receiver pair on each side of a diaphragm (one half of which is shown in the image above). When air is blown into or sucked out of the unit, the diaphragm moves and physically blocks one or the other emitter-receiver pair. The resulting signals are interpreted by an attached Arduino.

How does this enable faster text input? By throwing out the usual “screen keyboard” interface and using Morse code, with puffs as dots and sucks as dashes. The project then acts as a kind of Morse code keyboard. It does require skill on the user’s part, but the reward is much faster text entry. The idea got selected as a finalist in the Human-Computer Interface Challenge portion of the 2018 Hackaday Prize!

Morse code may seem like a strange throwback to some, but not only does the bipolar nature of [Ana]’s puff-suck switch closely resemble that of Morse code input paddles, it’s also easy to learn. Morse code is far from dead; we have pages of projects and news showing its involvement in everything from whimsical projects to solving serious communication needs.

Cheating The Perfect Wheelie With Sensors And Servos

Everyone remembers popping their first wheelie on a bike. It’s an exhilarating moment when you figure out just the right mechanics to get balanced over the rear axle for a few glorious seconds of being the coolest kid on the block. Then gravity takes over, and you either learn how to dismount the bike over the rear wheel, or more likely end up looking at the sky wondering how you got on the ground.

Had only this wheelie cheating device been available way back when, many of us could have avoided that ignominious fate. [Tom Stanton]’s quest for the perfect wheelie led him to the design, which is actually pretty simple. The basic idea is to apply the brakes automatically when the bike reaches the critical angle beyond which one dares not go. The brakes slow the bike, the front wheel comes down, and the brakes release to allow you to continue pumping along with the wheelie. The angle is read by an accelerometer hooked to an Arduino, and the rear brake lever is pulled by a hobby servo. We honestly thought the servo would have nowhere near the torque needed, but in fact it did a fine job. As with most of [Tom]’s build his design process had a lot of fits and starts, but that’s all part of the learning. Was it worth it? We’ll let [Tom] discuss that in the video, but suffice it to say that he never hit the pavement in his field testing, although he appeared to be wheelie-proficient going into the project.

Still, it was an interesting build, and begs the question of how the system could be improved. Might there be some clues in this self-balancing motorized unicycle?

Continue reading “Cheating The Perfect Wheelie With Sensors And Servos”

Cat Robot’s Secret To Slim Legs? Banish The Motors!

The first thing to notice about [Bijuo]’s cat-sized quadruped robot designs (link is in Korean, Google translation here) is how slim and sleek the legs are. That’s because unlike most legged robots, the limbs themselves don’t contain any motors. Instead, the motors are in the main body, with one driving a half-circle pulley while another moves the limb as a whole. Power is transferred by a cable acting as a tendon and is offset by spring tension in the joints. The result is light, slim legs that lift and move in a remarkable gait.

[Bijuo] credits the Cheetah_Cub project as their original inspiration, and names their own variation Mini Serval, on account of the ears and in keeping with the feline nomenclature. Embedded below are two videos, the first showing leg and gait detail, and the second demonstrating the robot in motion.

Continue reading “Cat Robot’s Secret To Slim Legs? Banish The Motors!”

Adding Upgrades To A Stock Motorcycle

In today’s world of over-the-air firmware upgrades in everything from cars to phones to refrigerators, it’s common for manufacturers of various things to lock out features in software and force you to pay for the upgrades. Even if the hardware is the same across all the models, you can still be on the hook if you want to unlock anything extra. And, it seems as though Suzuki might be following this trend as well, as [Sebastian] found out when he opened up his 2011 Vstrom motorcycle.

The main feature that was lacking on this bike was a gear indicator. Even though all the hardware was available in the gearbox, and the ECU was able to know the current gear in use, there was no indicator on the gauge cluster. By using an Arduino paired with an OBD reading tool (even motorcycles make use of OBD these days), [Sebastian] was able to wire an LED ring into the gauge cluster to show the current gear while he’s riding.

The build is very professionally done and is so well blended into the gauge cluster that even we had a hard time spotting it at first. While this feature might require some additional lighting on the gauge cluster for Suzuki to be able to offer this feature, we have seen other “missing” features in devices that could be unlocked with a laughably small amount of effort.

Continue reading “Adding Upgrades To A Stock Motorcycle”

The Tide Is High, And This Clock Lets You Know

In case you happen to have an ocean nearby, you’re probably familiar with its rising and falling tides. And if mudflat hiking is a thing in your area, you’re also aware of the importance of good timing and knowing when the water will be on its way back. Tide clocks will help you to be prepared, and they are a fun alternative to your usual clock projects. If you’re looking for a starting point, [rabbitcreek] put together an Arduino-based tide clock kit for educational purposes.

If you feel like you’re experiencing some déjà vu here, this indeed isn’t [rabbitcreek]’s first tide clock project. But unlike his prior stationary clock, he has now created a small and portable, coin-cell version to take with you out on the sea. And what shape would better fit than a 3D printed moon — unfortunately the current design doesn’t offer much waterproofing.

For the underlying tide calculation itself, [rabbitcreek] uses just like in his previous project [Luke Miller]’s location-based library for the ubiquitous DS1307 and DS3213 real-time clocks. Of course, if you also want to keep track of other events on your clock, why not set up calendar events for the next rising tide?

SMART Response XE Gets Wireless Bootloader

A few months back we first brought word of the progress being made in unlocking the SMART Response XE, an ATmega128RFA powered handheld computer that allowed teachers to create an interactive curriculum in the days before all the kids got Chromebooks. Featuring 2.4 Ghz wireless communication, a 384×160 LCD, and a full QWERTY keyboard, schools paid around $100 each for them 2010. Now selling for as little as $5 on eBay, these Arduino-compatible devices only need a little coaxing and an external programmer to get your own code running.

The previous post inspired [Larry Bank] to try his hand at hacking the SMART Response XE, and so far he’s made some very impressive progress. Not only has he come up with his own support library, but he’s also created a way to upload Arduino code to the devices through their integrated 802.15.4 radio. With his setup, you no longer need to open the SMART Response XE and attach a programmer, making it much easier to test and deploy software.

[Larry] has written up a very detailed account of his development process, and goes through the trouble of including his ideas that didn’t work. Getting reliable communication between two of these classroom gadgets proved a bit tricky, and it took a bit of circling around until he hit on a protocol that worked.

The trick is that you need to use one SMART Response XE attached to your computer as a “hub” to upload code to other XEs. But given how cheap they are this isn’t that big of a deal, especially considering the boost in productivity it will net you. [Larry] added a 5 x 2 female header to his “hub” XE so he could close the device back up, and also added a physical power switch. In the video after the break, you can see a demonstration of the setup sending a simple program to a nearby XE.

Between this wireless bootloader and the Arduboy compatibility covered previously, we’d suggest you get your SMART Response XE now. We wouldn’t be surprised if the prices of these things start going up like they did with the IM-ME. Continue reading “SMART Response XE Gets Wireless Bootloader”