We all know how important it is to achieve balance in life, or at least so the self-help industry tells us. How exactly to achieve balance is generally left as an exercise to the individual, however, with varying results. But what about our machines? Will there come a day when artificial intelligences and their robotic bodies become so stressed that they too will search for an elusive and ill-defined sense of balance?
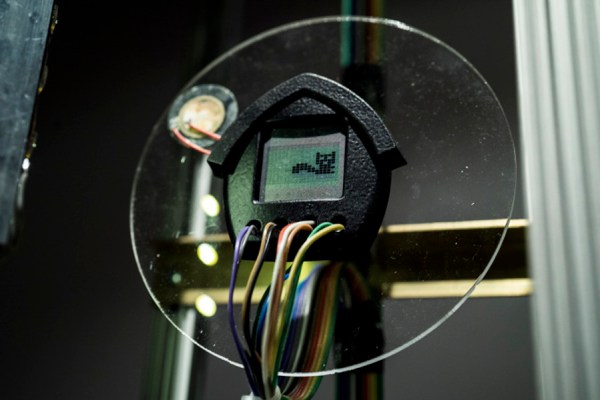
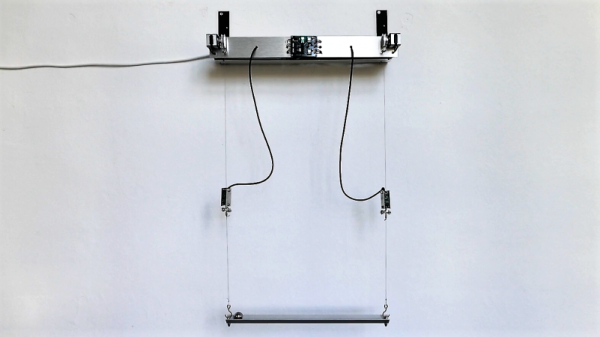
We kid, but only a little; who knows what the future field of machine psychology will discover? Until then, this kinetic sculpture that achieves literal balance might hold lessons for human and machine alike. Dubbed In Medio Stat Virtus, or “In the middle stands virtue,” [Astrid Kraniger]’s kinetic sculpture explores how a simple system can find a stable equilibrium with machine learning. The task seems easy: keep a ball centered on a track suspended by two cables. The length of the cables is varied by stepper motors, while the position of the ball is detected by the difference in weight between the two cables using load cells scavenged from luggage scales. The motors raise and lower each side to even out the forces on each, eventually achieving balance.
The twist here is that rather than a simple PID loop or another control algorithm, [Astrid] chose to apply machine learning to the problem using the Q-Behave library. The system detects when the difference between the two weights is decreasing and “rewards” the algorithm so that it learns what is required of it. The result is a system that gently settles into equilibrium. Check out the video below; it’s strangely soothing.
We’ve seen self-balancing systems before, from ball-balancing Stewart platforms to Segway-like two-wheel balancers. One wonders if machine learning could be applied to these systems as well.
Continue reading “Kinetic Sculpture Achieves Balance Through Machine Learning”