DIY Planetarium Built From PVC Pipes And Cardboard

When you think about DIY projects, you probably don’t consider building your own planetarium. Why would you? Building the thing is surely outside the capabilities of the individual, and even if you could figure it out, the materials would be far too expensive. There’s a limit to DIY projects, and obviously building a planetarium is on the wrong side of the line. Right?

Well, apparently not. [Gabby LeBeau] has documented the planetarium she built as her senior project, and if you’ll forgive the pun, it’s absolutely out of this world. Using readily available parts and the help of family and friends, she built a fully functional planetarium big enough to seat the Physics Department. No word on what grade she got, but it’s a safe bet she screwed the curve up for the rest of the class.

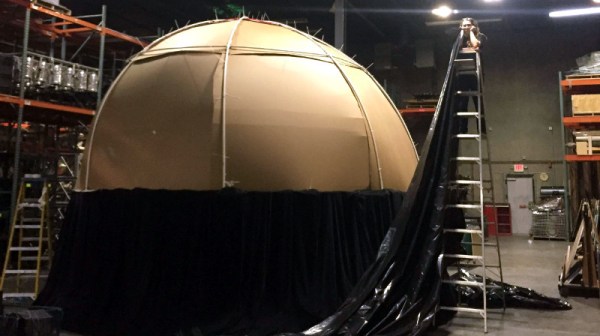
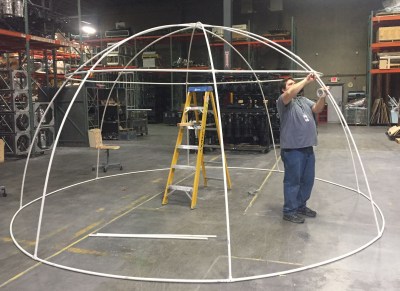
After two months of research and a couple of smaller proof of concept builds, she was able to find a business who graciously allowed her to construct the full scale planetarium in their warehouse. The frame is made of PVC pipes held together with zip ties. The big advantage to using the PVC pipes (beyond being cheap and easy to works with) is that they will automatically find a hemispherical shape when bent; saving the time and trouble it would take to create the shape with more rigid building materials.

Once the PVC frame was up, white cardboard panels were cut to shape and attached to the inside. The panels were lined up as closely as possible, but gaps were covered with white tape so the fit didn’t need to be perfect. When the dome was finished, it was lifted and placed on metal trusses to get some room underneath, and finally covered with a black tarp and stage curtain to block out all light.

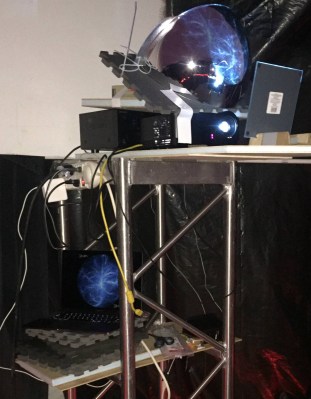
Of course, she didn’t go through all this trouble to just stick some glow in the dark stars on the inside of this thing. The image from a standard projector is directed at a flat mirror, which then bounces off of a convex mirror. Driving the projector is a laptop running Stellarium. While there were some imperfections she couldn’t get polished or cleaned off of the mirrors, the end result was still very impressive.

Unfortunately, you can’t really do a planetarium justice with a camera, so we aren’t able to see what the final image looked like. But judging by the slack-jawed faces of those who are pictured inside of it, we’re going to go out on a limb and say it was awesome.

We might suggest trying to quiet down the projector or adding some lasers to the mix, but overall this is a truly exceptional project, and we’re jealous of everyone who got to experience it first hand.

Glorious Body Of Tracked ‘Mad Mech’ Started As Cardboard

[Dickel] always liked tracked vehicles. Taking inspiration from the ‘Peacemaker’ tracked vehicle in Mad Max: Fury Road, he replicated it as the Mad Mech. The vehicle is remote-controlled and the tank treads are partly from a VEX robotics tank tread kit. Control is via a DIY wireless controller using an Arduino and NRF24L01 modules. The vehicle itself uses an Arduino UNO with an L298N motor driver. Power is from three Li-Po cells.

The real artistic work is in the body. [Dickel] used a papercraft tool called Pepakura (non-free software, but this Blender plugin is an alternative free approach) for the design to make the body out of thin cardboard. The cardboard design was then modified to make it match the body of the Peacemaker as much as possible. It was coated in fiberglass for strength, then the rest of the work was done with body filler and sanding for a smooth finish. After a few more details and a good paint job, it was ready to roll.

There’s a lot of great effort that went into this build, and [Dickel] shows his work and process on his project page and in the videos embedded below. The first video shows the finished Mad Mech being taken for some test drives. The second is a montage showing key parts of the build process.

Continue reading “Glorious Body Of Tracked ‘Mad Mech’ Started As Cardboard”

Cardboard Wall Is Surprisingly Well Built

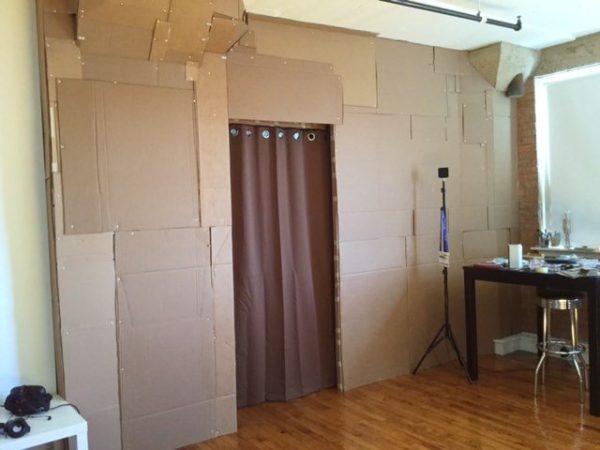
We all built cardboard forts when we were kids. [Paintingcook] has taken it into adulthood with a hand built cardboard wall. He and his wife leased a loft apartment. Lofts are great — one giant space to work with. Plans changed a bit when they found out they had a baby on the way. A single living, working, and sleeping space definitely wouldn’t be good for a newborn, so the couple set about separating a section of the room with a wall.

Sheetrock and steel or wood lumber would be the normal path here. They instead decided to recycle their cardboard moving boxes into a wall. The boxes were formed into box beams, which created the framework of the wall. The two pillars were boxed in and incorporated into the wall itself. The skin of the wall is a random patchwork of cardboard pieces. Most of the construction is completed with 3/8 ” screws and masking tape. Tape won’t last forever, but this is a temporary wall after all.

You might be wondering about fire hazards — sure, cardboard burns more readily than gypsum board, but the apartment is outfitted with sprinklers, which should help on this front. A few commenters on [Paintingcook’s] Reddit thread asked about formaldehyde and other gasses emitting from the cardboard. Turns out he’s an inorganic chemist by trade. He says any outgassing happens shortly after the cardboard is manufactured. It should be safe for the baby.

Cardboard is a great material to work in. You can build anything from robots to computers to guns with it. So get hop the couch, grab that Amazon box, and get hacking!

Super Low Tech Mario

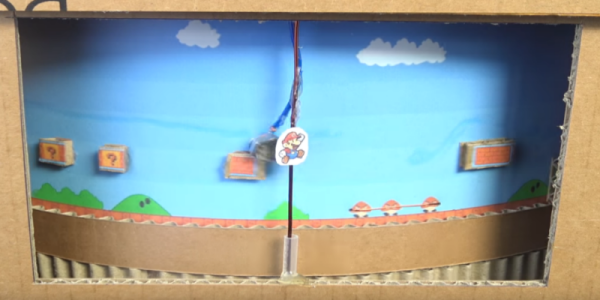
Browsing around the depths of the Internet we came across a super low tech version of Super Mario from [Sata Productions]. The video presents a complete tutorial on how to make a playable, cardboard version of the famous Super Mario game. If you are a fan, you probably going to like this.

You basically need cardboard, a hot glue gun, a ball bearing, a couple of DC motors, some iron BBs, some magnets, batteries, some wires… it sounds just like shopping list for a MacGuyver episode. But it works and it’s playable. It has a wired remote control, you control Mario to move and make him jump up and down in a kind of turning dashboard game. It even has a game over screen when Mario dies. Yes, Mario can die in this cardboard version. If you want to make a custom version you can always print a bigger level and resize the cardboard box.

Super Mario has had its shares of hacks, like this interface hack using a Kinect to control Mario or this super tricky jailbreak hack that allows players to run their own game mods, but this one is just on another level: a low tech approach. It seems like it could be a fun weekend project, especially if you have kids. If you’re not into Super Mario, it’s possible to just print a different game, the supporting platform is pretty generic and could support several simplified platform games.

Check out the video:

Continue reading “Super Low Tech Mario”

Hackaday Prize Entry: IO, The Cardboard Computer

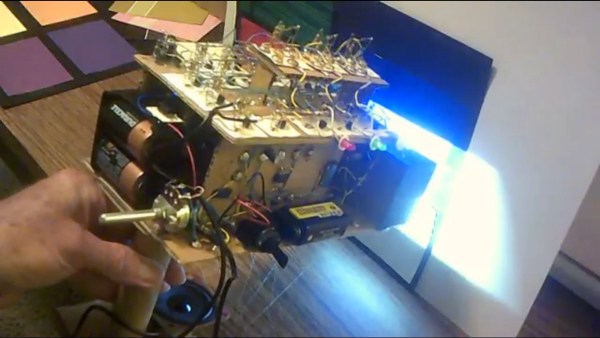
[Dr. Cockroach]’s goal was to build a four-bit computer out of recycled and repurposed junk. The resulting computer, called IO, consists of a single 555, around 230 PNP and NPN transistors, 230 diodes, and 460 resistors. It employs RISC architecture and operates at a speed of around 3 Hz.

He built IO out of cardboard for a good reason: he didn’t have a big budget for the project and he could get the material for free from his workplace. And because it was built so cheaply, he could also build it really big, allowing him to be able to really see each circuit close up and repair it if it wasn’t working right. You can really see the architecture very well when it’s this big—no tangle of wires for [Dr. Cockroach]. He uses over sixty blue LEDs to help monitor the system, and it doesn’t hurt that they look cool too. One of our favorite parts of the project is how he used copper fasteners to both manage the cardboard and serve as wiring points.

Continue reading “Hackaday Prize Entry: IO, The Cardboard Computer”

Fail Of The Week: Arduino Sand Matrix Printer

NYC beaches are where tropical beaches addicted to meth go to die. So says [Vije Miller] in his write-up for his Arduino sand matrix printer. It’s a clever idea, five servo-operated cardboard plungers that indent a pattern of dots in the sand as the device is pulled forward, resulting in something not unlike a dot matrix printer that can write messages in the sand.

He’s submitted it to us as a Fail Of The Week, because it doesn’t do a very good job of writing in the sand, and it’s burned out a servo. But we feel this isn’t entirely fair, because whether or not it has delivered the goods it’s still an excellent build. Cardboard isn’t a material we see much of here at Hackaday, but in this case he’s mastered it in a complex mechanism that while it may have proved a little too flexible for the job in hand is nevertheless a rather impressive piece of work.

You can see a brief video below the break showing it in action. He tells us his motivation has waned on this project, and expresses the hope that others will take up the baton and produce a more viable machine.

Continue reading “Fail Of The Week: Arduino Sand Matrix Printer”

Cardboard And Paper Gun Shows Off Clever Construction

This project by [blackfish] shows off a cardboard lookalike of an MP5 that loads from a working magazine, has a functional charging handle, and flings paper projectiles with at least enough accuracy to plink some red party cups. It was made entirely from corrugated cardboard, paper, rubber bands, and toothpicks.

In the video (embedded below) you can see some clever construction techniques. For example, using a cyanoacrylate adhesive to saturate areas of wood, cardboard, or paper to give them added strength and rigidity. The video is well-edited and worth a watch to see the whole process; [blackfish] even uses a peeled piece of cardboard — exposing the corrugated part — as a set of detents (6:56) to retain the magazine.

Continue reading “Cardboard And Paper Gun Shows Off Clever Construction”