For many people, these last few weeks have been quite an adjustment. When the normal routine of work or school is suddenly removed, it’s not unusual for your internal clock to get knocked out of alignment. It might have started with struggling to figure out if it was time for lunch or dinner, but now it’s gotten to the point that even the days are starting to blur together. If it takes more than a few seconds for you to remember whether or not it’s a weekday, [whosdadog] has come up with something that might help you get back on track.
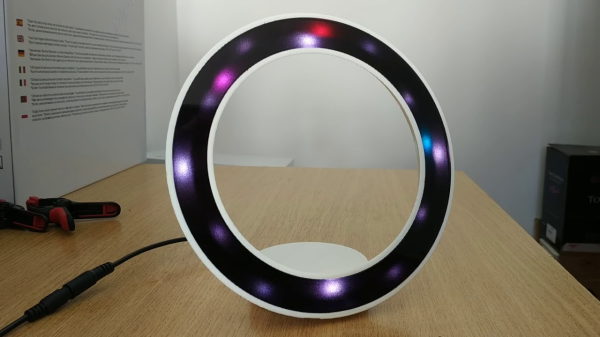
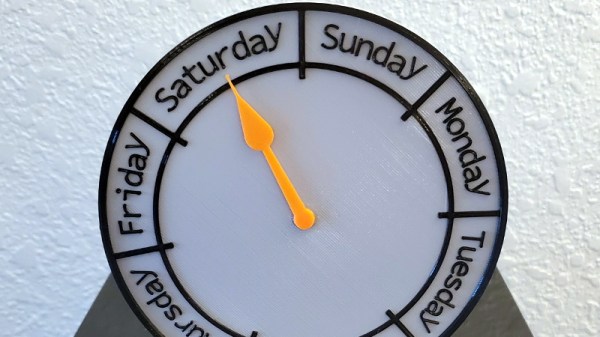
 Rather than showing the time of day, this 3D printed clock tells you where you are in the current week. Each day at midnight, the hand will advance to the center of the next day. If you wanted, a slight reworking of the gearing and servo arrangement on the rear of the device could allow it to sweep smoothly through each day. That would give you an idea of your progress through each 24 hour period, but then again, if you don’t even know if it’s morning or night you might be too far gone for this build anyway.
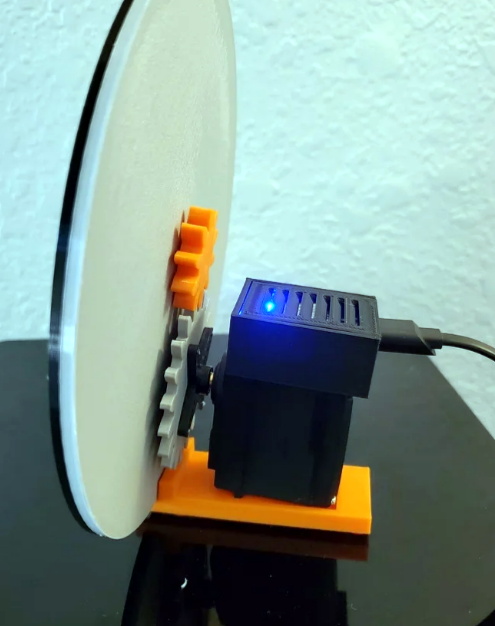
The clock’s servo is driven by a Wemos D1 Mini ESP8266 development board, which naturally means it has access to WiFi and can set itself to the current time (or at least, day) with NTP. All you’ve got to do is put your network information into the Sketch before flashing it to the ESP, and you’re good to go.
Naturally this project is a bit tongue-in-cheek, but we do think the design has practical applications. With a new face and some tweaked code, it could be an easy way to show all sorts of data that doesn’t require a high degree of granularity. Our very own [Elliot Williams] recently built a display to help his young son understand his new at-home schedule which operates on a similar principle.