Hack My House: Garage Door Cryptography Meets Raspberry Pi

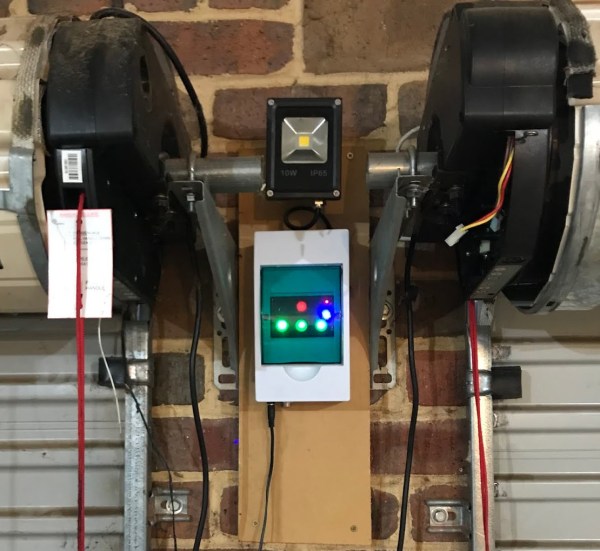
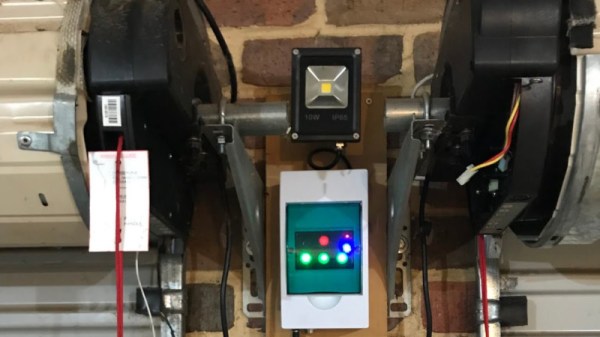
Today’s story is one of victory and defeat, of mystery and adventure… It’s time to automate the garage door. Connecting the garage door to the internet was a must on my list of smart home features. Our opener has internet connection capabilities built-in. As you might guess, I’m very skeptical of connecting a device to the internet when I have no control over the software running on it.

The garage door is controlled by a button hung on the garage wall. There is only a pair of wires, so a simple relay should be all that is needed to simulate the button press from a Raspberry Pi. I wired a relay module to a GPIO on the Pi mounted in the garage ceiling, and wrote a quick and dirty test program in Python. Sure enough, the little relay was clicking happily– but the garage door wasn’t budging. Time to troubleshoot. Does the push button still work? *raises the garage door* yep. How about the relay now? *click…click* nope.

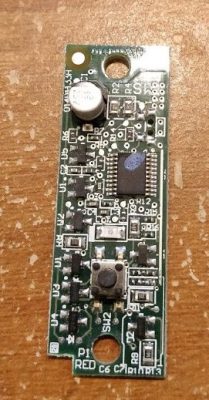
You may have figured out by now, but this garage door opener isn’t just a simple momentary contact push button. Yes, that’s a microcontroller, in a garage door button. This sort of scenario calls for forensic equipment more capable than a simple multimeter, and so I turned to Amazon for a USB oscilloscope that could do some limited signal analysis. A device with Linux support was a must, and Pico Technology fit the bill nicely.

Searching for a Secret We Don’t Actually Need

My 2 channel Picotech oscilloscope, the 2204A, finally arrived, and it was time to see what sort of alien technology was in this garage door opener. There are two leads to the button, a ground and a five volt line. When the button is pressed, the microcontroller sends data back over that line by pulling the 5 V line to ground. If this isn’t an implementation of Dallas 1-wire, it’s a very similar concept.

Continue reading “Hack My House: Garage Door Cryptography Meets Raspberry Pi”

LiftLocker Keeps Your Lift Safe From Attacking Garage Doors

Car lifts used to be a tool reserved for professional mechanics. Times are a-changing though. With the advent of reasonably priced four-post hydraulic lifts, more and more shade tree mechanics are joining the five-foot high club. Installing a lift in a home garage creates a few hazards, though. What happens when a family remotely opens the garage door while there is a car up on the lift? Garage door and lifted vehicle will meet – with expensive and/or dangerous results. [Joe Auman] saw this problem coming a mile away. He built the LiftLocker to make sure it never happens to him.

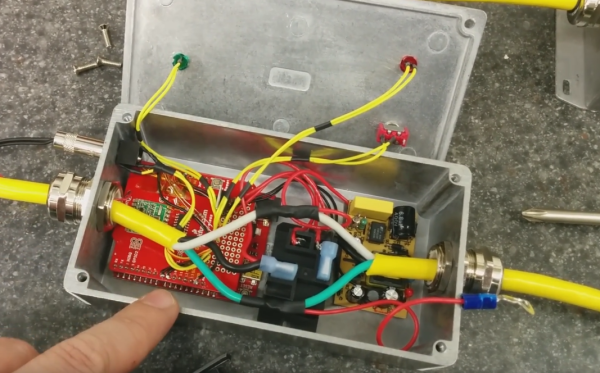
At its core, LiftLocker is a set of switched extension cords. Two cast-aluminum boxes hide the electronics. One box plugs in-line with the lift. The other box plugs in-line with the garage door opener. Each box includes a Sparkfun Redboard Arduino compatible, an RFM22 433 MHz Radio, and a relay. Input comes from a security system magnetic reed-switch. Both boxes are identical in hardware and code.

Operation is simple. One box and reed switch goes on the lift, the other on the garage door. If the lift is going up, its reed switch will open. The lift’s Arduino detects this and commands its RFM22 to send a signal to the other box on the garage door. Upon receiving this signal, the garage door controller will open its relay, disconnecting power to the garage door opener. Communication is two-way, so if the Lift controller doesn’t hear an ACK message from the garage door controller, everything will shut down. Click past the break to see the system in action.

Continue reading “LiftLocker Keeps Your Lift Safe From Attacking Garage Doors”

Garage Door Opener Logs To Google Drive

A garage door opener is a pretty classic hack around these parts. IR, Bluetooth, WiFi, smartphone controlled, web interfaces — we’ve seen it all.  But if you want to keep track of people going in and out, you need some way of logging what’s happening. You could go ahead and roll up your own SQL based solution, tied into a custom web page. But there’s an easier way; you can build a garage door opener that logs events to Google Drive.

[WhiskeyTangoHotel] was looking for an ESP8266 project, and a garage door opener seemed just the ticket. It’s simple enough to code up, and control over WiFi comes in handy. Interfacing with the garage door was simple enough — the existing opener uses a simple push button, which is easily controlled by wiring up a relay to do the job. Logging is as simple as having the ESP8266 send requests to IFTTT which is set up to make posts to a Google Sheet with status updates.

The project is fairly basic, but there’s room for expansion. By using separate Maker Channel triggers on IFTTT, different users of the garage door could be tracked. It would also be easy to add some limit switches or other sensors to detect the door’s position, so it can be determined whether the door was opened or closed.

There’s always another take on the garage door opener — check out this hack that opens the garage door in response to flashing headlights.

YAGDO – Yet Another Garage Door Opener

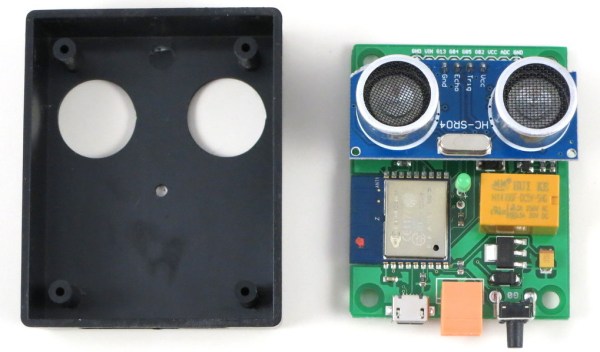
It seems like every few months we cover another garage door opener, and the concept is quickly becoming the “Hello World” of DIY home automation. In this installment, reader [ray] made his own garage door opener and chose the ESP8266 as the wireless interface of choice, but spiced the application up with an ultrasonic sensor that detects whether the car is in the garage and a web app that shows history, plus integration with Blynk for remote access. For posterity, he made the project open source as well.

The video is well produced with lots of details and instructions, and the circuit board and assembly are refined and clean. It may be a “Hello World”, but it’s done right.

Some of the other garage door hacks we’ve covered in the last year include the fingerprint scanner opener, the IM-ME opener, the motion-based security opener, the cat-enabled opener, the OpenCV Pi opener, and a Bluetooth Low Energy opener.

Continue reading “YAGDO – Yet Another Garage Door Opener”

Open Sesame Raspberry Pi Style

[Don] installed an Android tablet into his wife’s vehicle and realized he wanted to allow it to operate and monitor the garage door. His biggest challenge? Meeting the (what he refers to) as the WAF or Wife Acceptance Factor. He decided to use a Web app on a Raspberry Pi, along with a handful of switches and a relay. His list of goals were straightforward:

  • Provide the status of the door (open/closed/unknown)
  • Open and close the door
  • Work across multiple platforms
  • Secure enough to connect to the Internet
  • Reliable and simple

Continue reading “Open Sesame Raspberry Pi Style”

Hacking The IM-ME To Open Garages

If you have a wireless controlled garage door, a child’s toy can wirelessly open it in a few seconds. [Samy Kamkar] is a security researcher who likes to”think bad, do good”. He’s built OpenSesame, a device that can wirelessly open virtually any fixed-code garage door in seconds, exploiting a new attack he’s discovered in wireless fixed-pin devices, using the Mattel IM-ME toy.

The exploit works only on a gate or garage which uses “fixed codes”. To prevent this type of attack, all you need to do is to upgrade to a system which uses rolling codes, hopping codes, Security+ or Intellicode. These are not foolproof from attack, but do prevent the OpenSesame attack along with other traditional brute forcing attacks. It seems there are at least a couple of vendors who still have such vulnerable products, as well as several more whose older versions are affected too.

Before you read further, a caveat – the code released by [Samy] is intentionally bricked to prevent it from being abused. It might work, but just not quite. If you are an expert in RF and microcontrollers, you could fix it, but then you wouldn’t need his help in the first place, would you?

The IM-ME is a defunct toy and Mattel no longer produces it, but it can be snagged from Amazon or eBay if you’re lucky. The Radica Girltech IM-ME texting toy has been extensively hacked and documented. Not surprising, since it sports a TI CC1110 sub-GHz RF chip, an LCD display, keyboard, backlight, and more.  A good start point is the GoodFET open-source JTAG adapter, followed by the work of [Travis Godspeed] , [Dave] and [Michael Ossmann].

One issue with fixed code systems is their limited key space. For example, a remote with 12 binary dip switches supports 12 bits of possible combinations. Since its binary and 12 bits long, that’s 2^12, which is 4096 possible combinations. With a bit of math, [Samy] shows that it takes 29 minutes to open an (8-12)-bit garage, assuming you know the frequency and baud rate, both of which are pretty common. If you have to attempt a few different frequencies and baud rates, then the time it takes is a multiple of 29 minutes. If you don’t transmit the codes multiple times, and remove the pauses in between codes, the whole exercise can be completed in 3 minutes.

The weak link in the hardware is how the shift registers which decode the received codes work. Each bit is loaded in the register sequentially, gradually moving as additional bits come in and push the previous ones. This, and using an algorithm [Samy] wrote based on the De Bruijn sequence, the whole brute force attack can be completed in just over 8 seconds. OpenSesame implements this algorithm to produce every possible overlapping sequence of 8-12 bits in the least amount of time.

You can take a look at understanding how the code works by checking it out on Github. [Samy] loves doing such investigative work – check out his combo lock code breaker we featured recently, the scary, keyboard sniffing wall wart and the SkyJack – a drone to hack all drones.

Continue reading “Hacking The IM-ME To Open Garages”

garage door indicator

Indicator For Forgetful-Minded Garage Door Users

[Gareth] had a friend who regularly forgot to close his garage door after parking his car and heading inside. Since [Gareth] was familiar with basic electronics and an overall good pal, he offered to make a device that would indicate whether the garage door was open or not.

The project starts off simple with an Arduino and ultrasonic distance sensor. Both are mounted to the ceiling of the garage with the ultrasonic sensor pointed down. When the garage door is open, the sensor outputs a shorter distance measurement than when the garage door is closed.

Now that the system knows when the door is open or closed, the next part was sending a signal inside the house. He could have run a wire up through the house walls to an LED indicator but decided to go wireless with a 433mhz transmitter. There is a second Arduino inside equipped with a 433mhz receiver. When the garage door is open, the Arduino inside the house flashes an LED reminding the forgetful occupant to close the door.

[Gareth] made all his code for both the sensor/transmitter and the receiver available on his site for anyone interested in making something similar.