With some clever hacks and fast IO work, it’s possible to get your average garden-variety microcontroller to output some form of video. Old analog standards like composite and VGA are just slow enough that it’s possible to bitbash one’s way to success. If you’re serious about video work, however, you’ll want something more capable. For those use cases, [purisame]’s got what you need – an open source HDMI implementation for FPGAs.
Unlike other free and open source projects in this space, [purisame] has eschewed simply outputting compatible DVI signals on the port. This implementation is pure HDMI 1.4b, enabling the extended capabilities this brings, like combined video and audio streams. Thus far, it’s been tested on Xilinx and Altera platforms, though it may be compatible with Lattice, too.
In addition to the code, [purisame] breaks down options for those looking at going into production with an HDMI device. Licencing the technology for sale can be a fraught area, so a lawyer is recommended if you’re heading to market. Oh, and funnily enough, if your really do want to do HDMI on an Arduino, there’s a shield for that, too. Natch!
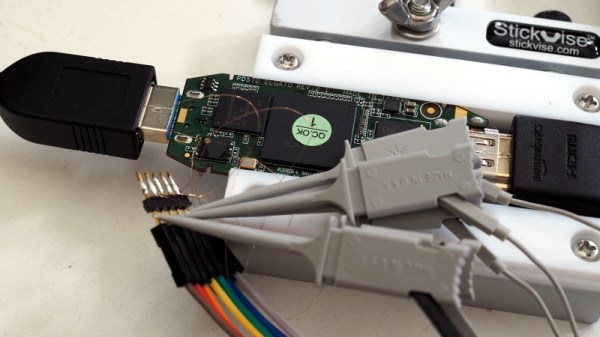
According to [Mike Walters], the Elgato Cam Link 4K is a great choice if you’re looking for a HDMI capture device that works under Linux. But the bad news is, it wouldn’t work with any of the video conferencing software he tried to use it with because they expect the video stream to be in a different pixel format. For most people, that would probably have been the end of the story. But you’re reading this on Hackaday, so obviously he didn’t give up without a fight.
Early on, [Mike] found there was a software workaround for this exact issue. The problem isn’t that the Elgato can’t generate the desired format, it’s that the video conferencing programs just don’t know how to ask it to switch modes. The software fix is to create a dummy Video4Linux device and use that to change the format in real-time using ffmpeg. It’s a clever trick if you’ve got a conference call coming up in a few minutes, but it does waste CPU resources and adds some unnecessary hoop jumping.
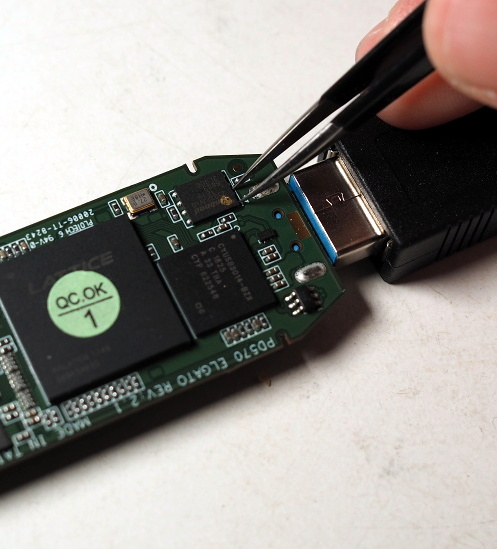
Putting the device into bootloader mode.
Inspired by the software fix, [Mike] wondered if there was a way he could simply force the Elgato to output video in the desire format by default. He found a firmware dump for the device online, and found where the pixel formats were referenced by searching for their names in ASCII with hexdump. Looking through the source for the Linux USB Video Class (UVC) driver, he was then able to determine what the full 16 byte sequence should be for each video mode was so he could zero out the unwanted ones. Then it was just a matter of flashing his modified firmware back to the hardware.
But there was a problem: with the modified firmware installed, the device stopped working. After investigating the obvious culprits, [Mike] broke out the oscilloscope and hooked it up to the Elgato’s flash chip. It turns out that due to a bug in the program he was using, the SPI erase commands weren’t getting sent during the flash. This lead to corrupted firmware which was keeping the Elgato from booting. After making a pull request with his fixes, the firmware flashed without incident and the capture device now does double-duty as a webcam when necessary.
We could certainly think of easier and quicker was to roll your own webcam, but we’re glad that [Mike] took the time to modify his Elgato Cam Link 4K and document it. It’s a fantastic example of practical firmware hacking, even if you’re not in the market for a new high-definition video conferencing rig.
With the benefit of decades of advances in miniaturization, looking back at the devices of yore can be entertaining. Take camcorders; did we really walk around with these massive devices resting on our shoulders just to record the family trip to Disneyworld? We did, but even if those days are long gone, the hardware remains for the picking in closets and at thrift stores.
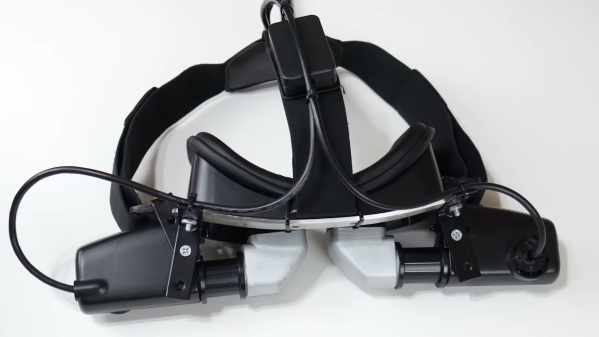
Those camcorders can be turned into cool things such as this CRT-based virtual reality headset. [Andy West] removed the viewfinders from a pair of defunct Panasonic camcorders from slightly after the “Reggievision” era, leaving their housings and optics as intact as possible. He reverse-engineered the connections and hooked up the composite video inputs to HDMI-to-composite converters, which connect to the dual HDMI ports on a Raspberry Pi 4. An LM303DLHC accelerometer provides head tracking, and everything is mounted to a bodged headset designed to use a phone for VR. The final build is surprisingly neat for the number of thick cables and large components used, and it bears a passing resemblance to one of those targeting helmets attack helicopter pilots use.
The software is an amalgam of whatever works – Three.js for browser-based 3D animation, some off-the-shelf drivers for the accelerometers, and Python and shell scripts to glue it all together. The video below shows the build and a demo; we don’t get the benefit of seeing what [Andy] is seeing in glorious monochrome SD, but he seems suitably impressed. As are we.
We’ve seen an uptick in projects using CRT viewfinders lately, including this tiny vector display. Time to scour those thrift stores before all the old camcorders are snapped up.
Modern home cinema equipment is well-equipped with features for interoperability and convenience, but in practice, competing standards and arcana can make it fall over. Sometimes, you’ve gotta do a little work on your own to glue it all together, and that’s what led [Victor] to develop a little utility of his own.
ChromecastControls is a tool that makes controlling your home cinema easier by improving Chromecast’s integration with the CEC features of HDMI. CEC, or Consumer Electronics Control, is a bidirectional serial bus that is integrated as a part of the HDMI standard. It’s designed to help TVs, audio systems, and other AV hardware to communicate, and allow the user to control an entire home cinema setup with a single remote. Common use cases are TVs that send shutdown commands to attached soundbars when switched off, or Blu-Ray players that switch the TV on to the correct output when the play button is pressed.
[Victor]’s tool allows Chromecast to pass volume commands to surround sound processors, something that normally requires the user to manually adjust their settings with a separate remote. It also sends shutdown commands to the attached TV when Chromecast goes into its idle state, saving energy. It relies on the PyChromecast library to intercept traffic on the network, and thus send the appropriate commands to other hardware. Simply running the code on a Raspberry Pi that’s hooked up to any HDMI port on a relevant device should enable the CEC commands to get through.
It’s a project that you might find handy, particularly if you’re sick of leaving your television on 24 hours a day because Chromecast never bothered to implement a simple CEC command on an idle timeout. CEC hacks have a long history, too – we’ve been covering them as far back as 2010!
Making upgrades to a popular product line might sound like a good idea, but adding bigger/better/faster parts to an existing product can cause unforeseen problems. For example, dropping a more powerful engine in an existing car platform might seem to work at first until people start reporting that the increased torque is bending the frame. In the Raspberry Pi world, it seems that the “upgraded engine” in the Pi 4 is causing the WiFi to stop working under specific circumstances.
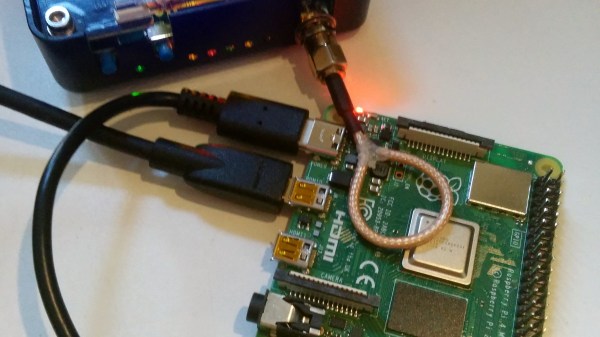
[Enrico Zini] noticed this issue and attempted to reproduce exactly what was causing the WiFi to drop out, and after testing various Pi 4 boards, power supplies, operating system version, and a plethora of other variables, the cause was isolated to the screen resolution. Apparently at the 2560×1440 setting using HDMI, the WiFi drops out. While you could think that an SoC might not be able to handle a high resolution, WiFi, and everything else this tiny computer has to do at once. But the actual cause seems to be a little more interesting than a simple system resources issue.
[Mike Walters] on a Twitter post about this issue probed around with a HackRF and discovered a radio frequency issue. It turns out that at this screen resolution, the Pi 4 emits some RF noise which is exactly in the range of WiFi channel 1. It seems that the Pi 4 is acting as a WiFi jammer on itself.
This story is pretty new, so hopefully the Raspberry Pi Foundation is aware of the issue and working on a correction. For now, though, it might be best to run a slightly lower resolution if you’re encountering this problem.
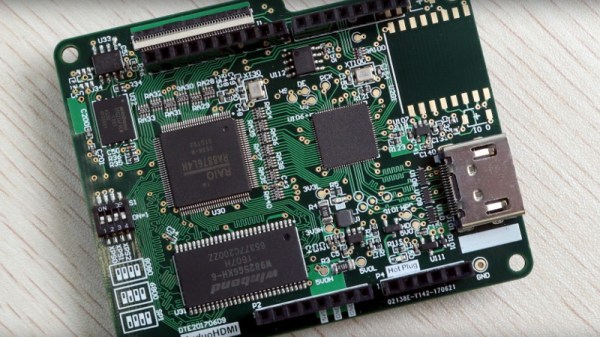
Creating a video signal from a computer, a job that once required significant extra hardware, is now a done deal with a typical modern microcontroller. We’ve shown you more NTSC, PAL, and VGA projects than you can shake a stick at over the years. Creating an HDMI video signal however is not so straightforward. It’s not a loosely defined analogue standard but a tightly controlled digital one upon which the clever hacks that eke full colour composite video from a single digital I/O pin will have little effect. Surely creating them from a simple microcontroller will be impossible! Not according to [techtoys], who has created an Arduino shield that creates an HDMI output from an SPI control input.
At its heart are two interesting integrated circuits that give us a little bit of insight into creating graphics at this level. First up is an RA8876 MIPI TFT controller which is a full graphics engine that produces a digital RGB output, followed by a CH7035B HDMI encoder that produces an HDMI output from the RGB. This combination of chips is particularly interesting one, because the RA8876 supports a variety of different interfaces that between them should be able to talk to most microcontrollers. In the Arduino world the only other HDMI options come via the use of an FPGA.
This is a project that seems to have been around for a couple of years, but which is still an active one. The classic Arduino shield form factor may now seem a little past its zenith, but as this board shows it’s still capable of being used for interesting new applications.
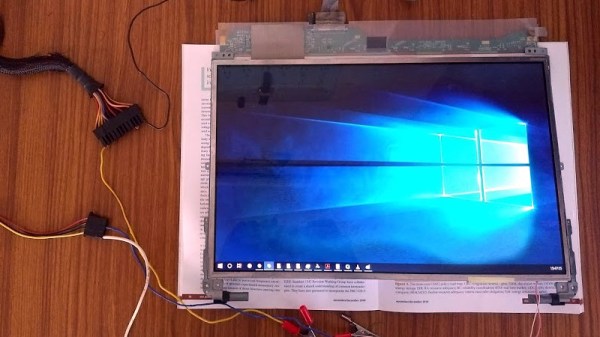
The lack of HDMI inputs on almost all laptops is a huge drawback for anyone who wants to easily play a video game on the road, for example. As to why no manufacturers offer this piece of convenience when we all have easy access to a working screen of this size, perhaps no one can say. On the other hand, if you want to ditch the rest of the computer, you can make use of the laptop screen for whatever you want.
This project from [Avner] comes to us in a few parts. In the first section, the teardown of the laptop begins and a datasheet for the screen is discovered, which allows [Avner] to prepare an FPGA to drive the screen. The second part involves building an HDMI sink, which is a device which decodes the signal from an HDMI source into its constituent parts so it can be sent to the FPGA. The final section of the project involves actually sending a video to this impressive collection of hardware in order to get a video to appear on the old laptop screen.
This build is worth checking out if you’ve ever dealt with anything involving digital video. It goes into great depth on a lot of the technical details involving HDMI, video devices, and hardware timing issues. This is a great build and, even though we’ve seen similar projects, definitely worth diving into if you have some time on your hands and a spare laptop screen.