A Pocket QWERTY For Arduino And More

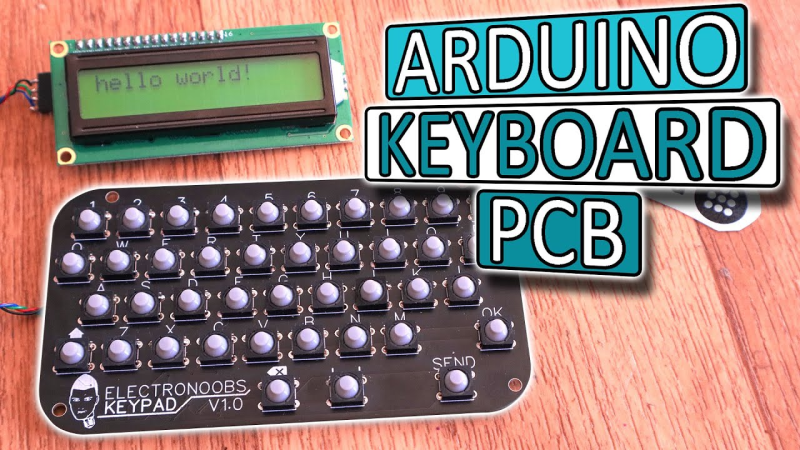
If you want to add a keypad to your Arduino project, the options are pretty limited. There’s that red and blue 4×4 membrane we’ve all seen in password-protected door lock projects, and the phone layout version that does pretty much all the same tricks. Isn’t it time for a full Arduino-compatible keyboard? [ELECTRONOOBS] thinks so.

This 41-button Arduino keyboard PCB is a stepping stone to his next project, a pair of two-way texting machines. (Which is nice, because we were totally going to suggest that). It’s based on that ubiquitous red/blue keypad, but it has a full QWERTY layout. There’s also a shift button that opens up special characters and uppercase, and the addition of return, ok, and send keys puts it over the top. The best part of this keyboard, hands down, is the soft, soundless buttons. Though you trade clicky feedback for comfort, it will be well worth it after a few dozen presses.

The keypad uses an onboard ATMega328P to scan the matrix for button presses, decode them, and send them via UART or I²C to an Arduino. [ELECTRONOOBS] has the PCB files available via Patreon for now, though they will be open in the future. The code is already available for download on his website.

Future plans include an LED to indicate when shift is pressed, and adding the special characters next to the numbers on the silkscreen (whoops!). Be sure to check out the build video after the break.

Want an Arduino-driven keyboard for longer hauls across the alphabet? Saddle up and ride this candy-colored mechanical unicorn.

Continue reading “A Pocket QWERTY For Arduino And More”

Bluetoothing Beautiful Phones

You’ve seen a landline phone converted into a Bluetooth headset. There’s nothing new there. It’s great for confusing kids when asking them to dial a rotary phone, but that’s about it. It’s the same phone, built by Ma Bell for fifty years, converted with a little Bluetooth breakout board.

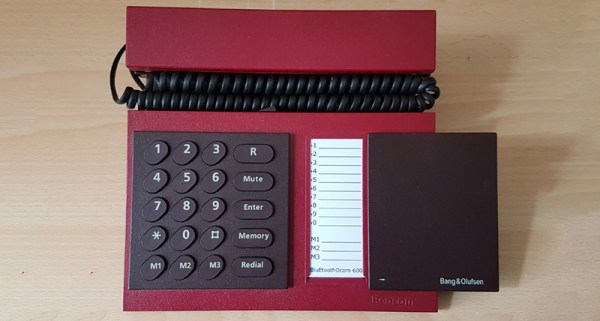
You’ve never seen a landline conversion like this. This is [Alessandro]’s Bluetooth-converted Beocom 600, complete with a drop-in replacement circuit board that turns this beautiful Bang & Olufsen design into a useful device for the smartphone era.

This phone was designed as Bang & Olufsen’s entry into phone design, and we’re shocked, simply shocked, that Apple hasn’t tried to lift this design yet. Unfortunately, it’s designed for landlines, making it horrifically inconvenient to take to Starbucks. That’s where the Bluetooth comes in, and [Alessandro]’s custom board that is meant to replace the guts of this vintage phone. Honestly, with Bluetooth modules it’s probably easier to deal with that instead of a telephone line.

Right now, the work is concentrated on the user interface, which means taking apart and mapping the pinout of the buttons. This keypad is plastic over rubber domes contacting a polyester sheet with contacts, feeding out to a ribbon cable. It’s fantastic work and finally some of the best design out there will be brought into the modern era.

3D-Printed Rotary Dial Keypad Is Wonderfully Useless

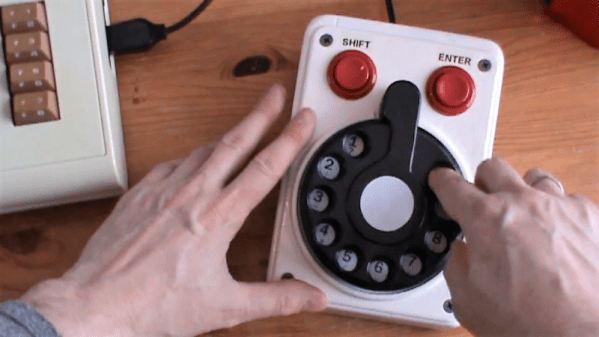
Right up front, let us stipulate that we are not making fun of this project. Even its maker admits that it has no practical purpose. But this 3D-printed Commodore-style rotary dial keypad fails to be practical on so many levels that it’s worth celebrating.

And indeed, celebrating deprecated technology appears to be what [Jan Derogee] had in mind with this build. Rotary dials were not long ago the only way to place a call, and the last time we checked, pulse dialing was still supported by some telephone central office switchgear. Which brings us to the first failure: with millions of rotary dial phones available, why build one from scratch? [Jan] chalks it up to respect for the old tech, but in any case, the 3D-printed dial is a pretty good replica of the real thing. Granted, no real dial used a servo motor to return the dial to the resting state, but the 3D-printed springs [Jan] tried all returned the dial instantly, instead of the stately spin back that resulted in 10 pulses per second. And why this has been done up VIC-20 style and used as a keypad for Commodore computers? Beats us. It had to be used for something. That the software for the C-64  generates DTMF tones corresponding to the number dialed only adds to the wonderful weirdness of this. Check out the video below.

We’ll hand it to [Jan], he has a unique way of looking at the world, especially when it comes to clocks. We really enjoyed his persistence of phosphorescence clock, and his screw-driven linear clock turns the standard timekeeping UI on its head.

Continue reading “3D-Printed Rotary Dial Keypad Is Wonderfully Useless”

A Custom Keypad With Vision

A combination of cheap USB HID capable microcontrollers, the ability to buy individual mechanical keys online, and 3D printing has opened up a whole new world of purpose-built input devices. Occasionally these take the form of full keyboards, but more often than not they are small boards with six or so keys that are dedicated to specific tasks or occasionally a particular game or program. An easy and cheap project with tangible benefits to anyone who spends a decent amount of time sitting in front of the computer certainly sounds like a win to us.

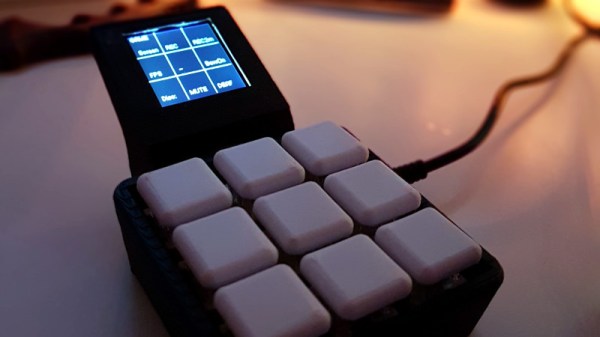
But this build by [r0ckR2] takes the concept one step farther. Rather than just being a simple 3×3 keypad, his includes a small screen that shows the current assignments for each key. Not only does this look really cool on the desk (always important), but it also allows assigning multiple functions to each key. The screen enables the user to switch between different pages of key assignments, potentially allowing a different set of hot keys or macros for every piece of software they use.

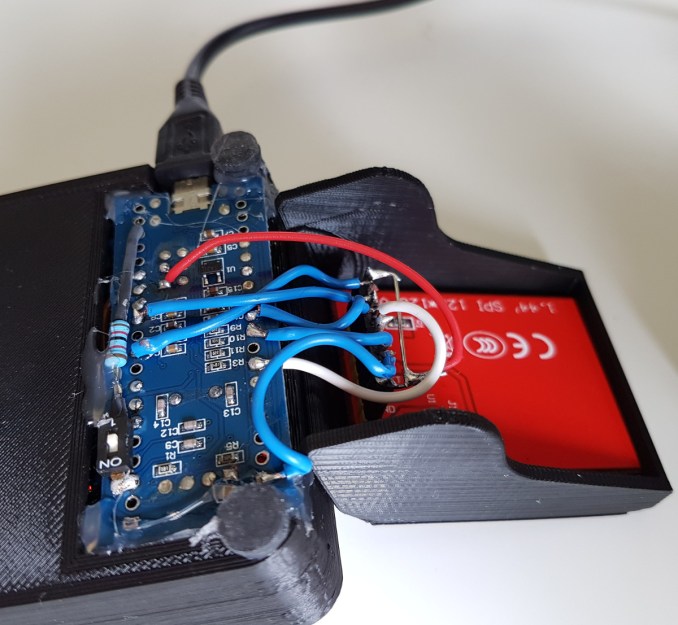
The case is entirely 3D printed, as are the key caps. To keep things simple, [r0ckR2] didn’t bother to design a full enclosure, leaving all the electronics exposed on the back. Some might think it’s a little messy, but we appreciate the fact that it gives you easy access to the internals if you need to fix anything. Rubber feet were added to the bottom so it doesn’t slide around while in use, but otherwise the case is a pretty straightforward affair.

As for the electronics, [r0ckR2] went with an STM32 “Blue Pill” board, simply because it’s what he had on hand. The screen is a ST7735 1.44 inch SPI TFT, and the keys themselves are Cherry MX Red clones he got off of eBay. All in all, most of the gear came from his parts bins or else was only a couple bucks online.

If you’re looking for something a bit bigger, check out this gorgeous Arduino-powered version, or this far more utilitarian version. Both are almost entirely 3D printed, proving the technology is capable of more than making little boats.

[via /r/functionalprint]

Sawed Off Keyboard

Have you ever had to cut a piece of furniture in two to get it into a new place? Yours truly has, having had to cut the longer part of a sectional sofa in two to get it into a high-rise apartment. That’s what [Charles]’ sawed off keyboard immediately reminded us of. It sounds just as crazy, but brilliant at the same time.

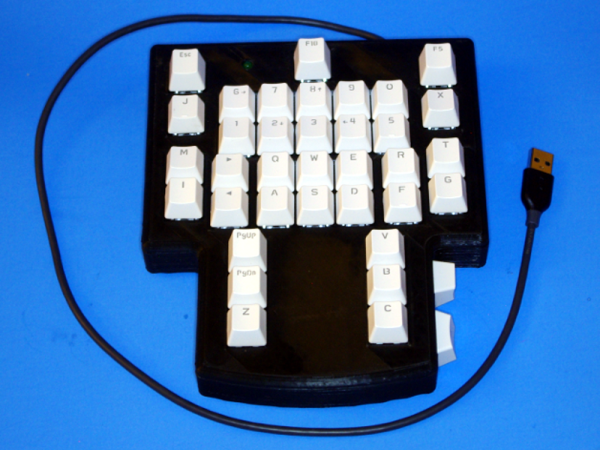
In [Charles]’ case he wanted a keypad whose keys were customizable, and that would make a single keypress do common things like cut, copy and paste, which are normally ctrl-X, ctrl-C and ctrl-V in Windows. To do that he literally sawed off the numeric keypad from a full-sized keyboard. He also sawed off the end to the left of the QWERTY keyboard, and glued it onto the open end of his keypad.

The circuit board was too wide to fit in his new keypad, but he couldn’t stretch out the connections from the keypad’s keys to the board. So he did what any self-respecting hacker would do, he cut the circuit board where there were a manageable number of traces, leaving one part that would fit inside the keypad and another part that he could connect the traces to using a few wires. Lastly, he’d started with a PS/2 keyboard but he wanted USB output and programmability. So he redirected the PS/2 wires to an Arduino compatible Pro Micro and wrote some conversion code which you can find on his GitHub.

What other transformations can we do to keyboards? [Shrodingers_Cat] combined his with some DVD case covers to come up with a pedal board for use with his feet. And given that the keys on the numeric keypad are redundant, [Kipkay] put it to use as a hiding place for valuables instead.

Cluephone For Partiers

[Sam Horne] adapted an old school landline phone to deliver clues to birthday party guests. When guests find a numerical clue, they type it into the keypad to hear  the next clue, which involves decoding some Morse code.

The phone consists of an Arduino Pro Mini, a MP3/WAV trigger, and the phone itself, of which the earpiece and keypad have been reused. [Sam] had to map out the keypad and solder leads connecting the various contact points of the phone’s PCB to the Arduino’s digital pins. He used a digitally-generated voice to generate the audio files, and employed the Keypad and Password Arduino libraries to deliver the audio clues.

This seems like a great project to do for a party of any age of attendee, though the keying speed is quick. Hopefully [Sam]’s guests have a high Morse WPM or are quick with the pen! For more keypad projects check out this custom shortcut keyboard and printing a flexible keyboard.

Continue reading “Cluephone For Partiers”

Custom Gaming Keypad Developed With PSoC And Fusion 360

There was a time when building something yourself probably meant it didn’t look very much like a commercial product. That’s not always a bad thing. We’ve seen many custom builds that are nearly works of art. We’ve also seen plenty of builds that are–ahem–let’s say were “hacker chic”.

[AlexanderBrevig] decided to take on a project using a PSoC development board he picked up. In particular, he wanted to build a custom game keypad. He prototyped a number of switches with the board and got the firmware working so that the device looks like a USB HID keyboard.

Continue reading “Custom Gaming Keypad Developed With PSoC And Fusion 360”