It is perhaps a surprise that the widespread adoption of CNC machinery in the home has not come from 3D printing or desktop mills, but as a quiet revolution in the crafting industry. CNC cutters for plastic or card have been around for quite a while now, and while the prospect of cutwork greetings cards might not set all maker pulses racing these cutters do have significant untapped potential in other directions. Perhaps you have to own a carburetor whose gaskets have been unavailable since the 1960s to truly appreciate that.
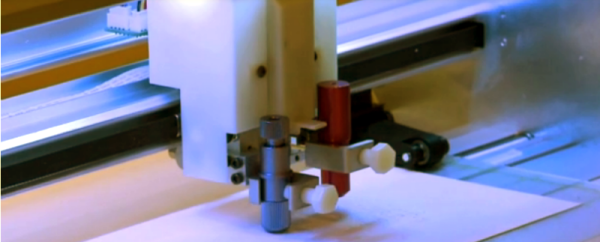
[James Muraca] has a KNK Force, something of an object of desire in the world of desktop CNC cutters. The computer inside the Force is a Raspberry Pi, so of course [James] set about investigating its potential for running his own software. His progress so far is on GitHub, a web interface through which you can upload and cut an SVG file, but his plans are more ambitious. He hopes to turn his machine into a complete PCB manufacturing station, able to both cut the PCB, and with the addition of a vacuum attachment to pick and place components.
The KNK Force is an interesting machine not just because it is powered by a Raspberry Pi. Its cutter head is a rotary tool with a Z axis, so it can perform more heavy-duty and complex cutting tasks than its competition. In addition it has a camera built-in, and it is this feature that [James] hopes to use in his PCB project.
We’ve covered plenty of cutter projects before, from projects turning CNC machines and pen plotters into vinyl cutters to using a cutter as a laser engraver and even cutting solder paste stencils with one. We look forward to further progress on [James’s] project.