Remember the days when the television was the most important appliance in the house? On at dawn for the morning news and weather, and off when Johnny Carson said goodnight, it was the indispensable portal to the larger world. Broadcast TV may have relinquished its hold on the public mind in favor of smartphones, but an information portal built into an old TV might take you back to the old days.
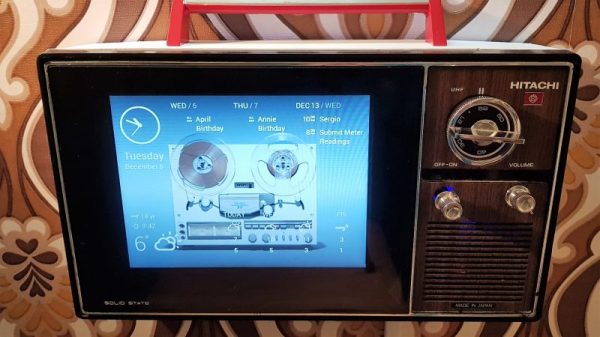
It seems like [MisterM] has a little bit of a thing for the retro look. Witness the wallpaper in the video after the break for proof, as well as his Google-ized Radio Shack intercom project from a few months back. His current project should fit right in, based on an 8″ black-and-white TV from the 70s as it is. TVs were bulky back then to allow for the long neck of the CRT, so he decided to lop off the majority of the case and use just the bezel for his build. An 8″ Pimoroni display sits where the old tube once lived, and replicates the original 4:3 aspect ratio. With Chromium set up in kiosk mode, the family can quickly select from a variety of news and information “channels” using the original tuning knob, while parts from a salvaged mouse turns the volume control into a scroll wheel.
It’s a nice twist on the magic mirror concept, and a little different from the other retro-TV projects we’ve seen, like a retro gaming console or an old-time case for a smart TV.