Subwoofer Gets Arduino Brain Transplant

The Samsung PS-WTX500 subwoofer is designed to be used as part of a 5.1 channel home theater system, but not just any system. It contains the amplifiers for all the channels, but they’ll only function when the subwoofer is connected to the matching receiver. [Alejandro Zarate] figured there must be some way to unlock the system’s full functionality without being limited to the original receiver, he just needed to reverse engineer how the subwoofer worked.

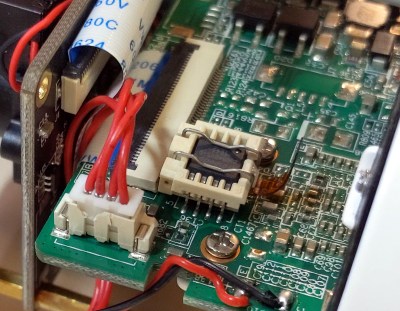
All the wires tuck underneath the Arduino

The result is a fantastically well documented write-up that covers the whole process, starting with how [Alejandro] identified and researched the Pulsus PS9829B Digital Audio Processor (DAP). Documentation for this particular chip seems hard to come by, but he was able to find a similar chip from the same manufacturer that was close enough to put him on the right track. From there, he started studying the SPI communications between the DAP and the subwoofer’s S3P70F4 microcontroller.

After analyzing the communication between the two chips, [Alejandro] pulled the S3P70F4 off the board and wired an Arduino Pro Mini 328 in its place. The Arduino was quite a bit larger than the original microcontroller, but with some careful wiring, he manged a very professional looking installation. Short of coming up with a custom PCB adapter, we don’t think it could look much better.

With some relatively straightforward code and a listing of the captured byte sequences, the Arduino was able to power up the PS-WTX500’s amplifiers and handle the incoming audio signal as a stand-alone device.

In the past we’ve seen a similar trick done with the ESP8266, which had the added benefit of enabling WiFi control of the speakers. We’re all for adding modern functionality to older hardware, even if you’ve got to hang it off the back as an external module.

Continue reading “Subwoofer Gets Arduino Brain Transplant”

A NES Motherboard For The Open Source Generation

As the original hardware from the golden era of 8-bit computer gaming becomes a bit long in the tooth, keeping it alive has become something of a concern for enthusiasts. There have been a succession of remanufactured parts for many of the major platforms of the day, and now thanks to [Redherring32] it’s the turn of the NES console.

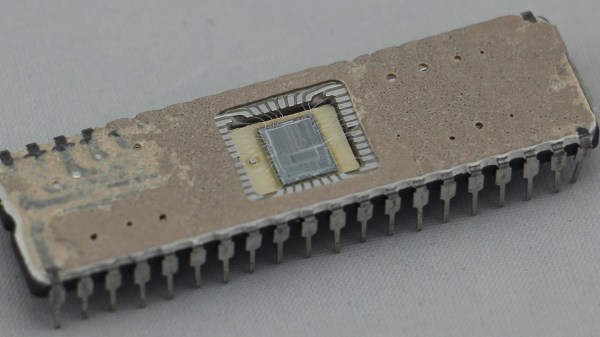
The OpenTendo is a completely open-source replacement for an original front-loading Nintendo Entertainment System motherboard, using both original or after-market Nintendo CPU and PPU chips, and other still readily available components. It doesn’t incorporate Nintendo’s CIC lockout chip — Drew Littrell wrote a great article on how that security feature worked — but if you really need the authenticity there is also the NullCIC project that can simulate that component.

It’s an interesting exercise in reverse engineering as well as a chance to look at the NES at the chip level. Also for Nintendo-heads, it provides all the component footprints and schematic items in KiCAD format. Will many be built? Given that the NES was the best-selling console of its time there should be no shortage of originals to be found, but that in no way invalidates the effort put into this project. There will be NES consoles somewhere running for decades to come because of work such as this, simply remember that you don’t need to blow in the slot to make it work!

Teardown: Cobra XRS 9740 Radar Detector

Drivers with a lead foot more often than not have Waze open on their phone so they can see if other drivers have spotted cops up ahead. But avoiding a speeding ticket used to involve a lot more hardware than software. Back before the smartphone revolution, that same driver would have had a radar detector on their dashboard. That’s not to say the gadgets are completely unused today, but between their relatively high cost (one of the top rated models on Amazon as of this writing costs over $300) and the inevitable false positives from so many vehicles on the road having their own radar and LIDAR systems, they’ve certainly become a less common sight over the years

The subject of today’s teardown is a perfect example of “Peak Radar Detector”. Manufactured back in 2007, the Cobra XRS 9740 would have been a fairly mid-range entry offering the sort of features that would have been desirable at the time. Over a decade ago, having an alphanumeric display, voice alerts, and a digital compass were all things worth shouting about on the box the thing was sold in. Though looking like some kind of Cardassian warship was apparently just an added bonus.

As the name implies these devices are primarily for detecting radar activity, but by this point they’d also been expanded to pick up infrared lasers and the strobe beacons on emergency vehicles. But false positives were always a problem, so the device allows the user to select which signals it should be on the lookout for. If you were getting some kind of interference that convinced the detector it was being bombarded with IR lasers, you could just turn that function off without having to pull the plug entirely.

But it’s important to remember that this device was built back when people were still unironically carrying around flip phones. Detecting laser and multi-band radars might sound like something pulled from the spec sheet of a stealth fighter jet, but this is still a piece of consumer electronics from more than a decade in the past. So let’s crack it open and take a look at what goes on inside a radar detector that’s only a few years away from being old enough to get its own driver’s license.

Continue reading “Teardown: Cobra XRS 9740 Radar Detector”

Xbox Controller Provides Intro To SWD Hacking

It’s amazing to see how much technology is packed into even the “simple” devices that we take for granted in modern life. Case in point, the third party Xbox controller that [wrongbaud] recently decided to tear into. Not knowing what to expect when he cracked open its crimson red case, inside he found an ARM Cortex microcontroller and a perfect excuse to play around with Serial Wire Debug (SWD).

Though even figuring out that much took a bit of work. As is depressingly common, all the interesting components on the controller’s PCB were locked away behind a black epoxy blob. He had no idea what chip was powering the controller, much less that debugging protocols it might support. But after poking around the board with his multimeter, he eventually found a few test points sitting at 3.3 V which he thought was likely some kind of a programming header. After observing that pulling the line labelled “RES” low reset the controller, he was fairly sure he’d stumbled upon a functional JTAG or SWD connection.

The Serial Wire Debug architecture.

As [wrongbaud] explains in his detailed blog post, SWD is something of a JTAG successor that’s commonly used by ARM hardware. Using just two wires (data and clock), SWD provides hardware debugging capabilities on pin constrained platforms. It allows you to step through instructions, read and write to memory, even dump the firmware and flash something new.

For the rest of the post, [wrongbaud] walks the reader through working with an SWD target. From compiling the latest version of OpenOCD and wiring an FTDI adapter to the port, all the way to navigating through the firmware and unlocking the chip so you can upload your own code.

To prove he’s completely conquered the microcontroller, he ends the post by modifying the USB descriptor strings in the firmware to change what it says when the controller is plugged into the computer. From here, it won’t take much more to get some controller macros like rapid fire implemented; a topic we imagine he’ll be covering in the future.

This post follows something of a familiar formula for [wrongbaud]. As part of his continuing adventures in hardware hacking, he finds relatively cheap consumer devices and demonstrates how they can be used as practical testbeds for reverse engineering. You might not be interested in changing the ROM that a Mortal Kombat miniature arcade cabinet plays, but learning about the tools and techniques used to do it is going to be valuable for anyone who wants to bend silicon to their will.

The Multiyear Hunt For A Gameboy Game’s Bug

[Enddrift] had a real problem trying to run a classic game, Hello Kitty Collection: Miracle Fashion Maker, into a GBA (Gameboy Advance) emulator. During startup, the game would hit an endless loop waiting for a read from a non-existent memory location and thus wouldn’t start under the emulator. The problem is, the game works on real hardware even though that memory doesn’t exist there, either.

To further complicate things, a similar bug exists when loading a saved game under Sonic Pinball Party. Then a hack for Pokemon Emerald surfaced that helped break the case. The story is pretty interesting.

Continue reading “The Multiyear Hunt For A Gameboy Game’s Bug”

New Part Day: LED Driver Is FPGA Dev Board In Disguise

Our new part of the day is the ColorLight 5A-75B, a board that’s meant to drive eight of those ubiquitous high-density color LED panels over gigabit Ethernet. If you were building a commercial LED wall, you’d screw a bunch of the LED panels together, daisy-chain a bunch of these boards to drive them, supply power, and you’d be done. Because of that high-volume application, these boards are inexpensive, around $15 each, and available as quickly as you can get stuff shipped from China.

But we’re not here to talk commercial applications. Managing fast Ethernet and pushing so many pixels in real time is a task best handled by an FPGA, and [Tom Verbeure] noticed that these things were essentially amazing FPGA development boards and started hacking on them. [q3k] put it up on GitHub, and you can follow along with the chubby75 reverse engineering project to dig into their secrets.

While the first generations of these boards used the old-standby Spartan 6, things got interesting for fans of open FPGA tools when newer versions were found using the Lattice ECP5-25 chips, the little brother of the stonking big chip [Sprite_TM] used on the 2019 Hackaday Supercon badge. If you want to grab one you’re looking for ColorLight boards marked with revision 6 or 7 as of this writing.

What does this mean? For the price of a gourmet hamburger, you get an FPGA that’s big enough to run a RISC-V softcore, two 166 MHz, 2 MB SDRAMS, flash for the FPGA bitstream, a bazillion digital outputs on 5 V level shifters, and two gigabit Ethernet ports. The JTAG port is broken out in 0.1″ headers, and it works with OpenOCD, which is ridiculously convenient. How’s that for a well-stocked budget FPGA dev board that’s served by a completely open toolchain? Continue reading “New Part Day: LED Driver Is FPGA Dev Board In Disguise”

Reverse Engineering Yokis Home Automation Devices

These days, it’s hard to keep track of all the companies that are trying to break into the home automation market. Whether they’re rebrands of somebody else’s product or completely new creations, it seems like every company has at least a few “smart” gadgets for you to choose from. We hadn’t heard of the Yokis devices that [Nicolas Maupu] has been working on before today, but thanks to his efforts to reverse engineer their protocol, we think they might become more popular with the hacking crowd.

Even if you don’t have a Yokis MTV500ER dimmer or MTR2000ER switch of your own, we think the detailed account of how [Nicolas] figured out how to talk to these devices is worth a read. His first step was to connect his oscilloscope directly to the SPI lines on the remote to see what it was sending out. With an idea of what he was looking for, he then used an nRF24L01+ radio connected to an ESP8266 to pull packets out of the air so he could analyze their structure. This might seem like a very specialized process, but in reality most of the techniques demonstrated could be applicable for any unknown communications protocol of which you’ve got a hex dump.

On the other hand, if you do have some of these devices (or plan to get them), then the software [Nicolas] has put together looks very compelling. Essentially it’s an interactive firmware for the ESP8266 that allows it to serve as a bridge between the proprietary Yokis wireless protocol and a standard MQTT home automation system. When the microcontroller is connected to the computer you get a basic terminal interface that allows you to scan and pair for devices as well as toggle them on and off.

This bridge could be used to allow controlling your Yokis hardware with a custom handheld remote, or you could follow the example of our very own [Mike Szczys], and pull everything together with a bit of Node-RED.