Wake Up With A NeoPixel Sunrise Alarm Clock

Like many of us, [Lee] wakes up every morning grumpy and tired. Once he decided to try to do something about it, he settled on making a sunrise alarm clock using NeoPixels. Over the course of thirty minutes the clock illuminates 60 NeoPixels one by one in blue mode to simulate a sunrise.

The clock has three modes: 30-minute sunrise, analog time display, and a seconds counter that uses the full RGB range of the LEDs to light up one for each passing second. It runs on an Arduino Pro Mini knockoff and an RTC module for the sake of simplicity. [Lee] chained NeoPixel strips together in five rows of eight, which allowed him to use a 3×5 font to display the time. The only other electronics are passives to protect the LEDs.

NeoPixels are great, but powering them becomes an issue pretty quickly. [Lee] did the math and figured that he would need 3.4 A to drive everything. He found a 3-outlet USB power adapter that delivers 3.4 A total while shopping at IKEA for an enclosure. [Lee] took his first Instructable from beginner to intermediate level by cracking the adapter open and using two of the USB ports wired in parallel to provide 5 V at 3.4 A. [Lee] has the code available along with detailed instructions for replicating this build. Be sure to check out the demo after the break.

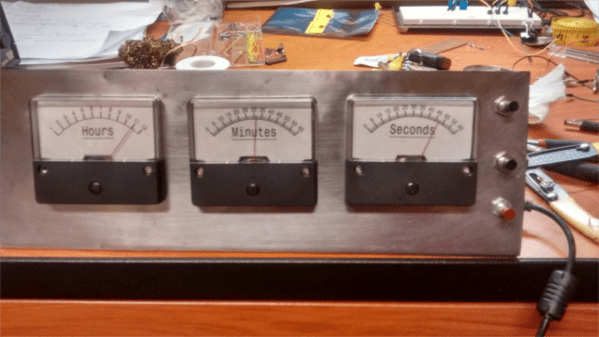
We love a good clock build around here, especially when they involve Blinkenlights. For those less interested in building an alarm clock, here’s a word clock that pulls time and weather data with an ESP8266.

Continue reading “Wake Up With A NeoPixel Sunrise Alarm Clock”

Current Meter Shows Current Time

This isn’t the first of its type, but [Daniel]’s MSP430 based Analog Gauge Clock certainly ticks off the “hack” quotient. He admits an earlier Voltmeter Clock we featured a while back inspired him to build his version.

[Daniel] was taking an Embedded systems class, and needed to build an MSP430G2553 microcontroller based final project. Which is why he decided to implement the real time clock using the micro-controller itself, instead of using an external RTC module. This also simplified the hardware used – the microcontroller, a crystal, three analog ammeters, and a few passives were all that he needed. Other than the Ammeters, everything else came from his parts bin. Fresh face plates were put on the ammeters, and the circuit was assembled on a piece of strip board. A piece of bent steel plate served as the housing.

The interesting part is the software. He wrote all of it in bare C, without resorting to using the Energia IDE. He walks through all of the important parts of his code on his blog post. Setting load capacitance for the timing crystal was important, so he experimented with an oscilloscope to see which value worked best. And TI’s Application Note on MSP430 32-kHz Crystal Oscillators (PDF) proved to be a useful resource. Three PWM output’s run the three ammeters which indicate hours, minutes and seconds. Push-button switches let him set the clock. See a short demo of the clock in the video below.

Continue reading “Current Meter Shows Current Time”

Tiny PIC Clock Is Not A Tiny Bomb

It’s been a few weeks since the incident where Ahmed Mohamed, a student, had one of his inventions mistaken for a bomb by his school and the police, despite the device clearly being a clock. We asked for submissions of all of your clock builds to show our support for Ahmed, and the latest one is the tiniest yet but still has all of the features of a full-sized clock (none of which is explosions).

[Markus]’s tiny clock uses a PIC24 which is a small yet powerful chip. The timekeeping is done on an RTCC peripheral, and the clock’s seven segment displays are temporarily lit when the user presses a button. Since the LEDs aren’t on all the time, and the PIC only consumes a few microamps on standby, the clock can go for years on a single charge of the small lithium-ion battery in the back. There’s also a phototransistor which dims the display in the dark, and a white LED which could be used as a small flashlight in a pinch. If these features and the build technique look familiar it’s because of [Markus’] tiny MSP430 clock which he was showing around last year.

Both of his tiny clocks are quite impressive for their size, features, and power consumption. Some of the other clocks we’ve featured recently include robot clocks, clocks for social good, and clocks that are not just clocks (but still won’t explode). We’re suckers for a good clock project here, so keep sending them in!

Continue reading “Tiny PIC Clock Is Not A Tiny Bomb”

Embed With Elliot: We Don’t Need No Stinkin’ RTCs

A lot of microcontroller projects out there need some sense of wall-clock time. Whether you’re making (yet another) crazy clock, logging data, or just counting down the time left for your tea to steep, having access to human time is key.

The simplest solution is to grab a real-time-clock (RTC) IC or module. And there’s good reason to do so, because keeping accurate time over long periods is very hard. One second per day is 1/86,400 or around eleven and a half parts per million (ppm), and it’s tricky to beat twenty ppm without serious engineering.

Chronodot uses a Maxim TXCO

Good RTC ICs like Maxim’s DS3231, used in the Chronodot, can do that. They use temperature correction logic and a crystal oscillator to get as accurate as five parts per million, or under half a second per day. They even have internal calendar functions, taking care of leap years and the day of the week and so on. The downside is the cost: temperature-compensated RTCs cost around $10 in single quantity, which can break the budget for some simple hacks or installations where multiple modules are needed. But there is a very suitable alternative.

What we’re looking for is a middle way: a wall-time solution for a microcontroller project that won’t break the bank (free would be ideal) but that performs pretty well over long periods of time under mellow environmental conditions. The kind of thing you’d use for a clock in your office. We’ll first look at the “obvious” contender, a plain-crystal oscillator solution, and then move on to something experimental and touchy, but free and essentially perfectly accurate over the long term: using power-line frequency as a standard.

Continue reading “Embed With Elliot: We Don’t Need No Stinkin’ RTCs”

Modded Microwave Sets Its Own Clock

Of all the appliances in your house, perhaps the most annoying is a microwave with a flashing unset clock. Even though a lot of devices auto-set their time these days, most appliances need to have their time set after being unplugged or after a power outage. [Tiago] switches off power to some of his appliances while he’s at work to save a bit of power, and every time he plugs his microwave back in he has to manually reset the clock.

Thankfully [Tiago] wrote in with his solution to this problem: an add-on to his microwave that automatically sets the time over the network. [Tiago]’s project uses an ESP8266 running the Lua-based firmware we’ve featured before. The ESP module connects to [Tiago]’s WiFi network and pulls the current time off of his Linux server.

Next, [Tiago] ripped apart his microwave and tacked some wires on the “set time” button and on the two output pins of the microwave’s rotary encoder. He ran all three signals through optoisolators for safety, and then routed them to a few GPIO pins on his ESP module. When the microwave and the ESP module are powered up, [Tiago]’s Lua script pulls the time from his server, simulates a press of the “set time” button, and simulates the rotary encoder output to set the microwave’s time.

While [Tiago] didn’t post any detailed information on his build, it looks like a great idea that could easily be improved on (like adding NTP support). Check out the video after the break to see the setup in action.

Continue reading “Modded Microwave Sets Its Own Clock”

Pac Man Clock

Pac-Man Clock Eats Time, Not Pellets

[Bob’s] Pac-Man clock is sure to appeal to the retro geek inside of us all. With a tiny display for the time, it’s clear that this project is more about the art piece than it is about keeping the time. Pac-Man periodically opens and closes his mouth at random intervals. The EL wire adds a nice glowing touch as well.

The project runs off of a Teensy 2.0. It’s a small and inexpensive microcontroller that’s compatible with Arduino. The Teensy uses an external real-time clock module to keep accurate time. It also connects to a seven segment display board via Serial. This kept the wiring simple and made the display easy to mount. The last major component is the servo. It’s just a standard servo, mounted to a customized 3D printed mounting bracket. When the servo rotates in one direction the mouth opens, and visa versa. The frame is also outlined with blue EL wire, giving that classic Pac-Man look a little something extra.

The physical clock itself is made almost entirely from wood. [Bob] is clearly a skilled wood worker as evidenced in the build video below. The Pac-Man and ghosts are all cut on a scroll saw, although [Bob] mentions that he would have 3D printed them if his printer was large enough. Many of the components are hot glued together. The electronics are also hot glued in place. This is often a convenient mounting solution because it’s relatively strong but only semi-permanent.

[Bob] mentions that he can’t have the EL wire and the servo running at the same time. If he tries this, the Teensy ends up “running haywire” after a few minutes. He’s looking for suggestions, so if you have one be sure to leave a comment. Continue reading “Pac-Man Clock Eats Time, Not Pellets”

Redundant Automated Water Filler For Your Coffee

We’ve always wondered why we have indoor plumbing if it isn’t hooked up to our coffee pots. We probably drink as much coffee as water anyway, so why not just hook up a water line to refill the pot? [Loose Cannon] aka [LC] has been working on just that problem, with a whole lot of extra features, creating a very robust automatically-filled, gravity-fed, vacuum-sealed water tank for whatever appliance you have that could use it, including your coffee pot.

[LC] tapped into the 1/4″ water line from the ice maker, which has the added bonus of being a common size for solenoid valves. He’s using an eTape sensor to measure the water level in the reservoir, but he ALSO is using a flow meter in the line itself to double-check that the reservoir won’t overflow. The flow meter allows a hard limit to be set for the maximum amount of water allowed into the tank. He’s used an Arduino Micro to tie the project together, which also handles a real-time clock so the tank can be filled on a schedule.

The tank that [LC] was trying to fill was vacuum-sealed as well, which made things a little trickier. Without a vacuum on the tank, the water would just run out of the overflow valve. This is an interesting project that goes way beyond the usual automatic water supplies for coffee pots we’ve seen before.