Upgraded Roboceratops Still Not Extinct

We first heard about [Robert Stephenson]’s robotic baby dinosaur a few years ago, and recently he made some upgrades.

Roboceratops V2 uses 10 servos in the jaw, neck, tail, and front and back legs with 16 degrees of freedom—the two front legs each got an additional degree of freedom in the upgrade. [Robert] is currently in the process of swapping out the Hitec HS645 MGs for higher-torque New Power XLDs.

The older version had aluminum legs covered with upholstery foam, but [Robert] has refined the design. The head, body, and legs are made from laser-cut MDF sanded to give a more natural, bone-like rounding. Finally, to better make use of the new servos [Robert] rewrote the gait engine, giving Robosaurus a more natural motion as it adjusts its center of gravity with each step.

So, for the next version are we all on board for simulated skin?

Continue reading “Upgraded Roboceratops Still Not Extinct”

Vintage Plotter Handles Chaos With Ease

No lab in almost any discipline was complete in the 70s and 80s without an X-Y plotter. The height of data acquisition chic, these simple devices were connected to almost anything that produced an analog output worth saving. Digital data acquisition pushed these devices to the curb, but they’re easily found, cheap, and it’s worth a look under the hood to see what made these things tick.

The HP-7044A that [Kerry Wong] scored off eBay is in remarkably good shape four decades after leaving the factory. While the accessory pack that came with it shows its age with dried up pens and disintegrating foam, the plotter betrays itself only by the yellowish cast to its original beige case. Inside, the plotter looks pristine. Completely analog with the only chips being some op-amps in TO-5 cans, everything is in great shape, even the high-voltage power supply used to electrostatically hold the paper to the plotter’s bed. Anyone hoping for at least a re-capping will be disappointed; H-P built things to last back in the day.

[Kerry] puts the plotter through its paces by programming an Arduino to generate a Lorenz attractor, a set of differential equations with chaotic solutions that’s perfect for an X-Y plotter. The video below shows the mesmerizing butterfly taking shape. Given the plotter’s similarity to an oscilloscope, we wonder if some SDR-based Lissajous patterns might be a fun test as well, or how it would handle musical mushrooms.

Continue reading “Vintage Plotter Handles Chaos With Ease”

[Hari] Prints An Awesome Spider Robot

Although we have strong suspicions that the model’s designer failed entomology, this spider robot is very cool. [Hari Wiguna] made one, and is justifiably thrilled with the results. (Watch his summary on YouTube embedded below.)

Thanks to [Regis Hsu]’s nice design, all [Hari] had to do was order a hexapod’s dozen 9g servos for around $20, print out the parts, attach an Arduino clone, and he was done. We really like the cutouts in the printed parts that nicely fit the servo horns. [Hari] says the calibration procedure is a snap; you run a sketch that sets all the servos to a known position and then tighten the legs in place. Very slick.

The parts should print without support on basically any printer. [Hari]’s is kinda janky and exhibits all sorts of layer-to-layer irregularities (sorry, man!) but the robot works perfectly. Which is not to say that [Hari] doesn’t have assembly skills — check out the world’s smallest (?) RGB LED cube if you think this guy can’t solder. Of course, you can entirely sidestep the 3D-printed parts and just fix a bunch of servos together and call it a robot. It’s harder to make building a four-legger any easier than these two projects. What are you waiting for?

Continue reading “[Hari] Prints An Awesome Spider Robot”

Hackaday Prize Entry: Experiments With Wheeled Legs

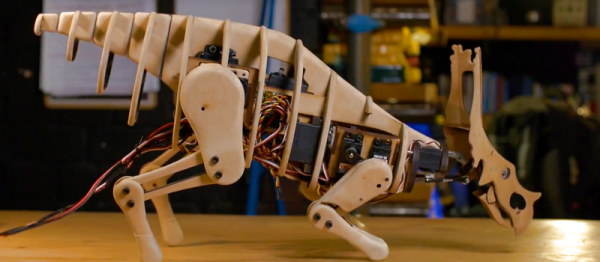
If you’ve been keeping tabs on recent developments in robotics, you surely remember Handle — the awesome walking, wheeled robot from Boston Dynamics. There’s a good reason why such a combination is a good choice of locomotion for robots. Rolling on wheels is a good way to cover smooth terrain with high efficiency. But when you hit rocky patches or obstacles, using legs to negotiate these obstacles makes sense. But Handle isn’t the only one, nor is it the first.

[Radomir Dopieralski] has been building small robots for a while now, and is especially interested in how they move. He is sharing his experience while Experimenting with Wheeled Legs, with the eventual aim of “building an experimental walking+rolling robot, to more efficiently kill all humans and thus solve all the problems”. His pithy comments aside, investigating and experimenting with different forms of locomotion to understand which method is most efficient will pay rich dividends in the design of future robots.

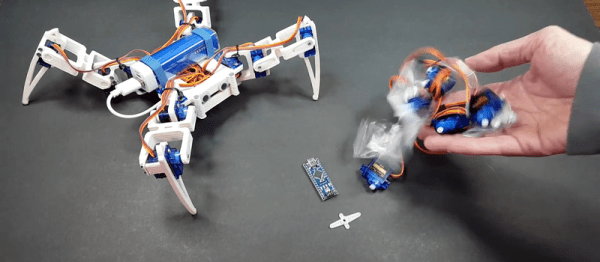
During an earlier version of the Hackaday Prize, [Radomir] snagged a coupon for laser cutting services. He used it to build a new robot based on a fresh look at some of his earlier designs. This resulted in the Logicoma-kun — a functional model of a Logikoma (a logistics robot designed to be a fast all-terrain vehicle for transporting weapons and ammunition) from “Ghost in the Shell: Arise”. Along the way, he figured out how to save some servo channels. For gripping function, he needed to drive two servos in sync with each other, but in opposing directions. This would usually require two GPIO’s and a few extra lines of code. Instead, he dismantled a servo and reversed the motor AND the servo potentiometer connections.

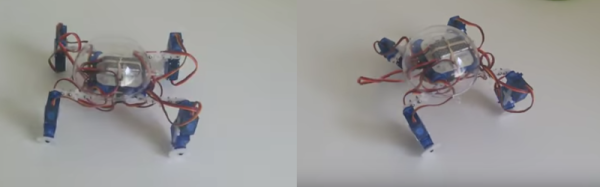
But this is still early days for [Radomir]. He is fleshing out ideas, looking for feedback and discussions on robotic locomotion. This fits in perfectly with the “Design Your Concept” phase of the Hackaday Prize 2017. He has already made some progress on Logicoma-kum by having it move in either the wheeled or walking modes — check out the videos after the break.

Continue reading “Hackaday Prize Entry: Experiments With Wheeled Legs”

Robot Arm From Recyclables

A robot assistant would make the lives of many much easier. Luckily, it’s possible to make one of your own with few fancy materials. The [circuito.io] team demonstrates this by building a robot arm out of recyclables!

With the exception of the electronics — an Arduino, a trio of servo motors, and a joystick — the arm is made almost completely out of salvaged recyclables: scrap wood, a plastic bottle, bits of plastic string and a spring. Oh, and — demonstrating yet another use for those multi-talented tubers — a potato acts as a counterweight.

Instead of using screws or glue, these hackers used string made from a plastic bottle as a form of heat shrink wrap to bind the parts of the arm together. The gripper has only one pivoting claw for greater strength, and the spring snaps it open once released. Behold: your tea-bag dunking assistant.

Continue reading “Robot Arm From Recyclables”

Zero-Intrusion Wireless Light Switch

What do you do if your light switch is too far from your desk, and you’re in a rental property so you can’t put in extra wiring to install an electronic control for it? Get up and turn it on or off by hand? Of course not!

If you are [Guyfromhe], you solve this problem with a servo attached to a screw-on light switch faceplate, and you control it with a pair of Arduino/nRF24L01 combos. It’s a pretty simple arrangement, the wireless link simply takes the place of a serial cable that instructs the Arduino on the light switch to operate the servo that in turn moves the switch. The whole thing is triggered through his home automation system, which in turn responds to an Amazon Dash button on his desk. Yes, it’s complex. But turning on the light has been automated without intrusion into his landlord’s domain, and that’s all that matters.

On a more serious note, he’s put some Arduino code up on his write-up, as well as a YouTube video we’ve put below the break.

Continue reading “Zero-Intrusion Wireless Light Switch”

Arduino + Geometry + Bicycle = Speedometer

It is pretty easy to go to a big box store and get a digital speedometer for your bike. Not only is that no fun, but the little digital display isn’t going to win you any hacker cred. [AlexGyver] has the answer. Using an Arduino and a servo he built a classic needle speedometer for his bike. It also has a digital display and uses a hall effect sensor to pick up the wheel speed. You can see a video of the project below.

[Alex] talks about the geometry involved, in case your high school math is well into your rear view mirror. The circumference of the wheel is the distance you’ll travel in one revolution. If you know the distance and you know the time, you know the speed and the rest is just conversions to get a numerical speed into an angle on the servo motor. The code is out on GitHub.

Continue reading “Arduino + Geometry + Bicycle = Speedometer”