Old Scanner Finds New Life In DIY PCB Fab

Cheap, high-quality PCBs are truly a wonder of our age. That a professionally fabricated board with silkscreen and solder mask can be ordered online and delivered to your door has lowered the bar between a hobbyist project and a polished product. But the wait can be agonizing, and it can throw a wrench into the iterative design process. What to do?

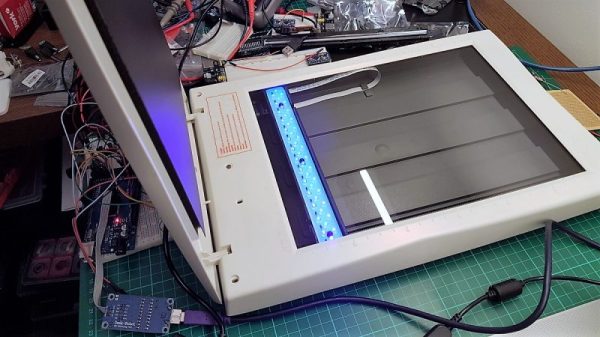
[Andras Kabai] knows the answer to that, and this former flatbed scanner turned into a UV exposer is the centerpiece of his DIY board fab. The old Mustek scanner was a couple of bucks secondhand, and provided not only the perfect form-factor for a board scanner but a trove of valuable parts to reuse. [Andras] replaced the original fluorescent light bar with a long, narrow PCB stuffed with UV LEDs, and added an Arduino Mega to control the original stepper drive. The project looks like it went through a little feature creep, with an elaborate menu system and profiles that include controls for exposure time, the brightness of the LED array via PWM, and the length of board that gets exposed. It’s clearly a work in progress, but early results are encouraging and we’ll be watching to see how [Andras]’ in-house fab shapes up.

This approach to PCB fab is only one of many, of course. You can turn a budget 3D-printer into a PCB machine, or even use an LCD to mask the boards during exposure. The latter intrigues us — an LCD mask and a scanning UV light source could make for a powerful PCB creation tool.

UV Sensitive Filament As A Persistent Display

Some of the hacks we feature are modifications of existing devices, others are ground-up builds of entirely new ones. And then there are the experiments, things that have to be worth trying because they just might work. In this final category we have [Matt]’s work with  UV sensitive plastic to form the basis of a simple persistent display, which has created something best described as a proof-of-concept that shows promise, and definitely proves that he had an idea very much worth trying.

The idea makes use of a plastic that changes colour from white to purple when exposed to UV light. He 3D printed a waffle-like structure to locate over a 3×3 grid of UV LEDs, which he could then illuminate under the control of an Arduino Mini Pro. A short illumination changes the colour of the plastic above it, creating a “pixel” that persists for several seconds. In this he has created a working proof of concept for a very simple 3×3 matrix display, albeit rather an unwieldy one. The advantage the idea offers is that a relatively long time of display can be achieved for a relatively short LED illumination, giving a potential for power saving.

The proof-of-concept itself isn’t particularly useful, but from this idea it’s possible a larger display could be practically made. An array of surface-mount LEDs could perhaps illuminate a larger array of plastic to a greater resolution, it’s definitely an idea that was worth trying, and which shows promise for further pursuit. If you’d like to see it in action he’s posted a video, which we’ve placed below the break.

Continue reading “UV Sensitive Filament As A Persistent Display”

DIY Illuminator For UV Fluorescence Photography

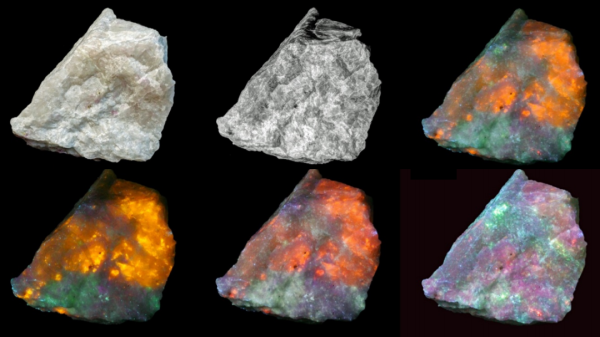
The image shown is the mineral Hackmanite, which fluoresces under ultraviolet lighting. However, not all UV is created equal, and that makes a difference if you’re into UV imaging. The image for this article is from [David Prutchi] and shows the striking results of using different wavelengths of UV. [David] goes into detail on how to make your own DIY Long, Medium, and Short-wave UV Illuminator complete with part numbers and wiring diagram. The device isn’t particularly complicated; the real work was determining the exact part numbers and models of lamp, filters, and ballasts required to get the correct results. [David] has done that work and shared it for anyone interested in serious UV fluorescence photography, along with a white paper on the process.

We’ve seen [David]’s work before. We featured his DIY short-wave UV imager in the past, and his DOLPi camera project was a 2015 Hackaday Prize finalist. It’s clear he really knows his stuff, and genuinely enjoys sharing his discoveries and work.

Hackaday Prize Entry: DIY LCD Based SLA 3D Printer

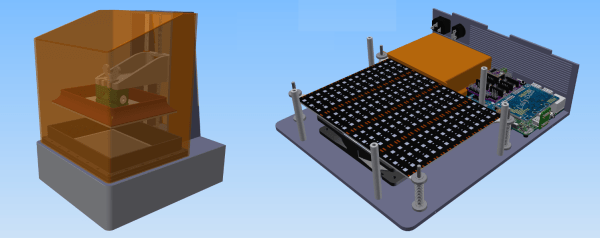
Resin-based SLA 3D printers are seen more and more nowadays but remain relatively uncommon. This Low Cost, Open Source, LCD based SLA 3D Printer design by [Dylan Reynolds] is a concept that aims to make DIY SLA 3D printing more accessible. The idea is to use hardware and manufacturing methods that are more readily available to hobbyists to create a reliable and consistent DIY platform.

[Dylan]’s goal isn’t really to compete with any of the hobbyist or prosumer options on the market; it’s more a test bed for himself and others, to show that a low-cost design that takes full advantage of modern hardware like the Raspberry Pi can be made. The result would be a hackable platform to let people more easily develop, experiment, or simply tamper with whatever part or parts they wish.

The Smartest Smart Watch Is The One You Make Yourself

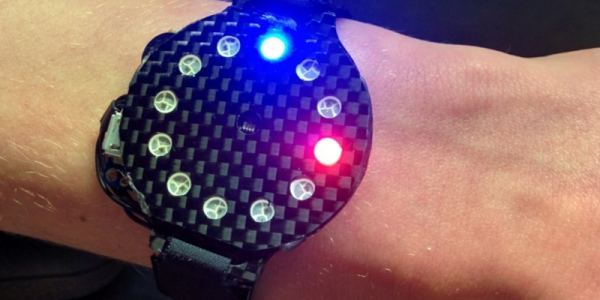
If you’re building a smart watch these days (yawn!), you’ve got to have some special sauce to impress the jaded Hackaday community. [Dominic]’s NeoPixel SmartWatch delivers, with his own take on what’s important to have on your wrist, and just as importantly, what isn’t.

There’s no fancy screen. Instead, the watch gets by with a ring of NeoPixels for all its notification needs. But notification is what it does right. It tells [Dominic] when he’s got an incoming call of course, but also has different flashing color modes for SMS, Snapchat, and e-mail. Oh yeah, and it tells time and even has a flashlight mode. Great functionality for a minimalistic display.

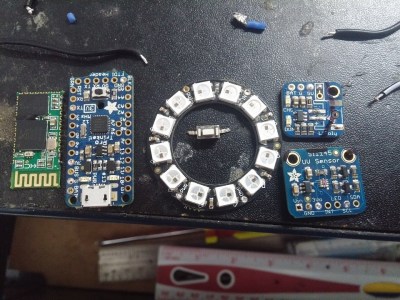
But that’s not all! It’s also got a light sensor that works from the UV all the way down to IR. At the moment, it’s being used to automatically adjust the LED brightness and to display current UV levels. (We imagine turning this into a sunburn alarm mode.) Also planned is a TV-B-Gone style IR transmitter.

The hardware is the tough part of this build, and [Dominic] ended up using a custom PCB to help in cramming so many off-the-shelf modules into a tiny space. Making it look good is icing on the cake.

Thanks [Marcello] for the tip!

Continue reading “The Smartest Smart Watch Is The One You Make Yourself”

Finding A Lost Tooth With Science!

Sometimes the hack is a masterwork of circuit design, crafting, 3D printing and programming. Other times, the hack is knowing which tool is right for the job, even when the job isn’t your regular, run-of-the-mill, job. [John]’s son lost his tooth on their gravel driveway, so [John] set out to find it.

socks-fluoresce-under-uv-light-640x480
White socks fluoresce under UV

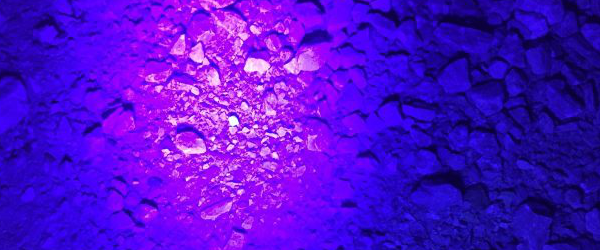
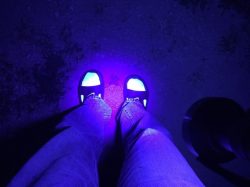
When [John] set out to help his son and find the tooth, he needed a plan of attack – there was a large area to cover and, when [John] looked over the expanse of gravel the terms “needle” and “haystack” came to mind. Just scanning the ground wasn’t going to work, he needed a way to differentiate the tooth from the background. Luckily, he had a UV flashlight handy and, after testing it on his own teeth, realized that his son’s tooth would fluoresce under UV light and the gravel wouldn’t.

Off [John] went at night to find the tooth with his flashlight. He soon realized that many things fluoresce under UV light – bits of plastic, quartz crystal in the rocks, his socks. [John] eventually found the tooth, and his son is happier now. No soldering was involved, no development on breadboards, no high-voltage, but this is one of those hacks that is more about problem solving than throwing microcontrollers at a situation. In the end, though, everyone’s happy, and that’s what counts.

Extracting Sounds With Acid And UV

Toaplan was a Japanese video game developer in the 80s and early 90s, most famous for Zero Wing, the source of the ancient ‘All Your Base’ meme. Memeology has come a long way since the Something Awful forums and a pre-Google Internet, but MAME hasn’t. Despite the completionist nature of MAME aficionados, there are still four Toaplan games with no sound in the current version of MAME.

The sound files for these games is something of a holy grail for connoisseurs of old arcade games, and efforts to extract these sounds have been fruitless for three decades. Now, finally, these sounds have been released with the help of sulfuric acid and microscopes.

The sounds for Fire SharkVimanaTeki Paki, and Ghox were stored on their respective arcade boards inside the ROM for a microcontroller, separate from the actual game ROM. Since the fuse bits of this microcontroller were set, the only way to extract the data was decapsulation. This messy and precise work was done by CAPS0ff, who melted away the epoxy coating of the chip, revealing the microcontroller core.

Even without a microscope, the quarry of this hunt was plainly visible, but there was still no way to read out the data. The built-in read prevention bit was set, and the only way to clear that was to un-set a fuse. This was done by masking everything on the chip except the suspected fuse, putting it under UV, and checking if the fuse switched itself to an unburnt state.

The data extraction worked, and now the MAME project has the sound data for games that would have otherwise been forgotten to time. A great success, even if the games are generic top-down shooters.