While our collective minds have been turned towards the global pandemic it’s refreshing to hear that in some quarters life has continued, and events that would have made the news in more normal times have continued to take place while they have been replaced in coverage by more urgent considerations.
In the last few weeks there has been a piece of routine American bureaucracy that flew under the radar but which will have a significant effect on global technology; the United States’ Federal Communication Commission first proposed, then ratified, the allocation of an extra 1200 MHz of spectrum in the 6 GHz band to ISM usage. This allocation process is likely to be repeated by other regions worldwide, freeing up another significant piece of spectrum for unlicensed usage.
In practice this means that there will be a whole new set of WiFi channels created, and we’ll all have a little more spectrum to play around with, so it’s worth examining in a little more detail. Continue reading “What Will You Do With An Extra 1.2 Gigahertz?”→
Bluetooth is a technology with a very interesting history. When it first came around in the late 1990s, it promised to replace the mess of wires that was tucked behind every desk of the day. Unfortunately, the capabilities of early Bluetooth didn’t live up to the hype, and it never quite took off. It wasn’t until the rise of the smartphone more than a decade later that Bluetooth, now several versions more advanced, really started to make sense.
As [Larry Bank] explains in a recent blog post, that means there’s a whole lot to learn if you want to really understand Bluetooth hacking. For example, the Bluetooth versions that were used in the 1990s and 2000s are actually a completely different protocol from that which most modern devices are using. But the original protocol, now referred to as “Classic”, is still supported and in use.
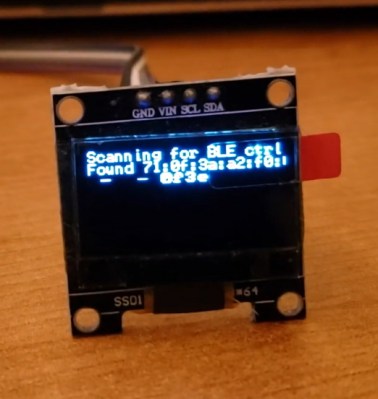
That means to really get your head wrapped around working with Bluetooth, you need to learn about the different versions and all the tools and tricks associated with them. To that end, [Larry] does a great job of breaking down the primary versions of Bluetooth and the sort of tools you might find yourself using. That includes microcontrollers such as the ESP32 or Arduino Nano 33 BLE.
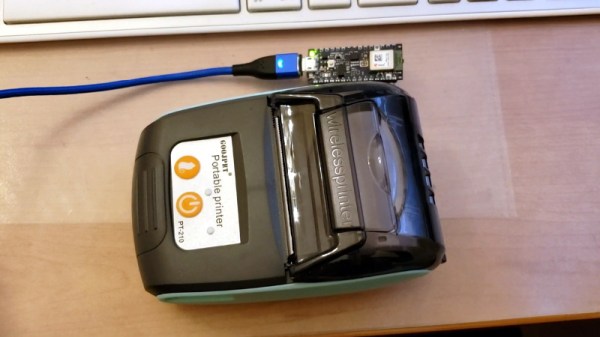
But the post isn’t just theory. [Larry] also goes over a few real-world projects of his that utilize Bluetooth, such as getting a portable printer working with his Arduino, or figuring out how to use those tiny mobile phone game controllers for his own purposes. Even if you don’t have these same devices, there’s a good chance that the methods used and lessons learned will apply to whatever Bluetooth gadgets you’ve got your eye on.
When you’re looking to add some wireless functionality to a project, there are no shortage of options. You really don’t need to know much of the technical details to make use of the more well-documented modules, especially if you just need to get something working quickly. On the other hand, maybe you’ve gotten to the point where you want to know how these things actually work, or maybe you’re curious about that cheap RF module on AliExpress. Especially in the frequency bands below 1 GHz, you might find yourself interfacing with a module at really low level, where you might be tuning modulation parameters. The following overview should give you enough of an understanding about the basics of RF modulation to select the appropriate hardware for your next project.
Three of the most common digital modulation schemes you’ll see in specifications are Frequency Shift Keying (FSK), Amplitude Shift Keying (ASK), and LoRa (Long Range). To wrap my mechanically inclined brain around some concepts, I found that thinking of RF modulation in terms of pitches produced by a musical instrument made it more intuitive.
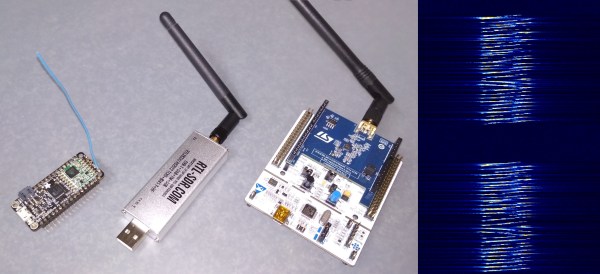
And lots of pretty graphs don’t hurt either. Signals from two different RF dev boards were captured and turned into waterfall and FFT plots using a $20 RTL-SDR dongle. Although not needed for wireless experimentation, the RTL-SDR is an extremely handy debugging tool, even to just check if a module is actually transmitting. Continue reading “RF Modulation: Crash Course For Hackers”→
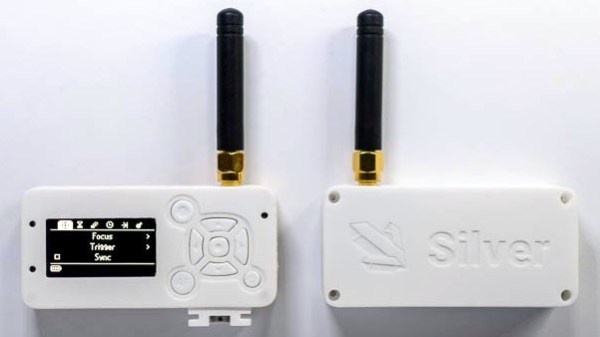
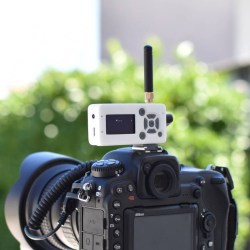
[Foaly] has been hard at work making an open-source long range camera remote, and recently shared a deeply thoughtful post about how it is never too early to consider all aspects of design, lest it cost you in the end. It all started with designing an enclosure for a working prototype, and it led to redesigning the PCB from scratch. That took a lot of guts, and we recommend you make some time to click that link and read up on what he shared. You’ll either learn some valuable tips, or just enjoy nodding sagely as he confirms things you already know. It’s win-win.
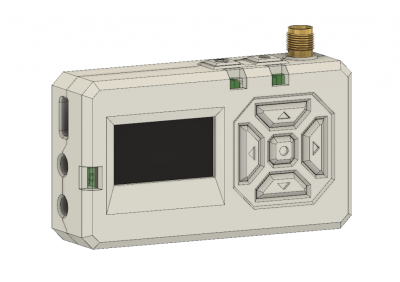
The project in question is Silver, and calling it a camera remote is selling it a bit short. In any case, [Foaly] had a perfectly serviceable set of prototypes and needed a small batch of enclosures. So far so normal, but in the process of designing possible solutions, [Foaly] ran into a sure-fire sign that a project is in trouble: problems cropping up everywhere, and in general everything just seeming harder than it should be. Holding the mounting-hole-free PCB securely never seemed quite right. Buttons were awkward to reach, ill-proportioned, and didn’t feel good to use. The OLED screen’s component was physically centered, but the display was off-center which looked wrong no matter how the lines of the bezel were sculpted. The PCB was a tidy rectangle, but the display ended up a bit small and enclosures always looked bulky by the time everything was accounted for. The best effort is shown here, and it just didn’t satisfy.
[Foaly] says the real problem was that he designed the electronics and did the layout while giving some thought (but not much thought) to their eventual integration into a case. This isn’t necessarily a problem for a one-off, but from a product design perspective it led to so many problems that it was better to start over, this time being mindful of how everything integrates right from the start: the layout, the components, the mechanical bits, the assembly, and the ultimate user experience. The end result is wonderful, and we’re delighted [Foaly] took the time to document his findings.
I’ve been told all my life about old-timey Army/Navy surplus stores where you could buy buckets of FT-243 crystals, radio gear, gas masks, and even a Jeep boxed-up in a big wooden crate. Sadly this is no longer the case. Today surplus stores only have contemporary Chinese-made boots, camping gear, and flashlights. They are bitterly disappointing except for one surplus store that I found while on vacation in the Adirondacks: Patriot of Lake George.
There I found a unicorn of historical significance; an un-modified-since-WW2 surplus CBY-46104 receiver with dynamotor. The date of manufacture was early-war, February 1942. This thing was preserved as good as the day it was removed from its F4F Hellcat. No ham has ever laid a soldering iron or a drill bit to it. Could this unit have seen some action in the south Pacific? Imagine the stories it could tell!
My unconventional restoration of this radio followed strict rules so as to minimize the evidence of repair both inside and out yet make this radio perform again as though it came fresh off the assembly line. Let’s see how I did.
If your neighborhood is anything like ours, walking across the street is like taking your life in your own hands. Drivers are increasingly unconcerned by such trivialities as speed limits or staying under control, and anything goes when they need to connect Point A to Point B in the least amount of time possible. Monitoring traffic with this passive radar will not do a thing to slow drivers down, but it’s a pretty cool hack that will at least yield some insights into traffic patterns.
The principle behind active radar – the kind police use to catch speeders in every neighborhood but yours – is simple: send a microwave signal towards a moving object, measure the frequency shift in the reflected signal, and do a little math to calculate the relative velocity. A passive radar like the one described in the RTL-SDR.com article linked above is quite different. Rather than painting a target with an RF signal, it relies on signals from other transmitters, such as terrestrial TV or radio outlets in the area. Two different receivers are used, both with directional antennas. One points to the area to be monitored, while the other points directly to the transmitter. By comparing signals reflected off moving objects received by the former against the reference signal from the latter, information about the distance and velocity of objects in the target area can be obtained.
The RTL-SDR test used a pair of cheap Yagi antennas for a nearby DVB-T channel to feed their KerberosSDR four-channel coherent SDR, a device we last looked at when it was still in beta. Essentially four SDR dongles on a common board, it’s available now for $149. Using it to build a passive radar might not save the neighborhood, but it could be a lot of fun to try.
Just because something is being actively documented and tampered with by enthusiastic hackers doesn’t mean the information is handily centralized. There can be a lot of value in gathering disparate resources in one place, and that’s exactly what [Trammell Hudson] has done with his resource page for hacking the IKEA TRÅDFRI LED power supply with wireless interface. Schematic teardown, custom firmware images, it’s all there in one convenient spot.
Back in 2017, the IKEA TRÅDFRI hacking scene was centered around the LED light bulbs but as the group of products expanded, the rest of the offerings have also gotten some attention.
Why bother tampering with these units? One reason is to add features, but another is to make them communicate over your own MQTT network. And MQTT is the reason you are only a Raspberry Pi and a trip to IKEA away from the beginnings of a smart home that is under no one’s control or influence but your own.