Trimmed Dreamcast Board Makes For Perfect Portable

In the last year or so we’ve been seeing an array of portable game system builds based around “trimmed” Wii motherboards which have literally been cut down to a fraction of their original size. It turns out that most of the board is dedicated to non-essential functions, with the core Wii system contained within one specific area that can be isolated with a steady hand. But as [Gman] shows in his latest build, the same concept can also be applied to the Sega Dreamcast.

But of course, there’s a bit more to it than just taking a hacksaw to a Dreamcast motherboard. [Gman] had to supplement the trimmed system with quite a bit of additional hardware, such as a power management board he originally designed for portable Wii projects.
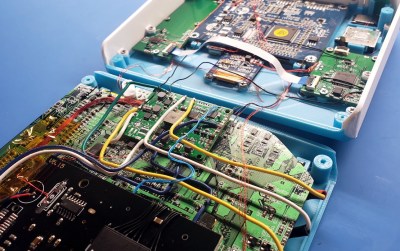
Other components were specifically built for this project. For example there’s a custom PCB that handles emulating the Dreamcast controller using a PIC32MZ microcontroller. He’s also using a LM49450 to pull digital audio from the motherboard over I2S, completely bypassing the analog output.

While not currently functioning, [Gman] also included an SPI OLED display and the hardware necessary to emulate basic functionality of the system’s unique Visual Memory Unit (VMU) right in the front of the system. We’re looking forward to seeing him revisit this feature in the future when he’s got the software side of things worked out.

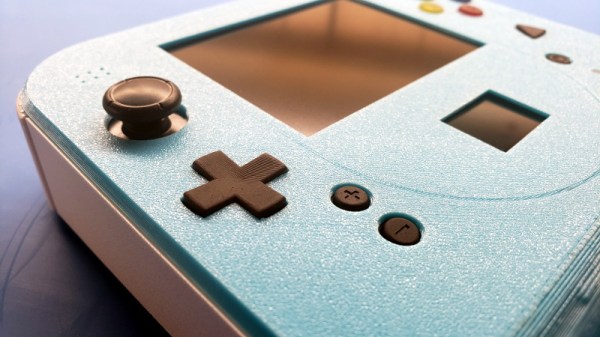
The Nintendo 2DS inspired enclosure is completely 3D printed. A Prusa i3 with textured PEI bed was used to achieve the gorgeous dappled look on the system’s front panel, while the buttons were done on a Form 2 SLA printer. With a mold made from the printed buttons, [Gman] was able to cast the final pieces using a variety of colors until he found a combination he was happy with.

If you’re not Team Sega and would rather hack up your own tiny versions of Nintendo’s hardware, look no further than this fully functional trimmed Wii built into an Altoids tin.

A Car Phone — No, Not That Kind

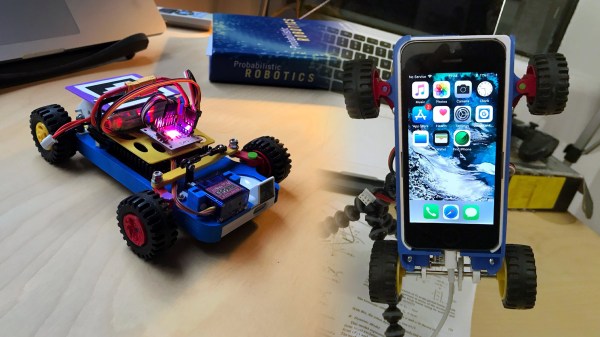
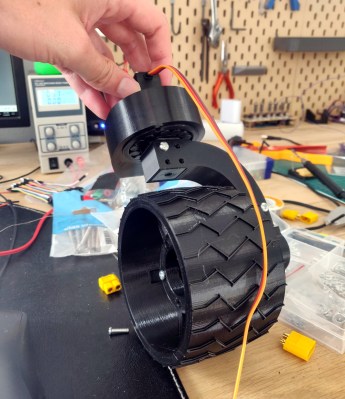
Autonomous vehicle development is a field of technology that remains relatively elusive to the average hacker, what with the needing a whole car and all. Instead of having to deal with such a large scale challenge, [Piotr Sokólski] has instead turned to implementing the same principles on the scale of a small radio-controlled car.

Wanting to lower the barrier of entry for developing software for self-driving cars, he based his design off of something you’re likely to have lying around already: a smartphone. He cites the Google Cardboard project for his inspiration, with how it made VR more accessible without needing expensive hardware. The phone is able to control the actuators and wheel motors through a custom board, which it talks to via a Bluetooth connection. And since the camera points up in the way the phone is mounted in the frame, [Piotr] came up with a really clever solution of using a mirror as a periscope so the car can see in front of itself.

The software here has two parts, though the phone app one does little more than just serve as an interface by sending off a video feed to be processed. The whole computer vision processing is done on the desktop part, and it allows [Piotr] to do some fun things like using reinforcement learning to keep the car driving as long as possible without crashing. This is achieved by making the algorithm observe the images coming from the phone and giving it negative reward whenever an accelerometer detects a collision. Another experiment he’s done is use a QR tag on top of the car, visible to a fixed overhead camera, to determine the car’s position in the room.

This might not be the first time someone’s made a scaled down model of a self-driving vehicle, though it’s one of the most cleverly-designed ones, and it’s certainly much simpler than trying to do it on a full-sized car in your garage.

Continue reading “A Car Phone — No, Not That Kind”

Following Pigs: Building An Injectable Livestock Tracking System

I’m often asked to design customer and employee tracking systems. There are quite a few ways to do it, and it’s an interesting intersection of engineering and ethics – what information is reasonable to collect in different contexts, anonymizing and securely storing it, and at a fundamental level whether the entire system should exist at all.

On one end of the spectrum, a system that simply counts the number of people that are in your restaurant at different times of day is pretty innocuous and allows you to offer better service. On the other end, when you don’t pay for a mobile app, generally that means your private data is the product being bought and sold. Personally, I find that the whole ‘move fast and break things’ attitude, along with a general disregard for the privacy of user data, has created a pretty toxic tech scene. So until a short while ago, I refused to build invasive tracking systems – then I got a request that I simply couldn’t put aside…

Continue reading “Following Pigs: Building An Injectable Livestock Tracking System”

Vintage Car Radio Now Plays Games And Chiptunes

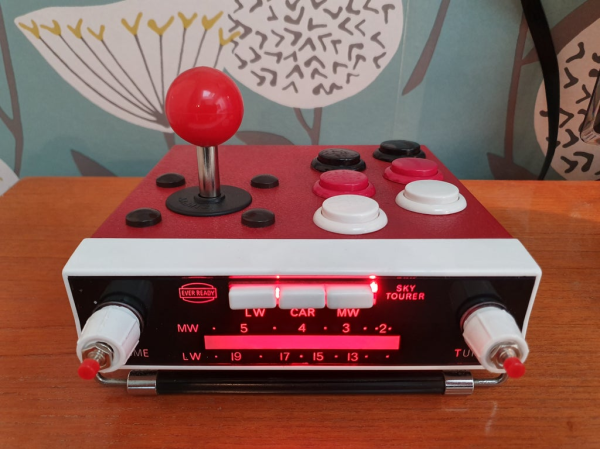
[MisterM] seems to specialize in squeezing new electronics into old but good-looking technology. His latest creation focuses on a space-age specimen: an interesting car radio from 1963 that could be pulled out from the dashboard and taken along wherever. The beat goes on, thanks to a shiny built-in speaker on the bottom.

He replaced the non-working radio guts with a Raspberry Pi 3 running RetroPie and a Picade controller board. A Pimoroni Blinkt LED strip behind the radio dial glows a different color for each emulated console, which we think is a nice touch. [MisterM] built this console to play in his workshop, and even made a dock for it. But in a lovely homage to the original radio, it’s self-contained and can be taken to the living room or to a friend’s house. There’s also a USB port for whenever player two is ready to enter. For [MisterM]’s next trick, he’ll be converting an 80s joystick.

We love that [MisterM] repurposed the dials as housings for start and select buttons. As he points out, this keeps them out of the way while he’s wildly working the controls. Just enter the Konami Code to unlock the build video below.

Do you dream of playing Donkey Kong absolutely everywhere? Check out the ultraportable mintyPi 2.0.

Continue reading “Vintage Car Radio Now Plays Games And Chiptunes”

The Amazon Dash Button: A Retrospective

The Internet of Things will revolutionize everything! Manufacturing? Dog walking? Coffee bean refilling? Car driving? Food eating? Put a sensor in it! The marketing makes it pretty clear that there’s no part of our lives which isn’t enhanced with The Internet of Things. Why? Because with a simple sensor and a symphony of corporate hand waving about machine learning an iPhone-style revolution is just around the corner! Enter: Amazon Dash, circa 2014.

The first product in the Dash family was actually a barcode scanning wand which was freely given to Amazon Fresh customers and designed to hang in the kitchen or magnet to the fridge. When the Fresh customer ran out of milk they could scan the carton as it was being thrown away to add it to their cart for reorder. I suspect these devices were fairly expensive, and somewhat too complex to be as frequently used as Amazon wanted (thus the extremely limited launch). Amazon’s goal here was to allow potential customers to order with an absolute minimum of friction so they can buy as much as possible. Remember the “Buy now with 1-Click” button?

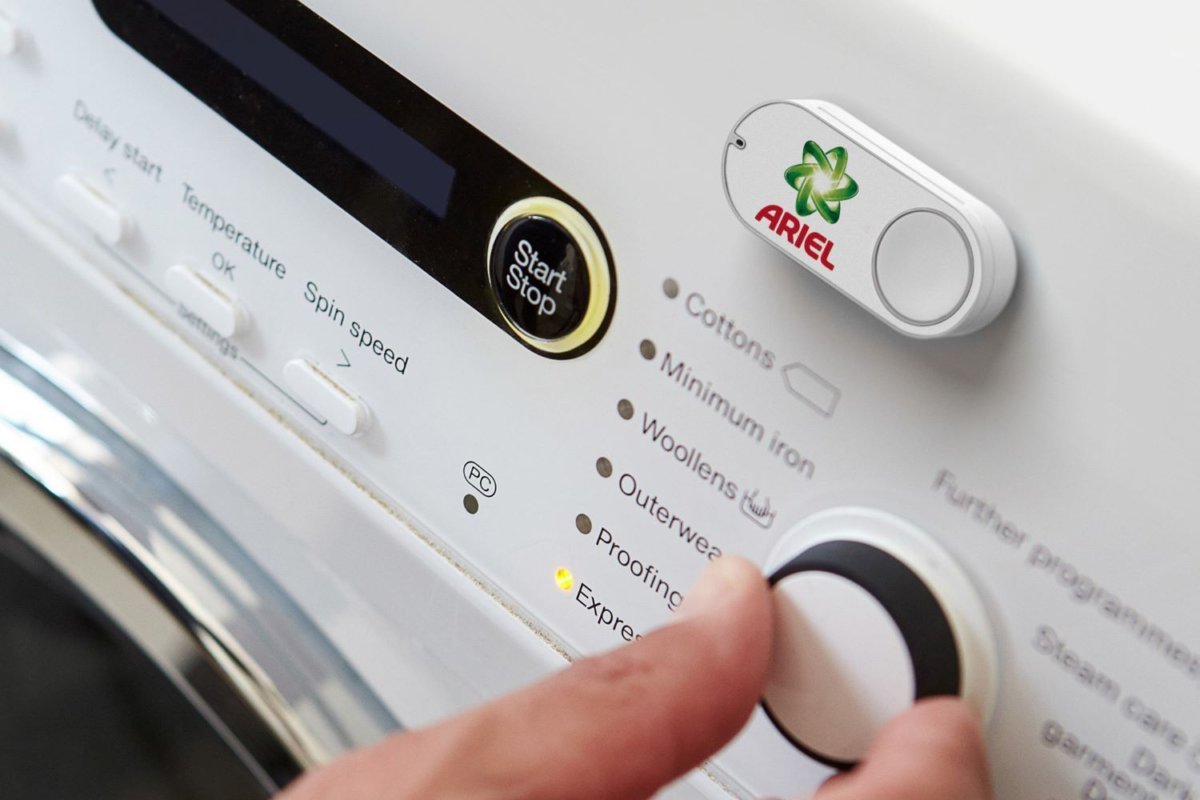
That original Dash Wand was eventually upgraded to include a push button activated Alexa (barcode scanner and fridge magnet intact) and is generally available. But Amazon had pinned its hopes on a new beau. Mid 2015 Amazon introduced the Dash Replenishment Service along with a product to be it’s exemplar – the Dash Button. The Dash Button was to be the 1-Click button of the physical world. The barcode-scanning Wands require the user to remember the Wand was nearby, find a barcode, scan it, then remember to go to their cart and order the product. Too many steps, too many places to get off Mr. Bezos’ Wild Ride of Commerce. The Dash Buttons were simple! Press the button, get the labeled product shipped to a preconfigured address. Each button was purchased (for $5, with a $5 coupon) with a particular brand affinity, then configured online to purchase a specific product when pressed. In the marketing materials, happy families put them on washing machines to buy Tide, or in a kitchen cabinet to buy paper towels. Pretty clever, it really is a Buy now with 1-Click button for the physical world.

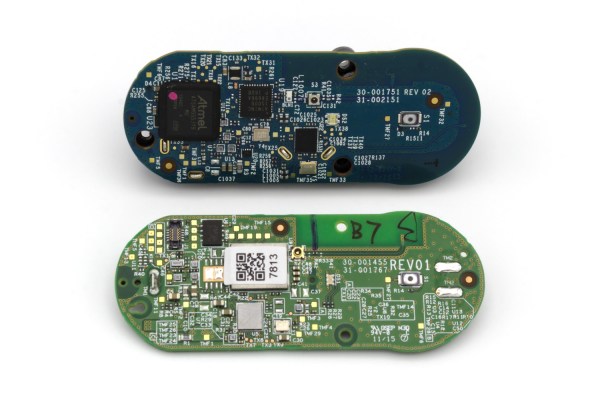
There were two versions of the Dash button. Both have the same user interface and work in fundamentally the same way. They have a single button (the software can recognize a few click patterns), a single RGB LED (‘natch), and a microphone (no, it didn’t listen to you, but we’ll come back to this). They also had a WiFi radio. Version two (silently released in 2016) added Bluetooth and completely changed the electrical innards, though to no user facing effect.

In February 2019, Amazon stopped selling the Dash Buttons. Continue reading “The Amazon Dash Button: A Retrospective”

3D Printed Rover Enjoys Long Walks On The Beach

More than a few hackers have put in the considerable time and effort required to build a rover inspired by NASA’s robotic Martian explorers, but unfortunately even the most well funded home tinkerer can’t afford the ticket to send their creation offworld. So most of these builds don’t journey through anything more exciting than a backyard sandbox. Not that we can blame their creators, we think a homebrew rover will look just as cool in your living room as it would traipsing through a rock quarry.

But the DIY rover status quo clearly wasn’t sufficient for [Jakob Krantz], who decided the best way to test his new Curiosity-inspired rover was to let it frolic around on the beach for an afternoon. But judging by the video after the break, his beefy 3D printed bot proved to be more than up to the task; powering through wildly uneven terrain with little difficulty.

Beyond a few “real” bearings here and there, all of the key components for the rover are 3D printed. [Jakob] did borrow a couple existing designs, like a printable bearing he found on Thingiverse, but for the most part he’s been toiling away at the design in Fusion 360 and using images of the real Curiosity rover as his guide.

Right now, he’s controlling the rover with a standard 6 channel RC receiver. Four channels are mapped to the steering servos, and a fifth to the single electronic speed control that commands the six wheel motors. But he’s recently added an Arduino to the rover which will eventually be in charge of interpreting the RC commands. This will allow more complex maneuvers with fewer channels, such as the ability to rotate in place.

We’re proud to count our very own [Roger Cheng] among the rover wrangling hackers of the world. An entire community has sprung up around his six-wheeled Sawppy, and the knowledge gained during its design and construction could be applicable to any number of other projects.

Continue reading “3D Printed Rover Enjoys Long Walks On The Beach”

GigaDevice Releasing RISC-V MCUs And Development Boards

Probably not too many people have heard of Chinese manufacturer GigaDevice who so far has mostly been known as a NOR Flash memory manufacturer. Their GD32 range of MCUs is however STM32-compatible, making them interesting (cheaper) alternatives to sourcing directly from ST. Now GigaDevice has announced during a presentation that they are releasing a range of RISC-V-based MCUs: the GD32V series.

As GigaDevice has not yet updated their English-language website, the information we do have is based on CNX-Software‘s translations from Chinese. The specs for the GD32VF103 series of MCUs are listed by them as follows:

  • Core – GD32VF103 RISC-V “Bumblebee Core” @ 108 MHz
  • Memory – 8KB to 32KB SRAM
  • Storage  – 16KB to 128KB flash
  • Peripherals – USB OTG and CAN 2.0B
  • I/O – 3.3V, 5V tolerant
  • Supply Voltage – 2.6 to 3.6V
  • Package – QFN36, LQFP48, LQFP64, and LQFP100 packages

Whether they are pin-compatible with the GD32 MCUs is still to be confirmed. If that turns out to be the case, then this might be an interesting drop-in solution for some products. From the specs it seems clear that they are targeting the lower-end ARM-based MCUs such as ST’s Cortex-M3-based STM32F103, which are quite common in a large range of embedded systems.

Seeing a performance comparison between both types of MCU would be interesting to see as lower power usage and higher efficiency compared to the ARM cores is being claimed. Both MCUs and development boards are already available for sale at Tmall, with the basic GD32VF103C-START board going for about $11 and the GD32VF103TBU6 MCU (QFN36, 64 kB Flash) for roughly $1.27.

Documentation and SDKs in English seem to be a bit scarce at this point, but hopefully before long we too will be able to use these MCUs without having to take up Chinese language classes.

Thanks to [Flaviu] for the tip!