3D Printering: The Search For Better Search

There’s no question that a desktop 3D printer is at its most useful when it’s producing parts of your own design. After all, if you’ve got a machine that can produce physical objects to your exacting specifications, why not give it some? But even the most diligent CAD maven will occasionally defer to an existing design, as there’s no sense spending the time and effort creating their own model if a perfectly serviceable one is already available under an open source license.

But there’s a problem: finding these open source models is often more difficult than it should be. The fact of the matter is, the ecosystem for sharing 3D printable models is in a very sorry state. Thingiverse, the community’s de facto model repository, is antiquated and plagued with technical issues. Competitors such as Pinshape and YouMagine are certainly improvements on a technical level, but without the sheer number of models and designers that Thingiverse has, they’ve been unable to earn much mindshare. When people are looking to download 3D models, it stands to reason that the site with the most models will be the most popular.

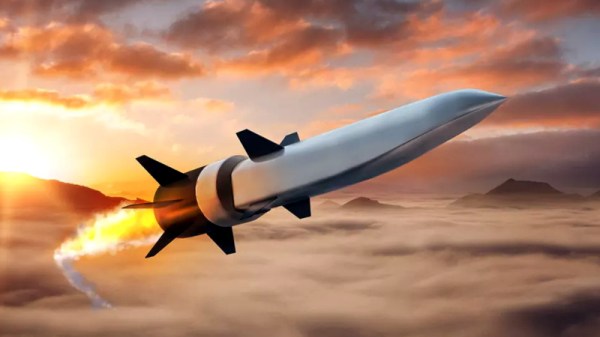
It’s a situation that the community is going to have to address eventually. As it stands, it’s something of a minor miracle that Thingiverse still exists. Owned and operated by Makerbot, the company that once defined the desktop 3D printer but is today all but completely unknown in a market dominated by low-cost printers from the likes of Monoprice and Creality, it seems only a matter of time before the site finally goes dark. They say it’s unwise to put all of your eggs in one basket, and doubly so if the basket happens to be on fire.

So what will it take to get people to consider alternatives to Thingiverse before it’s too late? Obviously, snazzy modern web design isn’t enough to do it. Not if the underlying service operates on the same formula. To really make a dent in this space, you need a killer feature. Something that measurably improves the user experience of finding the 3D model you need in a sea of hundreds of thousands. You need to solve the search problem.

Continue reading “3D Printering: The Search For Better Search”

A Teeny Tiny 3D Printed Macro Extension Tube

When you hear the term “extension tube”, you probably think of something fairly long, right? But when [Loudifier] needed an extension tube to do extreme close-ups with a wide-angle lens on a Canon EF-M camera, it needed to be small…really small. The final 3D printed extension provides an adjustable length between 0 and 10 millimeters.

But it’s not just an extension tube, that would be too easy. According to [Loudifier], the ideal extension distance would be somewhere around 3 mm, but unfortunately the mounting bayonet for an EF-M lens is a little over 5 mm. To get around this, the extension tube also adapts to an EF/EF-S lens, which has a shorter mount and allows bringing it in closer than would be physically possible under otherwise.

[Loudifier] says the addition of electrical connections between the camera and the lens (for functions like auto focus) would be ideal, but the logistics of pulling that off are a bit daunting. For now, the most reasonable upgrades on the horizon are the addition of some colored dots on the outside to help align the camera, adapter, and lens. As the STLs and Fusion design file are released under the Creative Commons, perhaps the community will even take on the challenge of adapting it to other lens types.

For the polar opposite of this project, check out the 300 mm long 3D printed extension tube we covered a few weeks back that inspired [Loudifier] to send this project our way.

Open Source Smart Smoker Brings The Heat (Slowly)

Conceptually, cooking on a grill is simple enough: just crank up the flames and leave the food on long enough for it to cook through, but not so long that it turns into an inedible ember. But when smoking, the goal is actually to prevent flames entirely; the food is cooked by the circulation of hot gasses generated by smoldering wood. If you want a well-cooked and flavorful meal, you’ll need the patience and dedication to manually keep the fuel and air balanced inside the smoker for hours on end.

Or in the case of the Smokey Mc Smokerson, you just let the electronics handle all the hard stuff while you go watch TV. Powered by the Raspberry Pi Zero and a custom control board, this open source smoker offers high-end capabilities on a DIY budget. Granted you’ll still need to add the fuel of your choice the old fashioned way, but with automatic air flow control and temperature monitoring, it greatly reduces the amount of fiddly work required to get that perfect smoke.

[HackersHub] has been working on Smokey Mc Smokerson for a few months now, and are getting very close to building the first complete prototype. The initial version of the software is complete, and the classy black PCBs have recently arrived. Some simulations have been performed to get an idea of how the smoke will circulate inside of the smoker itself, built from a 55 gallon drum, but technically the controller is a stand-alone device. If you’re willing to makes the tweaks necessary, the controller could certainly be retrofitted to  commercially available smoker instead.

Ultimately, this project boils down to tossing a bunch of temperature sensors at the problem. The software developed by [HackersHub] takes the data collected by the five MAX6675 thermocouples and uses it to determine when to inject more air into the chamber using a PWM-controlled fan at the bottom of the smoker. As an added bonus, all those temperature sensors give the user plenty of pretty data points to look at in the companion smartphone application.

We’ve actually seen a fair number of technologically-augmented grills over the years. From this automotive-inspired “turbocharged” beast to a robotic steak flipper built out of PVC pipes, we can confidently say that not all hackers are living on a diet of microwaved ramen.

The Ultimate Guide To Artisan USB Cables

If you’ve gone through the trouble of building your own customized mechanical keyboard, the last thing you want to do is plug it into your computer with some plebeian USB cable from the local electronics shop. Your productivity, nay livelihood, depends on all those 1s and 0s being reproduced with the crisp fidelity that’s only possible with a high-end USB cable. Anything less would be irresponsible.

Or at least, that’s what the advertising on the back of the package would say if we tried to sell the custom USB cables built by [Josef Adamčík]. But alas, he’s decided to give away all the details for free so that anyone can build their own delightfully overengineered USB cables. Do you need a paracord USB cable with GX12 aviation connectors in the middle? Of course not. But you still want one, don’t you?

As [Josef] admits in his blog post, there’s nothing particularly special about what he’s doing here. If you can splice wires together, you can build your own bespoke USB cables. But what attracted us to his write-up was the phenomenal detail he goes into. Every step is clearly explained and includes a nice, well-lit, photo to illustrate what he’s doing. Honestly, when the documentation for soldering some USB connectors onto a wire looks this good, there’s no excuse why more substantial projects get little more than a few blurry shots.

Of course, even for those of us who are no stranger to the ways of the soldering iron, there’s likely a few ideas you can pull from this project. We particularly liked his tip for taping the USB connector to the workbench while soldering it rather than trying to get it to stay in a vise, and his method for adding a coil the cable with a wooden jig and a heat gun is definitely something to file away for future use.

Then again in an era where even the lowly-USB cable can potentially be a security threat, or simply not live up to published specifications, rolling your own might not be such a bad idea.

3D Printing May Be The Key To Practical Scramjets

The first scramjet, an airbreathing jet engine capable of pushing an aircraft beyond Mach 5, was successfully flown in the early 1990s. But while pretty much any other technology you could imagine has progressed by leaps and bounds in the nearly 30 years that have passed, the state-of-the-art in hypersonic scramjets hasn’t moved much. We still don’t have practical hypersonic aircraft, military or otherwise, and any missiles that travel at those sort of speeds are rocket powered.

NASA’s X-43 hit Mach 9.6 in 2004

This is somewhat surprising since, at least on paper, the operating principle of the scramjet is simplicity itself. Air rushing into the engine is compressed by the geometry of the inlet, fuel is added, the mixture is ignited, and the resulting flow of expanded gases leaves the engine faster than it entered. There aren’t even any moving parts inside of a scramjet, it’s little more than a carefully shaped tube with fuel injectors and ignitors in it.

Unfortunately, pulling it off in practice is quite a bit harder. Part of the problem is that a scramjet doesn’t actually start working until the air entering the engine’s inlet is moving at around Mach 4, which makes testing them difficult and expensive. It’s possible to do it in a specially designed wind tunnel, but practically speaking, it ends up being easier to mount the engine to the front of a conventional rocket and get it up to speed that way. The downside is that such flights are one-way tickets, and end with the test article crashing into the ocean once it runs out of fuel.

But the bigger problem is that the core concept is deceptively simple. It’s easy to say you’ll just squirt some jet fuel into the stream of compressed air and light it up, but when that air is moving at thousands of miles per hour, keeping it burning is no small feat. Because of this, the operation of a scramjet has often been likened to trying to light a match in a hurricane; the challenge isn’t in the task, but in the environment you’re trying to perform it in.

Now, both Aerojet Rocketdyne and Northrop Grumman think they may have found the solution: additive manufacturing. By 3D printing their scramjet engines, they can not only iterate through design revisions faster, but produce them far cheaper than they’ve been able to in the past. Even more importantly, it enables complex internal engine geometries that would have been more difficult to produce via traditional manufacturing.

Continue reading “3D Printing May Be The Key To Practical Scramjets”

Null Shard Build Blurs Line Between Game And Reality With Laser Cutting, Mold Making, 3D Printing

In The Room Three, players are tasked with collecting mysterious objects known as “Null Shards”. But it seems one player, who goes by the name [Juiceman], took this challenge a bit literally. Starting with promotional art released for the game, he embarked on an epic journey to create a replica “Null Shard” that ended up looking so good that one of them is currently residing in a place of honor at the headquarters of developer Fireproof Games.

The developers had previously released image files to create a papercraft version of the Null Shard on their website, so [Juiceman] based his initial CAD work on these designs. But it turned out the surface texture was a little too complex to laser etch into acrylic without making a soupy mess. He simplified it a bit, while trying to retain the overall effect. From the superb laser-etched acrylic master he made a silicone mold started casting the eight triangular panels needed for two copies of the Shard.

To hold it all together [Juiceman] create a “skeleton” pyramid by first experimenting with designs on a traditional plastic FDM printer. After a few tries he had a workable design and switched over to a laser sintering machine, giving the final frame a gorgeous texture. With the cast panels installed and a few coats of paint, he had his Null Shards.

The final step was to turn down a piece of ash to make a nice base, and 3D print the feet and “claw” mount for the Shard using the same laser sintering process. The finished product looks fantastic, and apparently lives on a shelf next to a similarly constructed replica of the “Lament Configuration” puzzle cube from the Hellraiser films. [Juiceman] says the two replicas are the first entries into his “Geometries of Hell” collection, which incidentally, we’ve decided will officially be the name of our first metal album. All we need to do now is learn how to play instruments.

We’ve previously looked at how 3D printing and a dash of dedication can create some incredible prop builds, and once upon a time, we even ran a Sci-Fi Contest that challenged our readers to bring their favorite movie and game objects into the real world. Builds like this are a perfect example of what happens when a dedicated hacker or maker gets inspired by a piece of entertainment that really resonates with them.

[Thanks to Lauren for the tip]

Ham Radio Gets Embedded RTL-SDR

We usually think of the RTL-SDR as a low-cost alternative to a “real” radio, but this incredible project spearheaded by [Rodrigo Freire] shows that the two classes of devices don’t have to be mutually exclusive. After nearly 6 months of work, he’s developed and documented a method to integrate a RTL-SDR Blog V3 receiver directly into the Yaesu FT-991 transceiver.

The professional results of the hack are made possible by the fact that the FT-991 already had USB capability to begin with. More specifically, it had an internal USB hub that allowed multiple internal devices to appear to the computer as a sort of composite device.

Unfortunately, the internal USB hub only supported two devices, so the first order of business for [Rodrigo] was swapping out the original USB2512BI hub IC with a USB2514BI that offered four ports. With the swap complete, he was able to hang the RTL-SDR device right on the new chip’s pins.

Of course, that was only half of the battle. He had a nicely integrated RTL-SDR from an external standpoint, but to actually be useful, the SDR would need to tap into the radio’s signal. To do this, [Rodrigo] designed a custom PCB that pulls the IF signal from the radio, feed it into an amplifier, and ultimately pass it to the SDR. The board uses onboard switches, controlled by the GPIO ports on the RTL-SDR Blog V3, for enabling the tap and preamplifier.

In the video after the break, you can see [Rodrigo] demonstrate his modified FT-991. This actually isn’t the first time somebody has tapped into their Yaesu with a software defined radio, though this is surely the cleanest install we’ve ever seen.

Continue reading “Ham Radio Gets Embedded RTL-SDR”