The Bluetooth LCD Sniffer You Didn’t Know You Needed

At one time or another, we’ve all suffered through working with a piece of equipment that didn’t feature a way to export its data to another device. Whether it was just too old to offer such niceties, or the manufacturer locked the capability behind some upgrade, the pain of staring at digits ticking over on a glowing LCD display and wishing there was a practical way to scrape what our eyes were seeing is well known to hackers.

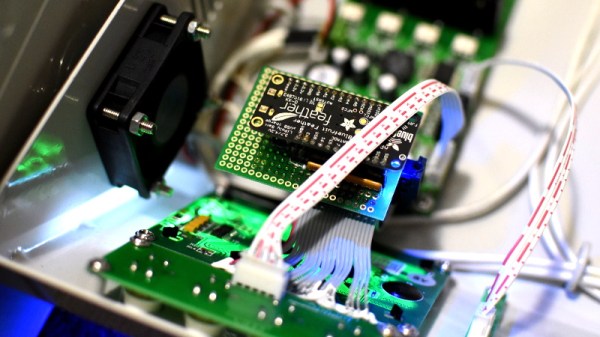
That was precisely the inspiration for DoMSnif, the dot matrix LCD sniffer that [Blecky] has been working on. Originally the project started as a way to record the temperature of his BRTRO-420 reflow oven, but realizing that such a device could have widespread appeal to other hardware hackers, he’s rightfully decided to enter it into the 2019 Hackaday Prize. If perfected, it could be an excellent way to bolt data capture capabilities to your older devices.

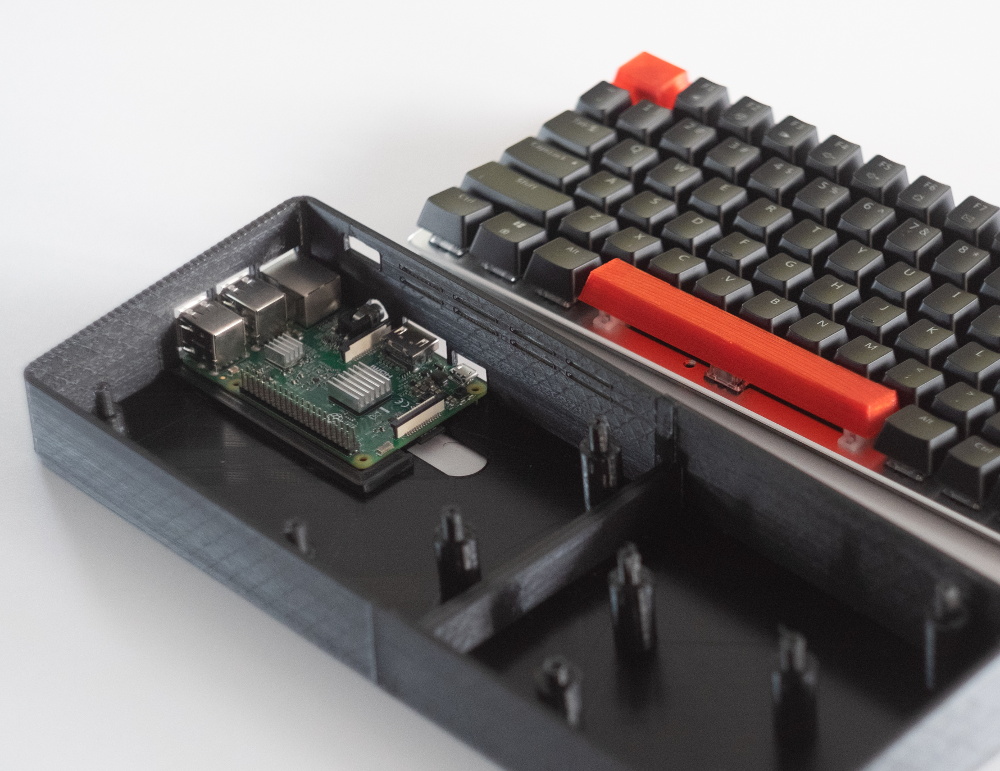
The first phase of this project was figuring out how to capture and parse the signals going into the device’s KS0108 LCD. Getting the data was certainly easy enough, he just had to hook a logic analyzer up between the display and the main board of the device. Of course, figuring out what it all means is a different story.

After running the oven for a bit with the analyzer recording, [Blecky] had more than enough data to get started on decoding it. Luckily, the layout of this fairly common 128×64 pixel display is well documented and easy enough to understand. With a little work, he was able to create a tool that would import the captured data and display it on a virtual LCD.

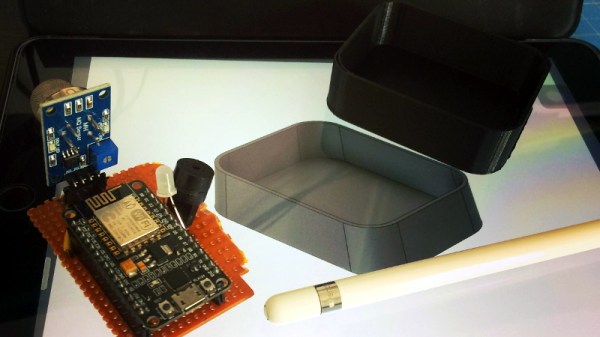
Unfortunately, the Bluetooth part is where things get tricky. Ultimately, [Blecky] wants to ditch the logic analyzer and use a Adafruit Feather nRF52 Bluefruit to capture the signals going to the LCD and pipe them to a waiting device over Bluetooth. But his testing has found that the nRF52’s radio is simply too slow. The display is receiving data every 14us, but it takes the radio at least 50us to send a packet.

[Blecky] is looking at ways around this problem, and we’re confident he’ll crack it. The solution could be in buffering and compressing the data before sending it out, though you’d lose the ability to monitor the display in real-time. Even if he has to abandon the Bluetooth aspect entirely and make the device wired, we still think there would be a market for an easy to use hardware and software solution for scraping LCD data.

Taking A Peek Inside Amazon’s Latest Dot

Like a million or so other people, [Brian Dorey] picked up a third generation Echo Dot during Amazon’s big sale a couple weeks ago. Going for less than half its normal retail price, he figured it was the perfect time to explore Amazon’s voice assistant offerings. But the low price also meant that he didn’t feel so bad tearing into the thing for our viewing pleasure.

By pretty much all accounts, the Echo Dot line has been a pretty solid performer as far as corporate subsidized home espionage devices go. They’re small, fairly cheap, and offer the baseline functionality that most people expect. While there was nothing precisely wrong with the earlier versions of the Dot, Amazon has used this latest revision of the device to give the gadget a more “premium” look and feel. They’ve also tried to squeeze a bit better audio out of the roughly hockey puck sized device. But of course, some undocumented changes managed to sneak in there as well.

For one thing, the latest version of the Dot deletes the USB port. Hackers had used the USB port on earlier versions of the hardware to try and gain access to the Android (or at least, Amazon’s flavor of Android) operating system hiding inside, so that’s an unfortunate development. On the flip side, [Brian] reports there’s some type of debug header on the bottom of the device. A similar feature allowed hackers to gain access to some of Amazon’s other voice assistants, so we’d recommend hopeful optimism until told otherwise.

The Echo Dot is powered by a quad-core Mediatek MT8516BAAA 64-bit ARM Cortex-A35 processor and the OS lives on an 8GB Samsung KMFN60012M-B214 eMMC. A pair of Texas Instruments LV320ADC3101 ADCs are used to process the incoming audio from the four microphones arranged around the edge of the PCB, and [Brian] says there appears to be a Fairchild 74LCX74 flip-flop in place to cut the audio feed when the user wants a bit of privacy.

Of course, the biggest change is on the outside. The new Dot is much larger than the previous versions, which means all the awesome enclosures we’ve seen for its predecessor will need to be reworked if they want to be compatible with Amazon’s latest and greatest.

Take Control Of Your DSLR With PiXPi

If you’ve ever tried to take a picture of a fast moving object, you know how important timing is. You might only have one chance, and if you hit the shutter a bit too early or too late, the shot could be ruined. Past a certain point, no human camera operator can react quickly enough. Which is exactly why [Krzysztof Krześlak] created PiXPi.

In the past we’ve seen high-speed flashes designed to “freeze time” by illuminating the scene at the precise moment, and while PiXPi can technically do that, it also offers a few alternate methods of capturing that perfect moment. The idea here is to give the photographer the best chance of getting the shot they’re after by offering them as many tools as possible.

Essentially, PiXPi is a microcontroller that allows you to orchestrate your DSLR’s trigger, external flashes, and various other sensors and devices using an easy to use graphical programming interface from your smartphone. So for example, you could program the PiXPi to trigger your camera when it detected a loud enough noise.

But the device also allows you to be a bit more proactive. Rather than sitting back and waiting for a signal to fire off the camera, the PiXPi can directly take control of the action. As an example, [Krzysztof] has created an electronically triggered valve which can release a drop of liquid on command. Using PiXPi, the photographer can quickly put together a routine that triggers a drop, waits the few milliseconds it takes for it to hit the target, and then snaps a picture.

The goal of the 2019 Hackaday Prize is to develop a product fit for production, and naturally a huge part of that is having a well thought-out design. But if you’re ultimately looking to sell said product, it’s also very important to keep the needs of the end user in mind. To that end, we think [Krzysztof] has done a great job by not only making the system very flexible, but keeping it easy to use.

Continue reading “Take Control Of Your DSLR With PiXPi”

Building A Safe ESP32 Home Energy Monitor

The first step to reducing the energy consumption of your home is figuring out how much you actually use in the first place. After all, you need a baseline to compare against when you start making changes. But fiddling around with high voltage is something a lot of hackers will go out of their way to avoid. Luckily, as [Xavier Decuyper] explains, you can build a very robust DIY energy monitoring system without having to modify your AC wiring.

In the video after the break, [Xavier] goes over the theory of how it all works, but the short version is that you just need to use a Current Transformer (CT) sensor. These little devices clamp over an AC wire and detect how much current is passing through it via induction. In his case, he used a YHDC SCT-013-030 sensor that can measure up to 30 amps and costs about $12 USD. It outputs a voltage between 0 and 1 volts, which makes it extremely easy to read using the ADC of your favorite microcontroller.

Once you’ve got the CT sensor connected to your microcontroller, the rest really just depends on how far you want to take the software side of things. You could just log the current consumption to a plain text file if that’s your style, but [Xavier] wanted to challenge himself to develop a energy monitoring system that rivaled commercial offerings so he took the data and ran with it.

A good chunk of his write-up explains how the used Amazon Web Services (AWS) to process and ultimately display all the data he collects with his ESP32 energy monitor. Every 30 seconds, the hardware reports the current consumption to AWS through MQTT. The readings are stored in a database, and [Xavier] uses GraphQL and Dygraphs to generate visualizations. He even used Ionic to develop a cross-platform mobile application so he can fawn over his professional looking charts and graphs on the go.

We’ve already seen how carefully monitoring energy consumption can uncover some surprising trends, so if you want to go green and don’t have an optically coupled electricity meter, the CT sensor method might be just what you need.

Continue reading “Building A Safe ESP32 Home Energy Monitor”

Jazzberry Bakes The Pi Into A Mechanical Keyboard

If you hang around Hackaday long enough, pretty soon you’ll start to see some patterns emerging. As the nexus of all things awesome in the hacking world, our front page offers a unique vantage point by which you can see what’s getting folks excited this particular month, year, or decade. Right now we can tell you hackers love the Raspberry Pi, 3D printing, and perhaps above all, they can’t get enough mechanical keyboards.

So that makes the Jazzberry by [Mattis Folkestad] something of a perfect storm in the hacker world. The project uses a 3D printed enclosure to combine a Raspberry Pi 3B+ and an Ajazz AK33 mechanical keyboard into a single unit like the home computers of old. Honestly, we’re just glad he didn’t sneak an ESP8266 in there; as the resulting combination might have been enough to crash the site.

That being said, we can’t help but notice there’s a lot of open space inside the 3D printed enclosure. Right now there’s nothing inside but the Raspberry Pi, which only takes up a fraction of the internal volume. Adding a battery and hard drive would be the logical next steps, but it could also be outfitted with a suite of radios and various other hacking and security research accoutrements. We’ve seen an influx of such builds over the last few months, and the Jazzberry seems like it could make a very slick entry into this burgeoning category of mobile pentesting devices.

The STL files are designed specifically for the combination of hardware that [Mattis] used, but it shouldn’t be too difficult to modify them for your own purposes. Even if you stick with the same AK33 keyboard, an upgrade to the impressively powerful Raspberry Pi 4 would be more than worth the time fiddling with the STLs in your CAD tool of choice. If you really want to go all in, add a display and you’re well on the way to that cyberdeck you’ve always wanted.

Building A Smarter Smoke Alarm With The ESP8266

The modern hacker wields a number of tools that operate on the principle of heating things up to extremely high temperatures, so a smoke alarm is really a must-have piece of equipment. But in an era where it seems everything is getting smarter, some might wonder if even our safety gear could benefit from joining the Internet of Things. Interested in taking a crack at improving the classic smoke alarm, [Vivek Gupta] grabbed a NodeMCU and started writing some code.

Now before you jump down to the comments and start smashing that keyboard, let’s make our position on this abundantly clear. Do not try to build your own smoke alarm. Seriously. It takes a special kind of fool to trust their home and potentially their life to a $5 development board and some Arduino source code they copied and pasted from the Internet. That said, as a purely academic exercise it’s certainly worth examining how modern Internet-enabled microcontrollers can be used to add useful features to even the most mundane of household devices.

In this case, [Vivek] is experimenting with the idea of a smoke alarm that can be silenced through your home automation system in the event of a false alarm. He’s using Google Assistant and IFTTT, but the code could be adapted to whatever method you’re using internally to get all your gadgets on the same virtual page. On the hardware side of things, the test system is simply a NodeMCU connected to a buzzer and a MQ2 gas sensor.

So how does it work? If the detector goes off while [Vivek] is cooking, he can tell Google Assistant that he’s cooking and it’s a false alarm. That silences the buzzer, but not before the system responds with a message questioning his skills in the kitchen. It’s a simple quality of life improvement and it’s certainly not hard to imagine how the idea could be expanded upon to notify you of a possible situation even when you’re out of the home.

We’ve seen how a series of small problems can cascade into a life-threatening situation. If you’re going to perform similar experiments, make sure you’ve got a “dumb” smoke alarm as a backup.

Continue reading “Building A Smarter Smoke Alarm With The ESP8266”

Tiny Game System Is An Experiment In Minimalism

Many people assumed the smartphone revolution would kill the dedicated handheld game system, and really, it’s not hard to see why. What’s the point of buying the latest Nintendo or Sony handheld when the phone you’re already carrying around with you is capable of high-definition 3D graphics and online connectivity? Software developers got the hint quickly, and as predicted, mobile gaming has absolutely exploded over the last few years.

But at the same time, we’ve noticed something of a return to the simplistic handheld systems of yore. Perhaps it’s little more than nostalgia, but small bare-bones systems like the one [Mislav Breka] has entered into the 2019 Hackaday Prize show that not everyone is satisfied with the direction modern gaming has gone in. His system is specifically designed as an experiment to build the most minimal gaming system possible.

In terms of the overall design, this ATMega328 powered system is similar to a scaled-down Arduboy. But while the visual similarities are obvious, the BOM that [Mislav] has provided seems to indicate a considerably more spartan device. Currently there doesn’t seem to be any provision for audio, nor is there a battery and the associated circuitry to charge it. As promised, there’s little here other than the bare essentials.

Unfortunately, the project is off to something of a rocky start. As [Mislav] explains in his writeup on Hackaday.io, there’s a mistake somewhere in either the board design or the component selection that’s keeping the device from accepting a firmware. He won’t have the equipment to debug the device until he returns to school, and is actively looking for volunteers who might be interested in helping him get the kinks worked out on the design.