Do you have anything radioactive in your house? Most people will say no, but they are probably wrong. A host of things ranging from glow-in-the dark timepieces to smoke detectors have some amount of radioactivity. But as [Wheeler Scientific] points out, so do some old Scotch tape dispensers. You can watch the video, below.
The dispenser in question is the C-15 which was very common around offices, military bases, and homes for years. They were made up until the 1980s. You have to wonder why a tape dispenser would be radioactive, and [Wheeler] has the explanation.
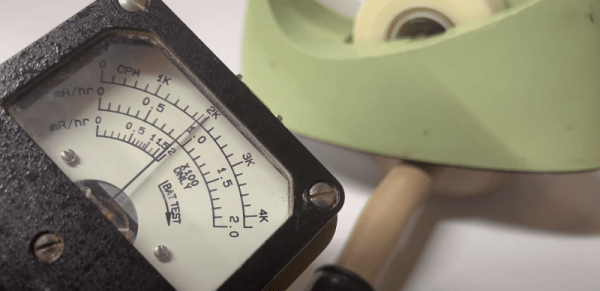
When you pull tape from the dispenser, you don’t want the dispenser to slide around the desk, so it needs to be heavy. But no one wants to have a giant dispenser nor do you want to pay for one made from a dense metal. So the plastic dispenser contains a ballast to make it heavier. In the case of the C-15 that ballast is thorium-containing monazite sand. A vintage counter shows the radioactivity which isn’t much, of course, but still way less than the ordinary sand used in newer models. You can also see in the video that the material is paramagnetic.
Monazite used to be a primary source of lanthanides but getting rid of the thorium led to alternate sources in the 1960s although it is still used as an ore for thorium. We know some lenses are radioactive. If you want to search your home for radioactivity and you don’t have a Geiger counter, you don’t need much to build one.