Arduino Converts Serial To Parallel: The Paralleloslam

After a youth spent playing with Amigas and getting into all sorts of trouble on the school computer network, I’ve always had a soft spot in my heart for hardware from the 80s and 90s. This extends beyond computers themselves, and goes so far as to include modems, photocopiers, and even the much-maligned dot matrix printer.

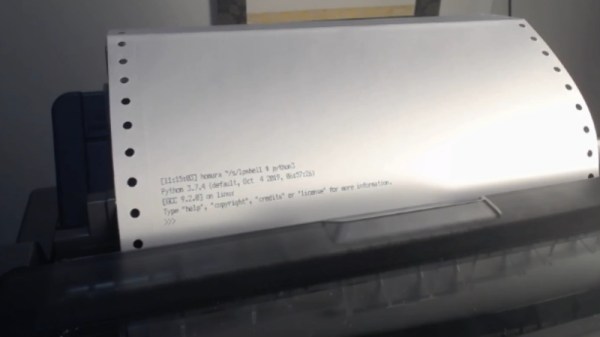
My partner in hacking [Cosmos2000] recently found himself with a wonderful Commodore MPS 1230 printer. Its parallel interface was very appropriate in its day, however parallel ports are as scarce as SID chips. Thankfully, these two interfaces are easy to work with and simple in function. Work on a device to marry these two disparate worlds began.

Enter: The Paralleloslam

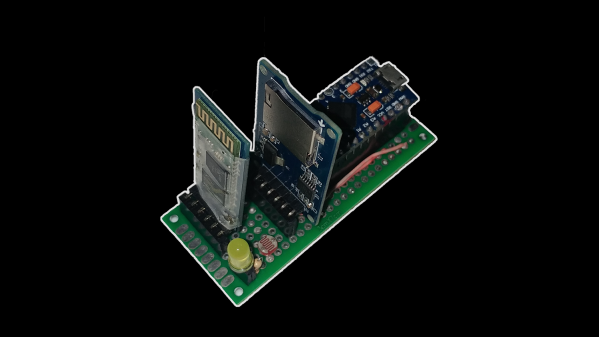
While I was gallivanting around the Eastern coast of Australia, [Cosmos2000] was hard at work. After some research, it was determined that it would be relatively simple to have an Arduino convert incoming serial data into a parallel output to the printer. After some testing was performed on an Arduino Uno, a bespoke device was built – in a gloriously plastic project box, no less.

An ATMEGA328 acts as the brains of the operation, with a MAX232 attached for level conversion from TTL to RS232 voltage levels. Serial data are received on the hardware TX/RX lines. Eight digital outputs act as the parallel interface. When a byte is received over serial, the individual bits are set on the individual digital lines connected to the printer’s parallel port. At this point, the strobe line is pulled low, indicating to the attached device that it may read the port. After two microseconds, it returns high, ready for the next byte to be set on the output lines. This is how parallel interfaces operate without a clock signal, using the strobe to indicate when data may be read.

At this point, [Cosmos2000] reached out – asking if I had a name for the new build.

“Hm. Paralleloslam?”

“Done. Cheers!”

Continue reading “Arduino Converts Serial To Parallel: The Paralleloslam”

Office Depot And OfficeMax Find Malware That Isn’t There

Sometimes we are rebuilding a RAID array or replacing a BIOS chip and we wonder how ordinary people keep their computes running. Then we realize that most of them come to someone like us for help. But what if you don’t have a family member or friend who is computer savvy? No problem! Plenty of stores — including big box office stores such as Office Depot and OfficeMax — will be glad to help you. Why most of them will be willing to test your computer for free. Sounds nice until you find out that at least in some cases these tests were showing problems that didn’t need fixing so users would pay for services they didn’t need. The Federal Trade Commission (FTC) has fined Office Depot (who owns OfficeMax) $25 million and plans to use the funds to issue refunds. In addition, a vendor, Support.com, will pay $10 million to support the refunds.

The free check used software to detect problems on a PC. However, during the scan the user is asked if their computer has any of the following symptoms. For example, if their PC has become slow or frequently reboots. If you said yes to any of these questions, the software would produce a report claiming to have found evidence of malware and offering fixes that could cost significant amounts of money even if there was no other evidence.

Continue reading “Office Depot And OfficeMax Find Malware That Isn’t There”

Put An Arduino Enigma In Your Pocket

The German Enigma device has always been a fascinating gadget for hackers. We’ve seen various replicas and emulators created over the years, and it was recently even the subject of our weekly Hack Chat. But if you think about it it’s not really a surprise; the Enigma has the perfect blend of historical significance and engineering wizardry, with a healthy dash of mystery thrown in. Why do the bad guys always have the coolest toys?

If you’ve ever wanted your own little Enigma replica to explore, [Mark Culross] has put together a project which makes it easier than ever. In fact, it’s so straightforward that some of you reading this post will probably be able to put one together as soon as you’ve read this post from stuff you already have lying around in the parts bin. All you need is an Arduino Uno, an Adafruit 2.8″ TFT Touch Shield, and a penchant for World War II technology.

Thanks to the relatively high-resolution touch screen, [Mark] was able to develop a user interface for his Enigma that really gives you a feel for how the original machine worked. Obviously it’s considerably simplified from the real-world version, but using a stylus to tap the rotors you want to spin or the wires you want plugged in makes for a more immersive experience than many of the previous attempts we’ve seen. With a tap you’re even able to load historical machine configurations, such as how the Enigma aboard the submarine U-262 was configured when the Allies intercepted its encoded messages in 1942.

[Mark] says this project was always about developing the software, and he leaves the actual hardware implementation as an exercise for the user. Just to play around with the software it’s enough to hook up an Arduino and the touch screen, but we’d love to see somebody really take the idea and run with it. Add some batteries, a charging circuit, and put it all in a little wooden box for that authentic Enigma look. Can’t forget that iconic wrinkle finish paint, either.

Over the years, we’ve seen replica Enigma machines in all shapes and sizes. From ones you could mount on your wrist, to full size replicas using modern components. We’ve even seen one variation that you can print out on a couple of sheets of paper. The parade of recreations shows no sign of stopping, and we wouldn’t have it any other way.

Continue reading “Put An Arduino Enigma In Your Pocket”

Building An Artisanal Tape Measure

Some tools are so common, so basic, that we take them for granted. A perfect example is the lowly tape measure. We’ve probably all got a few of these kicking around the lab, and they aren’t exactly the kind of thing you give a lot of thought to when you’re using them. But while most of us might not give our tape measure a second thought, [Ariel Yahni] decided to create an absolutely gorgeous new enclosure for his. Because if you’re going to measure something, why not look good doing it?

A CNC router is used to carve the body of the new tape measure out of a solid block of wood and cut a top plate out of clear acrylic. [Ariel] then used an angle grinder to cut off a small section of steel rod which he secured into a carved pocket in the base using epoxy. Finally, the internals of a commercial tape measure were inserted into this new enclosure, and the acrylic top was screwed down into place.

[Ariel] has made the DXF files for this project public for anyone else who wants to carve out their own heirloom tape measure, though it seems likely the designs will need some tweaking depending on the make and model of donor tape measure. While this might not be the most technically impressive project to run on Hackaday, it’s still a fantastic example of the sort of bespoke designs that are made possible with modern manufacturing methods.

This design reminds us of a similar project to turn a basic Honda key fob into a true conversation piece with the addition of some CNC’d hardwood and aluminum.

Continue reading “Building An Artisanal Tape Measure”

Full Motion Video And 3D Graphics Make This Genesis Demo Pop

The SEGA Genesis (aka Mega Drive) was launched at the tail end of the 1980s, bringing a new level of performance to the console world. At the time, 2D graphics ruled the roost, outside a few niche titles here and there. Decades later however, the demoscene continues to work in earnest. The Red Eyes demo is a great example of what can be done when pushing the Genesis hardware to the limits.

The demo features full motion video and an impressive 3D sequence. It’s quite a feat to pull this off with the limited resources of the Genesis platform. [Remute], [Kabuto] and [Exocet] have laid their secrets bare in a technical document, describing in explicit detail how it’s all achieved.

There’s plenty of juicy reading material here. There are palette hacks to produce high-quality greyscale images, rendering tips to produce the smooth 3D rendered sequences, as well as optimizations to create the best possible sample playback using the onboard YM2612 sound chip. It’s a tour de force of development, and it’s astounding to look behind the curtain to see just what can be achieved.

If you’re thinking about tinkering with the Genesis yourself, you might find it useful to have a dev kit on your bench. Video after the break.

Continue reading “Full Motion Video And 3D Graphics Make This Genesis Demo Pop”

The Surprising Tech Of A Cheap Toaster

How complicated can a toaster be? You can get a cheap one for way under $10 that is little more than a hot wire. However, there are a few little complications. First, consumer products need to be safe — lawsuits are expensive. Second, there has to be some mechanism to hold the toast down until it is done. If you can buy one for $10 you can bet it isn’t some super toast processor running Linux in there.

[Technology Connections] tore one down for you so you don’t have to. The circuitry is simple, and who knew there was a dedicated IC for toaster control? However, the real engineering is in the lowly little handle you pull down to start the toasting.

Continue reading “The Surprising Tech Of A Cheap Toaster”

LEDs Shine Through PCB On This Tiny Word Clock

Everyone seems to love word clocks. Maybe it’s the mystery of a blank surface lighting up to piece together the time in fuzzy format, or maybe it hearkens back to those “find-a-word” puzzles that idled away many an hour. Whatever it is, we see a lot of word clock builds, but there’s something especially about this diminutive PCB word clock that we find irresistible.

Like all fun projects, [sjm4306] found himself going through quite the design process with this one. The basic idea – using a PCB as the mask for the character array – is pretty clever. We’ve always found the laser-cut masks to be wanting, particularly in the characters with so-called counters, those enclosed spaces such as those in a capital A or Q that would be removed by a laser cutter. The character mask PCB [sjm4306] designed uses both the copper and a black solder mask to form the letters, which when lit by the array of SMD LEDs behind it glow a pleasing blue-green color against a dark background. Try as he might, though, the light from adjacent cells bled through, so he printed a stand that incorporates baffles for each LED. The clock looks great and even has some value-added modes, such as a falling characters display a la The Matrix, a Pong-like mode, and something that looks a bit like Tetris. Check out the video below for more details.

We’ve seen word clocks run afoul of the counter problem before, some that solved it by resorting to a stencil font, others that didn’t. We’re impressed by this solution, though, enough so that we hope [sjm4306] makes the PCB files available so we can build one.

Continue reading “LEDs Shine Through PCB On This Tiny Word Clock”