As long as there has been radio, people have wanted to eavesdrop on radio transmissions. In many cases, it is just a hobby activity like listening to a scanner or monitoring a local repeater. But in some cases, it is spy agencies or cyberhackers. [Giovanni Camurati] and his colleagues have been working on a slightly different way to attack Bluetooth radio communications using a technique that could apply to other radio types, too. The attack relies on the ubiquitous use of mixed-signal ICs to make cheap radios like Bluetooth dongles. They call it “Screaming Channels” and — in a nutshell — it is relying on digital information leaking out on the device’s radio signal.
Does it work? The team claims to have recovered an AES-128 key from 10 meters away. The technique reminds us a bit of TEMPEST in that unintended radio transmissions provide insight into the algorithm the device applies to encrypt or decrypt data. Most (if not all) encryption techniques assume you can’t see inside the “black box.” If you can, then it’s because it is relatively easy to break the code.
The last chapter of the fourth book of the Hitch-Hiker’s Guide to the Galaxy trilogy mentions two hacks that made life pleasant enough to prevent a war: a super-fly that could fly out of the open half of a half-open window, and an off-switch for children. This is one of those types of hacks. Plus, it’s just an awesome idea, fun to watch, and possibly adaptable for the workshop.
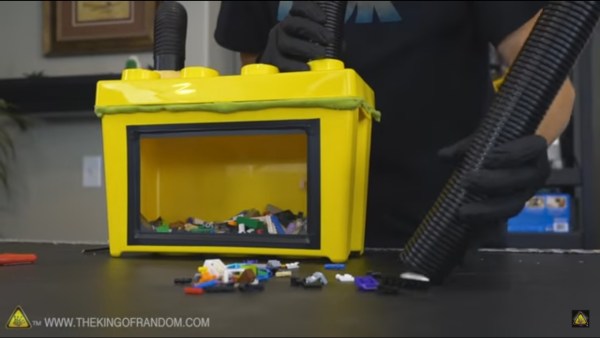
After the kids have gone to bed and LEGO bricks are scattered all over the floor, furniture, stairs (ouch), and everywhere else, wouldn’t it be nice if you could simply vacuum it all up directly into the LEGO box? This ingenious hack from [The King or Random] YouTube channel shows how to just that. They put two holes in opposite corners of the box’s lid, one a tight fit for a flexible intake hose and the other for the Shopvac hose, or a normal household vacuum cleaner hose if you prefer. A disk cut from flyscreen covers the Shopvac hole in case the suction is strong enough to pull the bricks back out of the box and into the Shopvac. They also make a gasket for the lid by mixing up some silicone sealant and cornstarch, the cornstarch is to prevent the cured mix from remaining sticky. We of course really like the version they made which has a window in the side of the box for watching the bricks as they fly in. Check out their build and the action in the video below.
We wonder what other uses this can be put to. How about a container for sucking up a mess of loose hardware from a workbench or a garage floor for later sorting?
We’ve often said that kids with hackers and makers for parents must be some of the luckiest kids in the world. While all the other children have to settle for some mass produced drivel from Toys“R”Us Amazon, they’ve got some of the most thoughtfully engineered and built toys and gadgets on the planet. After all, there’s no way any hacker worth their salt is going to give anything less than 110% for their own child.
A case in point is this RGB star nightlight that [Unexpected Maker] built for his children. The star itself is simple enough, just a basic shape printed in transparent PLA on his Prusa i3. The impressive part is how he lights it up. Rather than stick an Arduino or ESP8266 in there as we have seen plenty of times before, he’s put together his own custom ATTiny85 board specifically for controlling the RGB LED strips.
The board, which he calls TinyDev, is designed to be the same thickness as NeoPixel style LED strips so it can fit inside tight spaces. He solders it onto the tail end of his LED strip, adds a photoresistor so the star can tell when it’s time to light up, and then snakes the whole arrangement through a channel printed in the star itself. There’s a battery pack in the middle, but that’s about it. It really does allow for a remarkably clean LED strip implementation, and the mind can’t help but start thinking of interesting possibilities when you can tuck the controller into the same space as the lights themselves.
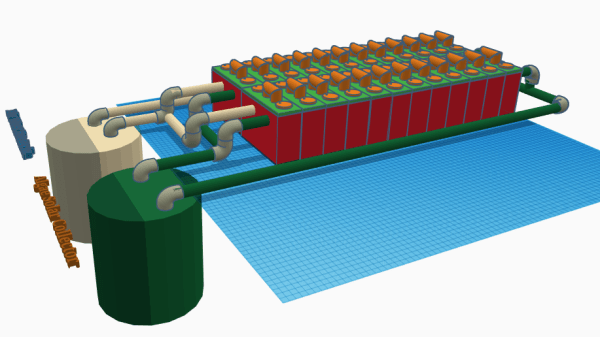
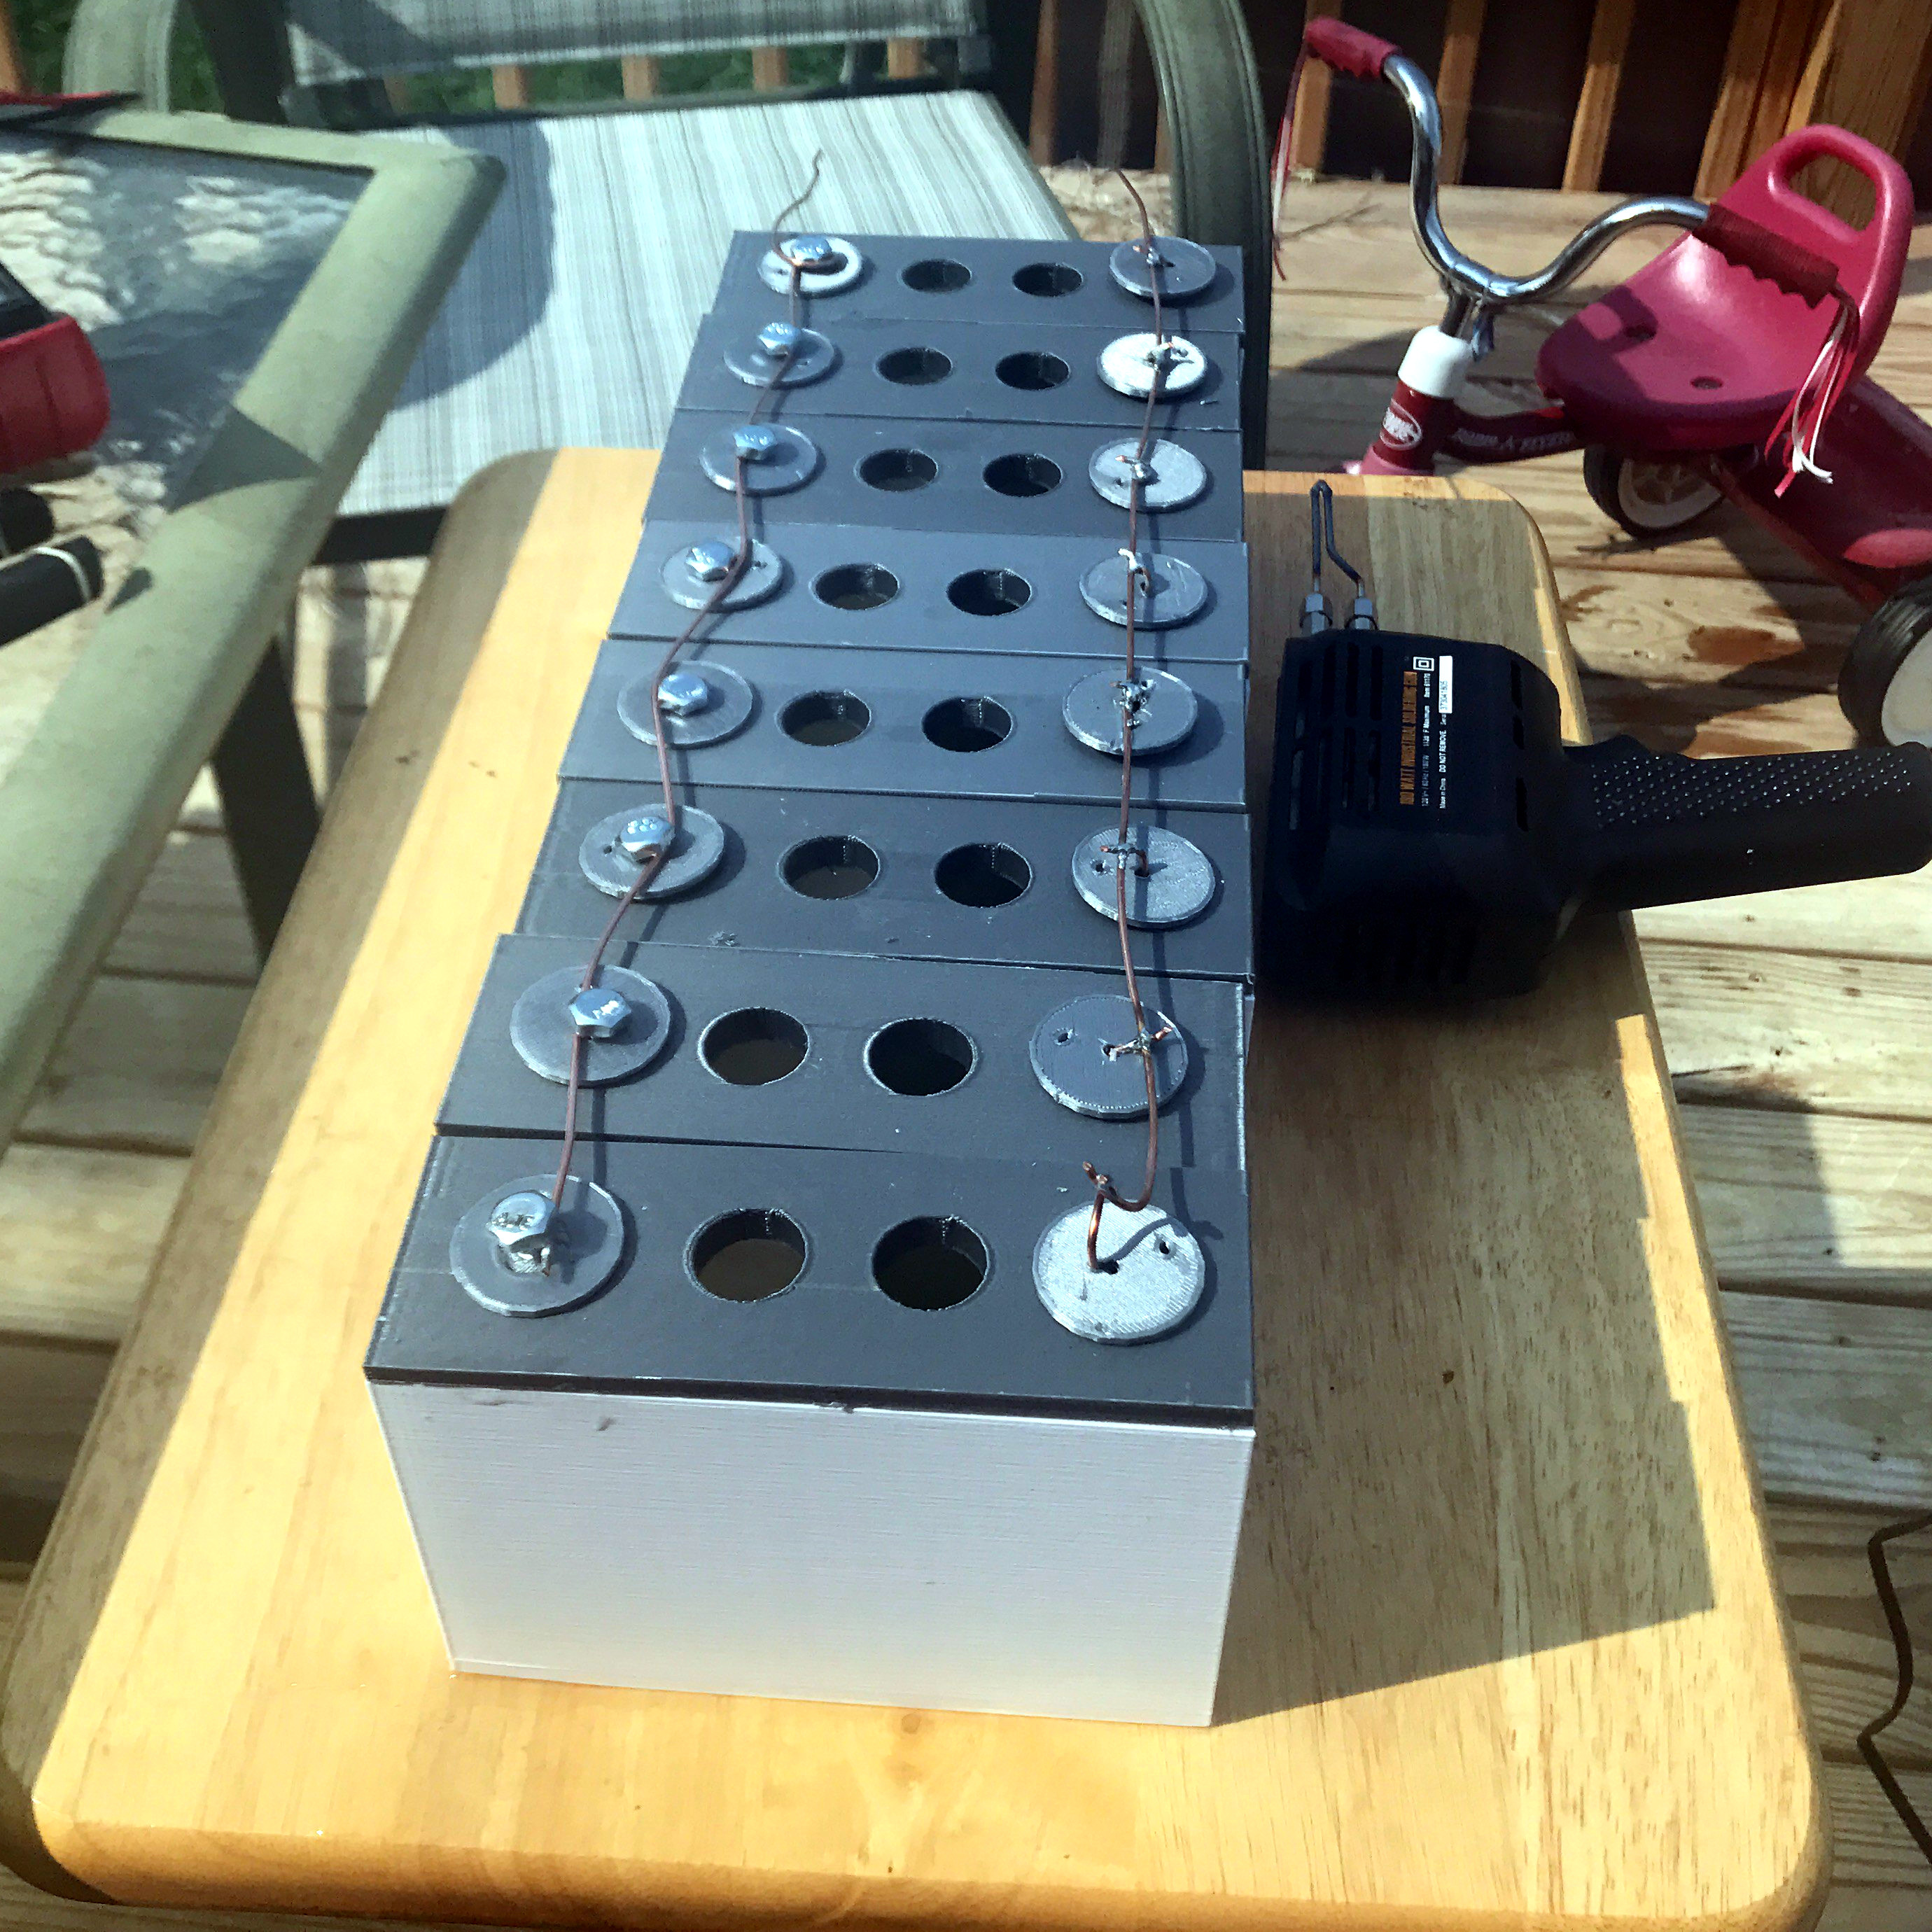
Battery cells work by chemical reactions, and the fascinating Hybrid Microbial Fuel Cell design by [Josh Starnes] is no different. True, batteries don’t normally contain life, but the process coughs up useful electrons all the same; 1.7 V per cell in [Josh]’s design, to be precise. His proof of concept consists of eight cells in parallel, enough to give his cell phone a charge via a DC-DC boost converter. He says it’s not known how long this can be expected to last before the voltage drops to an unusable level, but it works!
Eight-cell, 3D printed proof of concept.
There are two complementary sides to each cell in [Josh]’s design. On the cathode side are phytoplankton; green micro algae that absorb carbon dioxide and sunlight. On the anode side are bacteria that break organic material (like food waste) into nitrates, and expel carbon dioxide. Version 2 of the design will incorporate a semi-permeable membrane between the cells that would allow oxygen and carbon dioxide to be exchanged while keeping the populations of micro-organisms separate; this would make the biological processes more complementary.
A battery consisting of 24 cells and a plumbing system to cycle and care for the algae and bacteria is the ultimate goal, and we hope [Josh] can get closer to that now that his project won a $1000 cash prize as one of the twenty finalists in the Power Harvesting Challenge portion of the Hackaday Prize. (Next up is the Human Computer Interface Challenge, just so you know.)
In the last installment of Circuit VR, we walked around a simplified buck converter. The main simplification was using a constant PWM signal. The result is that the output voltage is a fixed fraction of the input voltage. For a regulator, the pulse width will need to depend on the output voltage so that any changes in the output are self-correcting. So this time, we’ll make a regulator, although we’ll still use a few Spice elements you’d have to replace in a practical design. In particular, we’ll assume you can generate a triangle wave, which is easy enough, and produce a stable 2.5 V reference.
The idea is to take a voltage reference and compare it to the output. We’ll think of the difference between the two as an error voltage, and use a comparator combined with a triangle wave generator to produce a PWM signal that is proportional to the error, and thus works to hold the output voltage constant.
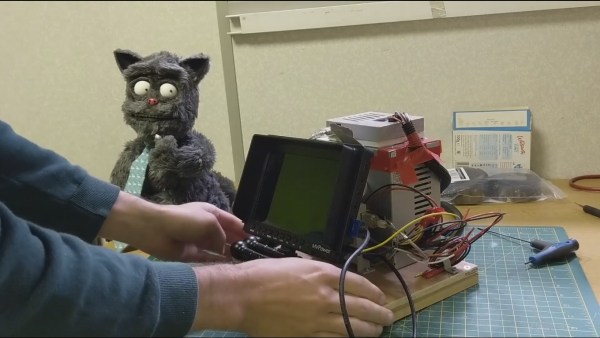
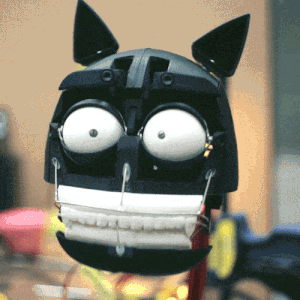
Lip syncing for computer animated characters has long been simplified. You draw a set of lip shapes for vowels and other sounds your character makes and let the computer interpolate how to go from one shape to the next. But with physical, real world puppets, all those movements have to be done manually, frame-by-frame. Or do they?
He toyed around with a number of approaches for making the lip mechanism before coming up with one that worked the way he wanted. The lips are shaped using guitar wire soldered to other wires going to servos further back in the head. Altogether there are four servos for the lips and one more for the jaw. There isn’t much sideways movement but it does enough and lets the brain fill in the rest.
On the software side, he borrows heavily from the tools used for lip syncing computer-drawn characters. He created virtual versions of the five servo motors in Adobe Animate and manipulates them to define the different lip shapes. Animate then does the interpolation between the different shapes, producing the servo positions needed for each frame. He uses an AS3 script to send those positions off to an Arduino. An Arduino sketch then uses the Firmata library to receive the positions and move the servos. The result is entirely convincing as you can see in the trailer below. We’ve also included a video which summarizes the iterations he went through to get to the finished Billy Whiskers or just check out his detailed website.
[Jame’s] work shows that there many ways to do stop motion animation, perhaps a part of what makes it so much fun. One of those ways is to 3D print a separate object for each character shape. Another is to make paper cutouts and move them around, which is what [Terry Gilliam] did for the Monty Python movies. And then there’s what many of us did when we first got our hands on a camera, move random objects around on our parent’s kitchen table and shoot them one frame at a time.
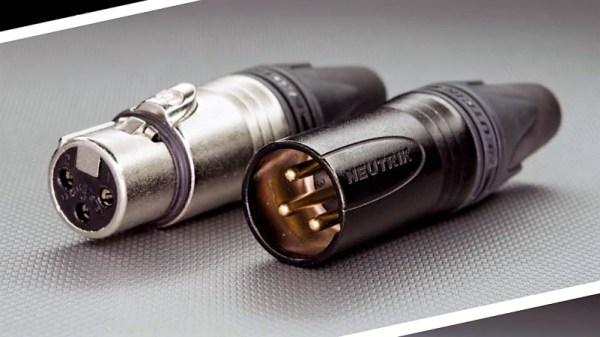
A few summers of my misspent youth found me working at an outdoor concert venue on the local crew. The local crew helps the show’s technicians — don’t call them roadies; they hate that — put up the show. You unpack the trucks, put up the lights, fly the sound system, help run the show, and put it all back in the trucks at the end. It was grueling work, but a lot of fun, and I got to meet people with names like “Mister Dog Vomit.”
One of the things I most remember about the load-in process was running the snakes. The snakes are fat bundles of cables, one for audio and one for lighting, that run from the stage to the consoles out in the house. The bigger the snakes, the bigger the show. It always impressed me that the audio snake, something like 50 yards long, was able to carry all those low-level signals without picking up interference from the AC thrumming through the lighting snake running right alongside it, while my stereo at home would pick up hum from the three-foot long RCA cable between the turntable and the preamp.
I asked one of the audio techs about that during one show, and he held up the end of the snake where all the cables break out into separate connectors. The chunky silver plugs clinked together as he gave his two-word answer before going back to patching in the console: “Balanced audio.”
 After the kids have gone to bed and LEGO bricks are scattered all over the floor, furniture, stairs (ouch), and everywhere else, wouldn’t it be nice if