Remote-Control Kinetic Sand Table Uses A Single Arduino

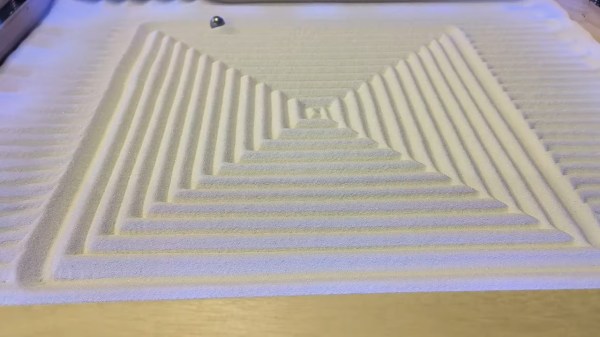
There’s nothing fun about a Sisyphean task unless you’re watching one being carried out by someone or something else. In that case, it can be mesmerizing like this Arduino-driven kinetic sand table.
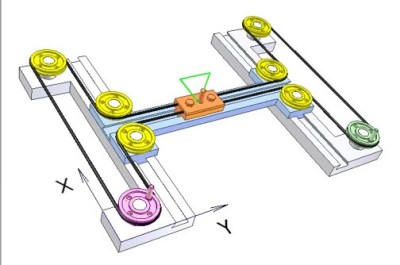
What you can’t see. Image via [thang010146] on YouTube
Like many of these builds, it all started with an ordinary coffee table from the hacker’s favorite furnitüre store. [NewsonsElectronics] opened it up and added a 3mm-thick board to hold the sand and another to hold the rails and magnets.

After designing some pieces to connect the rails and pulleys together, [NewsonsElectronics] let the laser cutter loose on some more 3mm stock. A pair of stepper motors connected to a CNC shield do all of the work, driving around a stack of magnets that causes the ball bearing to trudge beautifully through the sand.

Be sure to check out the videos after the break. The first is a nice demonstration, and the second is the actual build video. In the third video, [NewsonsElectronics] explains how they could write the world’s smallest GRBL code to swing this with a single Arduino. Hint: it involves removing unnecessary data from the g-code generated by Sandify.

Don’t have a laser cutter? Here’s a sand table built from 3D printer parts.

Continue reading “Remote-Control Kinetic Sand Table Uses A Single Arduino”

Telescope Rides On 3D Printed Equatorial Table

In the realm of amateur astronomy, enthusiasts find themselves navigating a cosmos in perpetual motion. Planets revolve around stars, which, in turn, orbit within galaxies. But the axial rotation of the Earth and the fact that its axis is tilted is the thing that tends to get in the way of viewing celestial bodies for any appreciable amount of time.

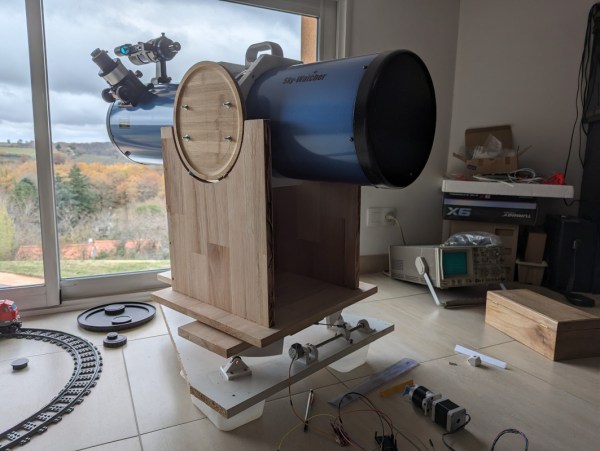
Amateur astronomy is filled with solutions to problems like these that don’t cost an arm and a leg, though, like this 3D printed equatorial table built by [aeropic]. An equatorial table is a device used to compensate for the Earth’s rotation, enabling telescopes to track celestial objects accurately. It aligns with the Earth’s axis, allowing the telescope to follow the apparent motion of stars and planets across the night sky.

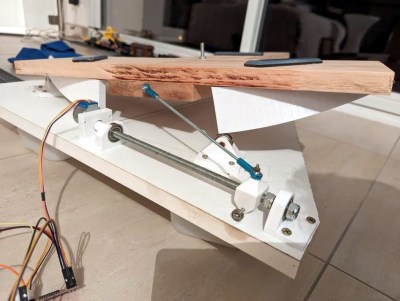
Equatorial tables are specific to a location on the Earth, though, so [aeropic] designed this one to be usable for anyone between around 30° and 50° latitude. An OpenSCAD script generates the parts that are latitude-specific, which can then be 3D printed.

From there, the table is assembled, mounted on ball bearings, and powered by a small stepper motor controlled by an ESP32. The microcontroller allows a telescope, in this case a Newtonian SkyWatcher telescope, to track objects in the sky over long periods of time without any expensive commercially-available mounting systems.

Equatorial tables like these are indispensable for a number of reasons, such as long-exposure astrophotography, time lapse imaging, gathering a large amount of observational detail for scientific purposes, or simply as an educational tool to allow more viewing of objects in the sky and less fussing with the telescope. They’re also comparatively low-cost which is a major key in a hobby whose costs can get high quickly, but not even the telescope needs to be that expensive. A Dobsonian telescope can be put together fairly quickly sometimes using off-the-shelf parts from IKEA.

Impressively Responsive Air Drums Built Using The Raspberry Pi Pico

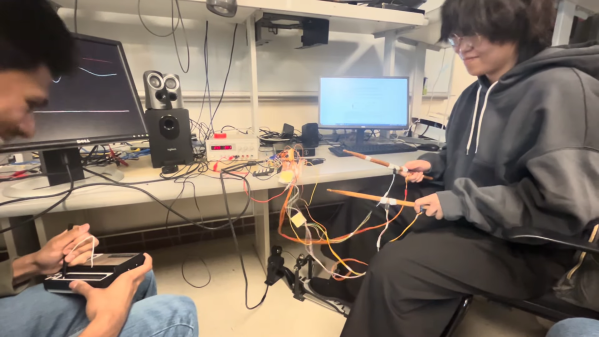
Drum kits are excellent fun and a terrific way to learn a sense of rhythm. They’re also huge and unwieldy. In contrast, air drums can be altogether more compact, if lacking the same impact as the real thing. In any case, students [Ang], [Devin] and [Kaiyuan] decided to build a set of air drums themselves for their ECE 4760 microcontroller class at Cornell.

As per the current crop of ECE4760 projects, the build relies on the Raspberry Pi Pico microcontroller as the brains of the operation. The Pico is charged with reading the output of MPU6050 inertial measurement units mounted to a pair of drum sticks. The kick pedal itself simply uses a button instead.

Where the project gets really interesting, though, is in the sound synthesis. The build doesn’t simply play different pre-recorded samples for different drums. Instead, it uses the Karplus-Strong Drum Synthesis function combined with a wavetable to generate different sounds.

In the demo video, we get to hear the air drums in action, complete with a Stylophone playing melody. Unlike some toy versions that trigger seemingly at random with no rhythm, these air drums are remarkably responsive and sound great. They could be a great performance instrument if designed for the purpose.

We’ve seen similar builds before, too.

Continue reading “Impressively Responsive Air Drums Built Using The Raspberry Pi Pico”

Building A Simple Compressed Air Cannon Is Easy

The world of warfare was revolutionized by the development of black powder, fireworks, cannons, and the like. You don’t need any of that chemical nonsense to just have fun, though, as this compressed air cannon from [OtisLiu153] demonstrates.

The build uses PVC pipes for both the barrel and the air tank. In the case of the latter, avoiding over-pressurization is key to avoiding injury, though some will say you should simply never build a PVC pipe pressure vessel at all. In this case, [OtisLiu153] strictly recommends 150 psi as a limit, which is nicely within the 280 PSI rating of the 2″ Schedule 40 PVC being used. Though, as they note, the connections in the design aren’t necessarily up to the same rating.

Off-the-shelf couplings are used to piece everything together, with the twin-reservoir design also acting as a useful shoulder mount. Charging the cannon is done via a Schrader valve, as you might find on a bike’s inner tube, and firing is achieved via a ball valve.

Of course, if you build such an air cannon yourself, just be careful with your aim. Video after the break.

Continue reading “Building A Simple Compressed Air Cannon Is Easy”

Simple CMOS Circuit Allows Power And Data Over Twisted-Pair Wiring

If you need to send data from sensors, there are plenty of options, including a bewildering selection of wireless methods. Trouble is, most of those protocols require a substantial stack of technology to make them work, and things aren’t much easier with wired sensors either. It doesn’t have to be that complicated, though, as this simple two-wire power-and-data interface demonstrates.

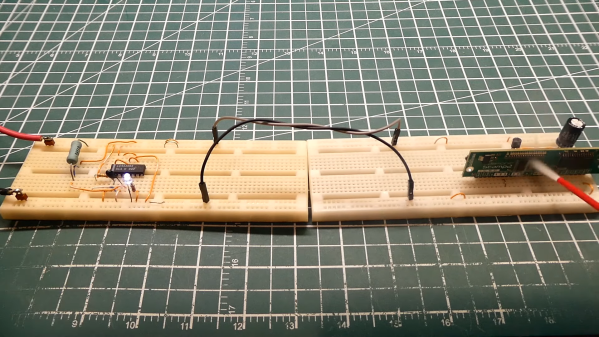
As with all things electronic, there are tradeoffs, which [0033mer] addresses in some detail in the video below. The basic setup for his use case is a PIC-based sensor — temperature, for this demo — that would be mounted in some remote location. The microcontroller needs to be powered, of course, and also needs to send a signal back to a central point to indicate whether the monitored location is within temperature specs. Both needs are accommodated by a single pair of wires and a tiny bit of additional circuitry. On one end of the twisted pair is a power supply and decoder circuit, which sends 9 volts up the line to power the PIC sensor. The decoder is based on a CD4538 dual monostable multivibrator, set up for an “on” time of one second. A trigger input is connected to the power side of the twisted pair going to the sensor, where a transistor connected to one of the PIC’s GPIO pins is set up to short the twisted pair together every half-second. Power to the PIC is maintained by a big electrolytic and a diode, to prevent back-feeding the controller. The steady 0.5-Hz stream of pulses from the sensor keeps resetting the timer on the control side. Once that stream stops, either through code or by an open or short condition on the twisted pair, the controller triggers an output to go high.

It’s a pretty clever system with very simple and flexible circuitry. [0033mer] says he’s used this over twisted-pair wires a couple of hundred feet long, which is pretty impressive. It’s limited to one bit of bandwidth, of course, but that might just be enough for the job. If it’s not, you might want to check out our primer on current-loop sensors, which are better suited for analog sensors but still share some of the fault-detection features.

Continue reading “Simple CMOS Circuit Allows Power And Data Over Twisted-Pair Wiring”

What The Artisan 3-in-1 CNC Offers (If One Has The Table Space)

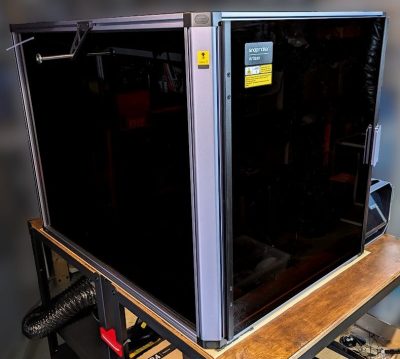
I never feel like I have enough space in my workshop. The promise of consolidating tools to make the most of limited space drew me to the Snapmaker Artisan, a plus-sized 3-in-1 tool combining 3D printer, laser engraver, and CNC machine.

Smaller than three separate tools, but still big.

Jacks of all trades may be masters of none, but it is also true that a tool does not need to be a master of its functions to be useful. For many jobs, it enough to simply be serviceable. Does a machine like the Artisan offer something useful to a workshop?

Snapmaker was kind enough to send me an Artisan that I have by now spent a fair bit of time with. While I have come to expect the occasional glitch, having access to multiple functions is great for prototyping and desktop manufacturing.

This is especially true when it allows doing a job in-house where one previously had to outsource, or simply go without. This combo machine does have something to offer, as long as one can give it generous table space in return.

What It Is

The Artisan is a large dual-extrusion 3D printer, CNC router, and diode-based laser engraver. To change functions, one physically swaps toolheads and beds. Very thankfully, there are quick-change fixtures for this.

Driving the Artisan is Snapmaker’s software Luban (GitHub respository). Named for the ancient Chinese master craftsman, it is responsible for job setup and control. For laser and CNC work, there are convenient built-in profiles for a variety of paper, plastic, leather, and wood products.

The unit is enclosed, nicely designed, and — while I have come to expect the occasional glitch — serviceable at all three of its functions. The size and stature of the machine warrants some special mention, however.

Continue reading “What The Artisan 3-in-1 CNC Offers (If One Has The Table Space)”

PCB Repair Is A Sticky Proposition

What do you do when a PCB is cracked or even broken in two? [MH987] has a plan: superglue the board back and then bridge the traces with solder, solder paste, or wire. The exact method, of course, depends on the extent of the damage.

We’ve had some success with similar techniques, and, honestly, for single-sided boards, we would be tempted to add a thin backer behind the crack. We’ve also used conductive paint to repair traces, but it’s good to have having as many tricks as possible because you never know what will work best for a particular repair. The post mentions that this is easier to do on a single-sided board, but it is certainly possible to do on a two-layer board.

The example repair is a Walkman which — if you are a youngster — was a portable music player that takes cassette tapes. These haven’t been made since 2010, so it is important to repair what you have.

If you can’t repair your Walkman, you could build an updated version. If your board is seriously damaged, you might get hope from this more extreme repair.