Decap ICs Without The Peril

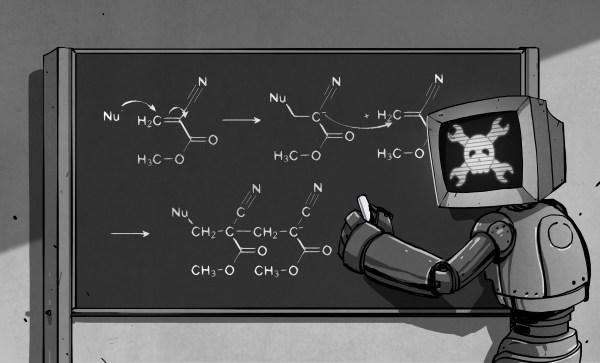
There can be few of us who haven’t gazed with fascination upon the work of IC decappers, whether they are showing us classic devices from the early years of mass semiconductor manufacture, or reverse-engineering the latest and greatest. But so often their work appears to require some hardcore scientific equipment or particularly dangerous chemicals. We’ve never thought we might be able to join the fun. [Generic Human] is out to change all that, by decapping chips using commonly available chemicals and easy to apply techniques. In particular, we discover through their work that rosin — the same rosin whose smell you will be familiar with from soldering flux — can be used to dissolve IC packaging.

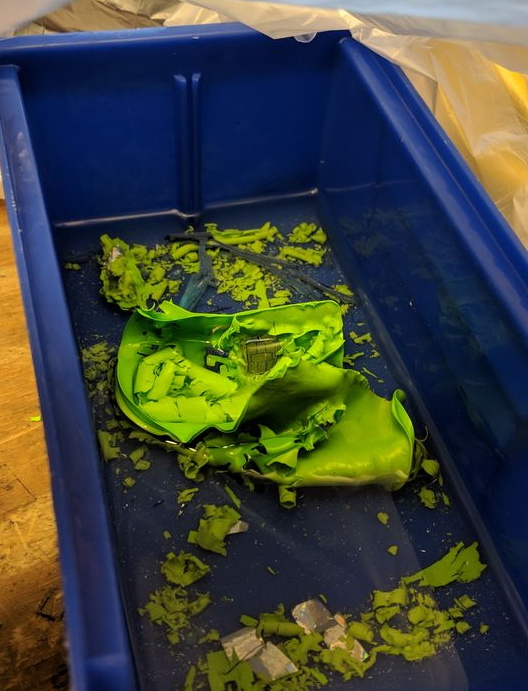
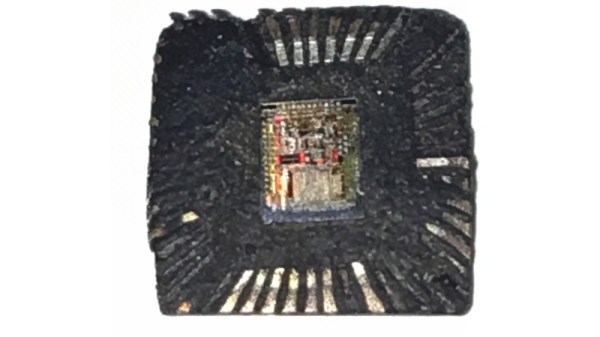
Of course, ICs that dissolved easily in the face of soldering wouldn’t meet commercial success, so an experiment with flux meets little success. Pure rosin, however, appears to be an effective decapping agent. [Generic Human] shows us a motherboard voltage regulator boiled in the stuff. When the rosin is removed with acetone, there among the debris is the silicon die, reminding us just how tiny these things are. We’re sure you’ll all be anxious to try it for yourselves, now, so take a while to look at the video below showing their CCC Congress talk.

The master of chip decapping is of course [Ken Shirriff], whose work we’ve featured many times. Our editor [Mike Szczys] interviewed him last year, and it’s well worth a look.

Continue reading “Decap ICs Without The Peril”

RFID Payment Ring Made From Dissolved Credit Card

RFID payment systems are one of those things that the community seems to be divided on. Some only see the technology as a potential security liability, and will go a far as to disable the RFID chip in their card so that it can’t be read by a would-be attacker. Others think the ease and convenience of paying for goods by tapping their card or smartphone on the register more than makes up for the relatively remote risk of RFID sniffers. Given the time and effort [David Sikes] put into creating this contactless payment ring, we think it’s pretty clear which camp he’s in.

Alright, so the whole ring making part sounds easy enough, but how does one get an RFID chip that’s linked to their account? Easy. Just call the bank and ask them for one. Of course, they won’t just send you out a little RFID chip and antenna to mount in your hacked up project. (If only things were so simple!) But they will send you a new card if you tell them your old one is getting worn out and needs a replacement. All you have to do when it gets there is liberate the electronics without damaging them.

[David] found that an hour or so in an acetone bath was enough to dissolve the plastic and expose the epoxy-encased RFID chip, assuming you scrape the outer layers of the card off first. He notes that you can speed this part of the process up considerably if you know the exact placement and size of the RFID chip; that way you can cut out just the area you’re interested in rather than having to liquefy the whole card.

Once you have your chip, you just need to mount it into a ring. [David] has designed a 3D printable frame (if you’ve got a high-resolution SLA machine, that is) which accepts the chip and a new antenna made from a coil of 38 AWG magnet wire. With the components settled into the printed frame, its off to a silicone mold and the liberal application of epoxy resin to encapsulate the whole thing in a durable shell.

If a ring is not personal enough for you, then the next step is getting the RFID chip implanted directly into your hand. There are even folks at hacker cons who will do that sort of thing for you, if you’re squeamish.

Continue reading “RFID Payment Ring Made From Dissolved Credit Card”

Component Shelf Life: How To Use All That Old Junk

There are two types of Hackaday readers: those that have a huge stock of parts they’ve collected over the years (in other words, an enormous pile of junk) and those that will have one a couple of decades from now. It’s easy to end up with a lot of stuff, especially items that you’re likely to use in more than one design; the price breakpoints at quantities of 10 or 100 of something can be pretty tempting, and having a personal stock definitely speeds the hacking process now that local parts shops have gone the way of the dinosaur. This isn’t a perfect solution, though, because some components do have shelf-lives, and will degrade in some way or another over time.

If your stash includes older electronic components, you may find that they haven’t aged well, but sometimes this can be fixed. Let’s have a look at shelf life of common parts, how it can be extended, and what you can do if they need a bit of rejuvenation.

Continue reading “Component Shelf Life: How To Use All That Old Junk”

Create Green, Soldermasked PCBs With Fritzing

Even though you can easily order a PCB from any one of a dozen board houses and have it on your desk in a few weeks, there’s still a need for home-made circuit boards. If it’s because you have very special or strange requirements, you want to save money, or you need to suffer for your art, you can make printed circuit boards at home. You can even apply soldermask. It’s easy, and [Renzo] is here to show you how.

The beginnings of this tutorial cover well-tread territory such as building a CNC router, laying out a circuit, and cutting a piece of single-sided, copper clad board. If you stopped right there, after milling traces into a board, you would have a functioning circuit. But it wouldn’t look good; a piece of copper does not a PCB make, and you need soldermask. That’s where the real work comes in.

Applying the soldermask meant there needed to be places without soldermask, mostly the vias and through-holes. For this, [Renzo] pulled the copper pad layer out of Fritzing, printed it on a transparency sheet, and finally applied the UV-curing soldermask. This came as a kit, and right now, you can get 10 ml of green, red, blue, yellow, and black UV-curing soldermask, and a UV flashlight for ten dollars on the usual Internet shops. This soldermask was lathered on, rolled out, and exposed with the UV flashlight. After a quick wash in acetone, the result is a perfect PCB.

Saving Your Vision From Super Glue In The Eyes

Super glue, or cyanoacrylate as it is formally known, is one heck of a useful adhesive. Developed in the 20th century as a result of a program to create plastic gun sights, it is loved for its ability to bond all manner of materials quickly and effectively. Wood, metal, a wide variety of plastics — super glue will stick ’em all together in a flash.

It’s also particularly good at sticking to human skin, and therein lies a problem. It’s bad enough when it gets on your fingers. What happens when you get super glue in your eyes?

Today, we’ll answer that. First, with the story of how I caught an eyeful of glue. Following that, I’ll share some general tips for when you find yourself in a sticky situation.

Continue reading “Saving Your Vision From Super Glue In The Eyes”

Plastics: Acrylic

If anything ends up on the beds of hobbyist-grade laser cutters more often than birch plywood, it’s probably sheets of acrylic. There’s something strangely satisfying about watching a laser beam trace over a sheet of the crystal-clear stuff, vaporizing a hairs-breadth line while it goes, and (hopefully) leaving a flame-polished cut in its wake.

Acrylic, more properly known as poly(methyl methacrylate) or PMMA, is a wonder material that helped win a war before being developed for peacetime use. It has some interesting chemistry and properties that position it well for use in the home shop as everything from simple enclosures to laser-cut parts like gears and sprockets.

Continue reading “Plastics: Acrylic”

Sanding Seashells By The Seashore

We all maintain this balancing act between the cool things we want, the money we can spend, and our free time. When the pièce de résistance is a couple of orders of magnitude out of our budget, the only question is, “Do I want to spend the time to build my own?” [Nick Charlton] clearly answered “Yes,” and documented the process for his Nautilus speakers. The speaker design was inspired by Bowers & Wilkins and revised from a previous Thingiverse model which is credited.

The sound or acoustic modeling is not what we want to focus on since the original looks like something out of a sci-fi parody. We want to talk about the smart finishing touches that transform a couple of 3D printed shells into enviable centerpieces. The first, and most apparent is the surface. 3D prints from consumer FDM printers are prone to layer lines, and that aesthetic has ceased to be trendy. Textured paint will cover them nicely and requires minimal elbow grease. Besides sand and shells go together naturally. At first glance, the tripod legs holding these speakers seemed like a classy purchase from an upscale furniture store, but they are, in fact, stained wood and ground-down bolts. Nicely done.

The moral is to work smarter, take pictures, then drop us a line.