Create Green, Soldermasked PCBs With Fritzing

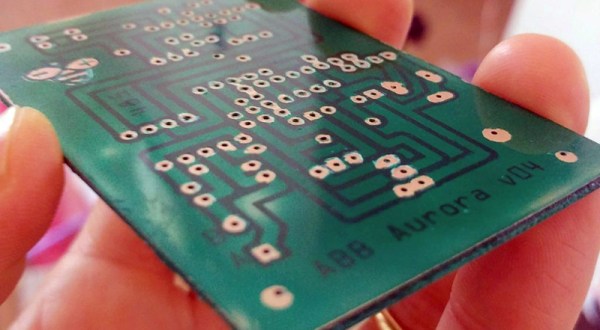
Even though you can easily order a PCB from any one of a dozen board houses and have it on your desk in a few weeks, there’s still a need for home-made circuit boards. If it’s because you have very special or strange requirements, you want to save money, or you need to suffer for your art, you can make printed circuit boards at home. You can even apply soldermask. It’s easy, and [Renzo] is here to show you how.

The beginnings of this tutorial cover well-tread territory such as building a CNC router, laying out a circuit, and cutting a piece of single-sided, copper clad board. If you stopped right there, after milling traces into a board, you would have a functioning circuit. But it wouldn’t look good; a piece of copper does not a PCB make, and you need soldermask. That’s where the real work comes in.

Applying the soldermask meant there needed to be places without soldermask, mostly the vias and through-holes. For this, [Renzo] pulled the copper pad layer out of Fritzing, printed it on a transparency sheet, and finally applied the UV-curing soldermask. This came as a kit, and right now, you can get 10 ml of green, red, blue, yellow, and black UV-curing soldermask, and a UV flashlight for ten dollars on the usual Internet shops. This soldermask was lathered on, rolled out, and exposed with the UV flashlight. After a quick wash in acetone, the result is a perfect PCB.

Saving Your Vision From Super Glue In The Eyes

Super glue, or cyanoacrylate as it is formally known, is one heck of a useful adhesive. Developed in the 20th century as a result of a program to create plastic gun sights, it is loved for its ability to bond all manner of materials quickly and effectively. Wood, metal, a wide variety of plastics — super glue will stick ’em all together in a flash.

It’s also particularly good at sticking to human skin, and therein lies a problem. It’s bad enough when it gets on your fingers. What happens when you get super glue in your eyes?

Today, we’ll answer that. First, with the story of how I caught an eyeful of glue. Following that, I’ll share some general tips for when you find yourself in a sticky situation.

Continue reading “Saving Your Vision From Super Glue In The Eyes”

Plastics: Acrylic

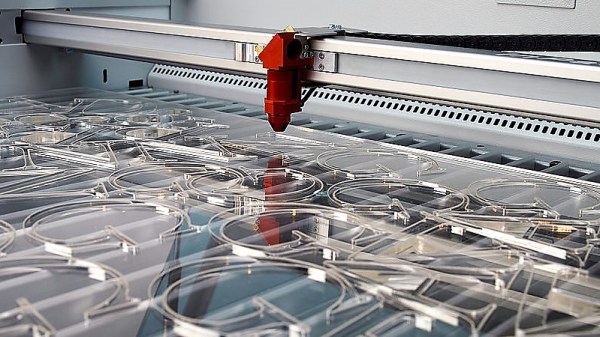
If anything ends up on the beds of hobbyist-grade laser cutters more often than birch plywood, it’s probably sheets of acrylic. There’s something strangely satisfying about watching a laser beam trace over a sheet of the crystal-clear stuff, vaporizing a hairs-breadth line while it goes, and (hopefully) leaving a flame-polished cut in its wake.

Acrylic, more properly known as poly(methyl methacrylate) or PMMA, is a wonder material that helped win a war before being developed for peacetime use. It has some interesting chemistry and properties that position it well for use in the home shop as everything from simple enclosures to laser-cut parts like gears and sprockets.

Continue reading “Plastics: Acrylic”

Sanding Seashells By The Seashore

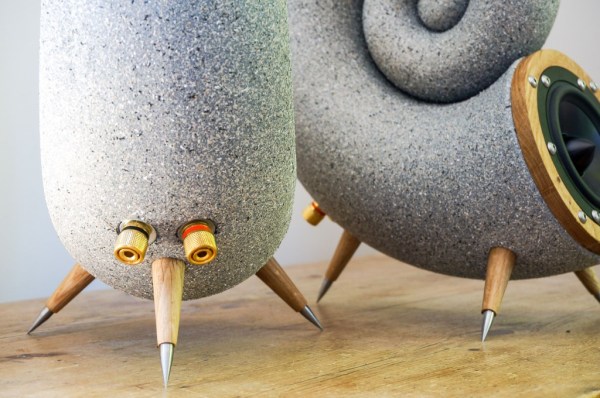
We all maintain this balancing act between the cool things we want, the money we can spend, and our free time. When the pièce de résistance is a couple of orders of magnitude out of our budget, the only question is, “Do I want to spend the time to build my own?” [Nick Charlton] clearly answered “Yes,” and documented the process for his Nautilus speakers. The speaker design was inspired by Bowers & Wilkins and revised from a previous Thingiverse model which is credited.

The sound or acoustic modeling is not what we want to focus on since the original looks like something out of a sci-fi parody. We want to talk about the smart finishing touches that transform a couple of 3D printed shells into enviable centerpieces. The first, and most apparent is the surface. 3D prints from consumer FDM printers are prone to layer lines, and that aesthetic has ceased to be trendy. Textured paint will cover them nicely and requires minimal elbow grease. Besides sand and shells go together naturally. At first glance, the tripod legs holding these speakers seemed like a classy purchase from an upscale furniture store, but they are, in fact, stained wood and ground-down bolts. Nicely done.

The moral is to work smarter, take pictures, then drop us a line.

Tiny Art Etched Into Silicon Wafers With Electron Beam Lithography

Looks like [Sam Zeloof] got bored on his Thanksgiving break, and things got a little weird in his garage. Of course when your garage contains a scanning electron microscope, the definition of weird can include experimenting with electron-beam lithography, resulting in tiny images etched into silicon.

You’ll probably remember [Sam] from his 2018 Hackaday Superconference talk on his DIY semiconductor fab lab, which he used to create a real integrated circuit. That chip, a PMOS dual-channel differential amp, was produced by photolithography using a modified DLP projector. Photolithography imposes limits to how small a feature can be created on silicon, based on the wavelength of light.

[Sam] is now looking into using the electron beam of his SEM as a sort of CNC laser engraver to produce much finer features. The process involves spin-coating silicon wafers with SU-8, an epoxy photoresist normally used with UV light but that also turns out to be sensitive to electron beams. He had to modify his SEM to control the X- and Y-axis deflection with a 12-bit DAC and provide a custom beam blanker. With a coated wafer in the vacuum chamber, standard laser engraving software generates the G-code to trace his test images on the resist. A very quick dip in acetone develops the exposed chip.

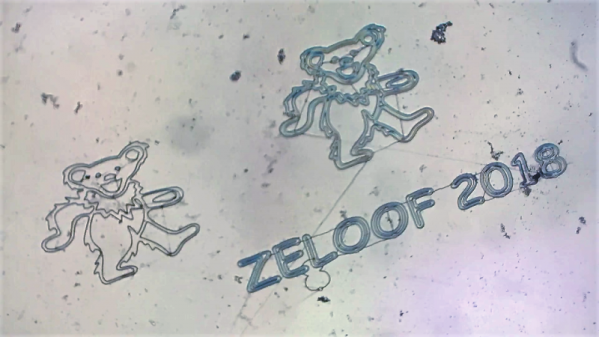
[Sam] says these first test images are not too dainty; the bears are about 2.5 mm high, and the line width is about 10 μm. His system is currently capable of resolving down to 100 nm, while commercial electron beam lithography can get down to 5 nm or so. He says that adding a Faraday cage to the setup might help him get there. Sounds like a project for Christmas break.

Continue reading “Tiny Art Etched Into Silicon Wafers With Electron Beam Lithography”

Tilt-Rotor Plane Needs Flight Controller Hack To Get Airborne

Part of the charm of quadcopters is the challenge that building and flying them presents. In need of complex sensors and computational power to just get off the ground and under tremendous stresses thanks to their massively powerful motors, they often seem only barely controlled in flight. Despite these challenges, quadcopter flight has been reduced to practice in many ways, leaving hobbyists in search of another challenge.

[Tom Stanton] is scratching his creative itch with this radio-controlled tilt-rotor airplane that presents some unique problems and opportunities. Tilt-rotor planes are, as the name implies, able to swivel their propellors and transition them from providing forward thrust to providing verticle lift. With the rotors providing lift, the aircraft is able to hover and perform vertical take-off and landing (VTOL); switched to thrust mode, wings provide the lift for horizontal flight.

[Tom]’s realization of this design seems simple – a spar running through the wing holding BLDC motors and props is swiveled through 90° by a servo to transition the aircraft. Standard control surfaces on the wings and tail take care of horizontal flight. Actually getting an off-the-shelf flight controller to deal with the transitions was tricky. [Tom] ended up adding an Arduino to intercept the PWM signals the flight controller normally sends directly to the servos and speed controls to provide the coordination needed for a smooth transition. Full details in the video below, and some test flights which show that an RC VTOL is anything but a beginner’s plane.

[Tom] is proving himself to be quite the Renaissance man these days. Between air-powered piston engines, over-balance trebuchets, and popping the perfect wheelie, he seems to have covered all the bases and done his best to keep our tip line stocked.

Continue reading “Tilt-Rotor Plane Needs Flight Controller Hack To Get Airborne”

Wind Turbine Pushes Limits Of Desktop 3D Printing

There was a time, not so long ago, when hype for desktop 3D printing as so high that it seemed you could print anything. Just imagine it, and your handy dandy magical 3D printer could manifest it into reality. But now that more people have had first hand experience with the technology, the bubble has burst. Reality has sobered us up a bit, and today we’ve got a much better idea of what can and cannot be printed on a traditional desktop 3D printer.

But that doesn’t mean we aren’t surprised from time to time. As a perfect example, take a look at this almost entirely 3D printed wind turbine designed and built by [Nikola Petrov]. Outside of the electronics, the pole it’s mounted to, and some assorted bits and bobs, he produced all the parts on his own large-format TEVO Black Widow printer. He mentions there are a few things he would do differently if he was to build another one, but it’s hard to find much to complain about with such a gorgeous build.

To be sure, this one isn’t for the 3D printing novice. First of all, you’ll need a printer with a bed that’s at least 370 mm wide just to print the blades. [Nikola] also recommends printing the parts in ABS and coating them with acetone to smooth and harden the outside surfaces. We’d be surprised if you could print such large objects in ABS without a heated enclosure as well, so plan on adding that to your shopping list.

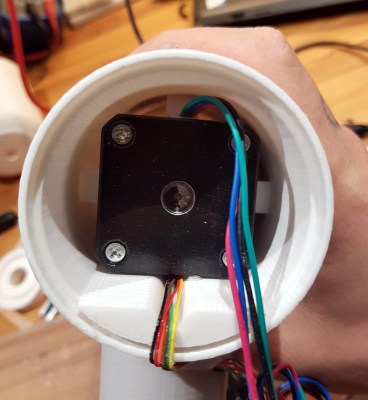
On the flip side though, the electronics are about as simple as they come. The blades are spinning a standard NEMA 17 stepper motor (through a 1:5 gearbox) to produce AC power. This is then fed into two W02M rectifiers and a beefy capacitor, which gives him DC with a minimum of fuss. In theory it should be capable of producing 1A at 12V, which is enough to light LEDs and charge phones. In this design there’s no battery charging circuit or anything like that, as [Nikola] says it’s up to the reader to figure out how to integrate the turbine into their system.

If you don’t think your 3D printing skills are up to the task, no worries. In the past we’ve seen wind turbines built out of ceiling fans, and occasionally, even less.