Creality WiFi Takes On Octoprint

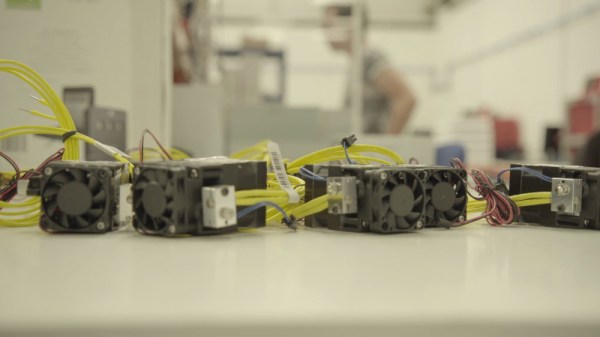
A very common hack to a 3D printer is to connect a Raspberry Pi to your printer and then load Octoprint or a similar program and send your files to the printer via the network. [Teaching Tech] noticed that Creality now has an inexpensive WiFi interface that promises to replace Octoprint and decided to give it a quick review.

You might wonder why you’d want this system when Octoprint exists? Mainly, the value proposition is the price. You can buy the Creality box for about $20. A Raspberry Pi with a similar case would be at least twice that price. In addition, the box integrates with a Thingiverse-like library and does cloud slicing, which is attractive when you have a very small computer connected to your printer.

However, [Teaching Tech] found some issues. The box was pretty picky about connecting to printers and there were many other problems. The 3D model library wasn’t very comprehensive, although that could change if the thing got very popular. Worse, the slicer didn’t really produce stellar results.

We have to admit, an attractive network interface for $20 would be of interest. But it is hard to see how this would be a better value than Octoprint unless you were very short on cash and had no Raspberry Pi surplus laying around. You still need an SD card and a power supply, so those extras are a wash.

On the other hand, if Creality fixes the problems and expands the 3D model library, we’d buy one. But it remains to be seen if either of those things will happen, much less both of them. We do wish [Teaching Tech] had opened the thing up for us. Maybe next time.

Continue reading “Creality WiFi Takes On Octoprint”

Slick DIY Compound Bow Uses Coiled Springs, Toothbrush Heads

Compound bows (unlike recurve bows, their more mechanically-simple relatives) use a levering system with pulleys and spring tension to grant the user a mechanical advantage. We’re not exactly sure what to call [Zünder’s] bow design. He shared his unconventional take on a DIY bow that uses coiled springs as well as some other unique features.

Toothbrush heads and 3D printing make an enclosed, bristle-supported arrow rest.

What we really dig about [Zünder]’s design is how easy it is to grasp how it all works. As he demonstrates using the bow, the way the levers, pulleys, and spring tension all work together is very clear. The 3D-printed quiver and arrow rest are nice added touches, and we especially love the use of three toothbrush heads to provide contained support for a nocked arrow. The ring of bristles are sturdy enough to easily support the shaft, and don’t interfere with the arrow’s fletching.

[Zünder] has a photo gallery with a few additional photos and closeups, and you can watch him demonstrate his bow in the video embedded below.

Continue reading “Slick DIY Compound Bow Uses Coiled Springs, Toothbrush Heads”

A Walking Rover Destined Explore Your Fridge Door

It’s usually the simple ideas that sprout bigger ones, and this was the case when we saw [gzumwalt]’s single-motor walking robot crawling up a fridge door with magnets on its feet. (Video, embedded below.)

The walking mechanism consists of an inner foot and two outer feet, connected by three sets of rotating linkages, driven by a single geared motor. The feet move in a leapfrog motion, in small enough steps that the center of mass always stays inside the foot area, which keeps it from tipping over. Besides the previously mentioned ability to crawl around on a vertical magnetic surface, it’s also able to crawl over almost any obstacle shorter than its step length. A larger version should also be able to climb stairs.

As shown, this robot can only travel in a straight line, but this could be solved by adding a disc on the bottom of the inner foot to turn the robot when the outer feet are off the surface. Add some microswitch feelers and an Arduino, and it can autonomously explore your fridge without falling off. Maybe we’ll get around to building it ourselves, but be sure to drop us a tip if you beat us to it!

[gzumwalt] is a master of 3D printed devices like a rigid chain and a domino laying robot. The mechanism for this robot was inspired by one design from [thang010146]’s marvelous video library of mechanisms.

Continue reading “A Walking Rover Destined Explore Your Fridge Door”

3D Printed Rigid Chain Mechanism

One of the major advantages of 3D printing is the ability to quickly test and then iterate on mechanical designs. [gzumwalt] does a lot of this, and has recently been working on various versions of a rigid chain mechanism. (Video, embedded below.)

A rigid-chain mechanism is one way of fitting a long beam into a small box. It works similar to a zipper, meshing two separate “chains” with specially teeth designed to form a rigid beam. Due to clearances between the teeth, the beam tends to be a bit floppy. [gzumwalt] made various sizes of the mechanism, and also reduced the clearances on later versions to reduce the flop. He also integrated it into a cool “snake in a basket” automaton (second video below) by adding a reversible gearbox and a binary snap-action switch.

One possible use for this type of mechanism is for autonomously assembling long structures in space, as one of the 2017 Hackaday Prize finalist projects, ZBeam, proposed.

[gzumwalt] has not made the files available for download yet, but you can keep and eye on his Instructables pages for updates. He got a number of fascinating 3D printed devices already available, like a domino laying machine or a WiFi controlled rover.

Continue reading “3D Printed Rigid Chain Mechanism”

Food Safe Printing Techniques

One thing that always provokes spirited debate around the Hackaday bunker is just how dangerous is it to use 3D printed plastic in contact with food. We mostly agree it isn’t a good thing, but we also know some people do it regularly and they don’t drop dead instantly, either. [Jakub] decided to do some testing and make some recommendations. There’s even a video explaining the results.

Unlike a lot of what we’ve read about this topic in the past, [Jakub’s] post is well-researched and does actual testing including growing bacteria cultures from cups used for milk. He starts out identifying the EU and US regulations about what you can call food-grade. There’s also recognition that while a base plastic might be safe for contact with food, there’s no way to know exactly what additives and other things are in the plastic to change its properties and color.

Continue reading “Food Safe Printing Techniques”

A Case For Project Part Numbers

Even when we share the design files for open source hardware, the step between digital files and a real-world mechatronics widget is still a big one. That’s why I set off on a personal vendetta to find ways to make that transfer step easier for newcomers to an open source mechantronics project.

Today, I want to spill the beans on one of these finds: part numbers, and showcase how they can help you share your project in a way that helps other reproduce it. Think of part numbers as being like version numbers for software, but on real objects.

I’ll showcase an example of putting part numbers to work on one of my projects, and then I’ll finish off by showing just how part numbers offer some powerful community-building aspects to your project.

A Tale Told with Jubilee

To give this idea some teeth, I put it to work on Jubilee, my open source toolchanging machine. Between October 2019 to November 2020, we’ve slowly grown the number of folks building Jubilees in the world from 1 to more than 50 chatting it up on the Discord server. Continue reading “A Case For Project Part Numbers”

Advanced Printer Control Aims To Stop Idle Waste

3D printers are capable of creating complex geometries with a minimum of fuss, but one of the tradeoffs is the long period of time it takes to print a part. Often, printers are left to run for many hours with a minimum of supervision to complete their tasks. This can leave printers idling for long periods of time after their work is finished. Noting this, [TheGrim] put together the Advanced Printer Control.

The aim of the APC is to monitor 3D printers, and shut them off when their work is complete. The aim is to avoid leaving printers running for hours after their prints are finished, which causes needless wear on fans and screens which can have a limited life. This is achieved by putting an ESP8266 in charge of the printer’s AC power supply, via a triac. It measures the current drawn by the printer when idling and in use to set a baseline. Then, whenever the printer drops back to idle levels, a timer begins. When the timer runs out, the printer is switched off. There’s also an option to automatically trigger shutdown with an I/O pin, too.

It’s a project that aims to extend printer life and save power, too. Of course, if you’re really worried about power draw, you could use a solar powered printer instead. If you’ve got your own printer controller hacks, be sure to drop us a line.