IBM PCjr Types Again, Thanks To KeybJr

Most of us think of keyboards — even vintage ones — as being fairly standardized and interchangeable, but that isn’t the case for the IBM PCjr. Its keyboard was quite unlike most others of its time, which means that a PCjr without an original keyboard is pretty much a dust collector. That’s what led [Jozef Bogin] to create the KeybJr, a piece of hardware that allows one to use any AT, XT, or PS/2 keyboard with the IBM PCjr.

The PCjr’s oddball keyboard can be a bit of a hassle for vintage computing enthusiasts.

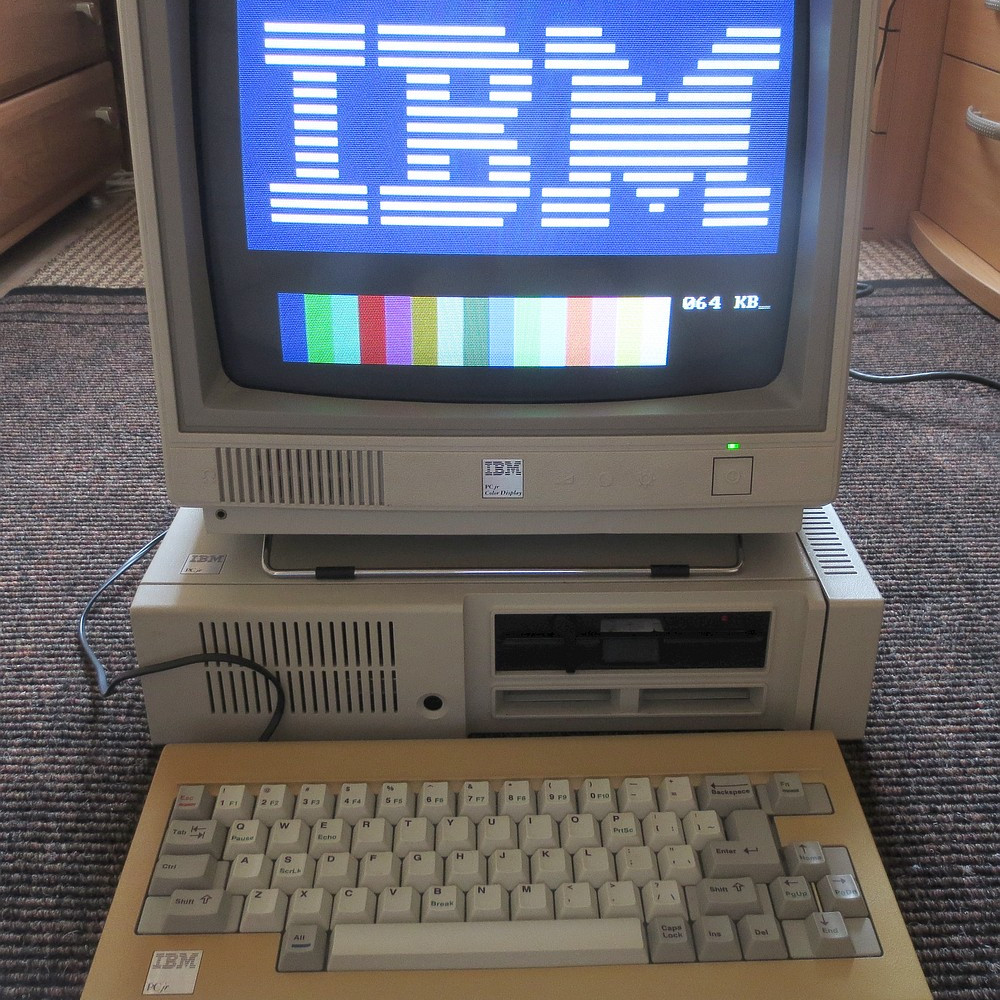
What was strange about the PCjr’s keyboard? From the outside it looked pretty normal, but it definitely had its own thing going on. For one, the PCjr keyboard operated over a completely different protocol than the other keyboards of the time. In addition, its connection to the host was either by IR, or via its own wired cable adapter.

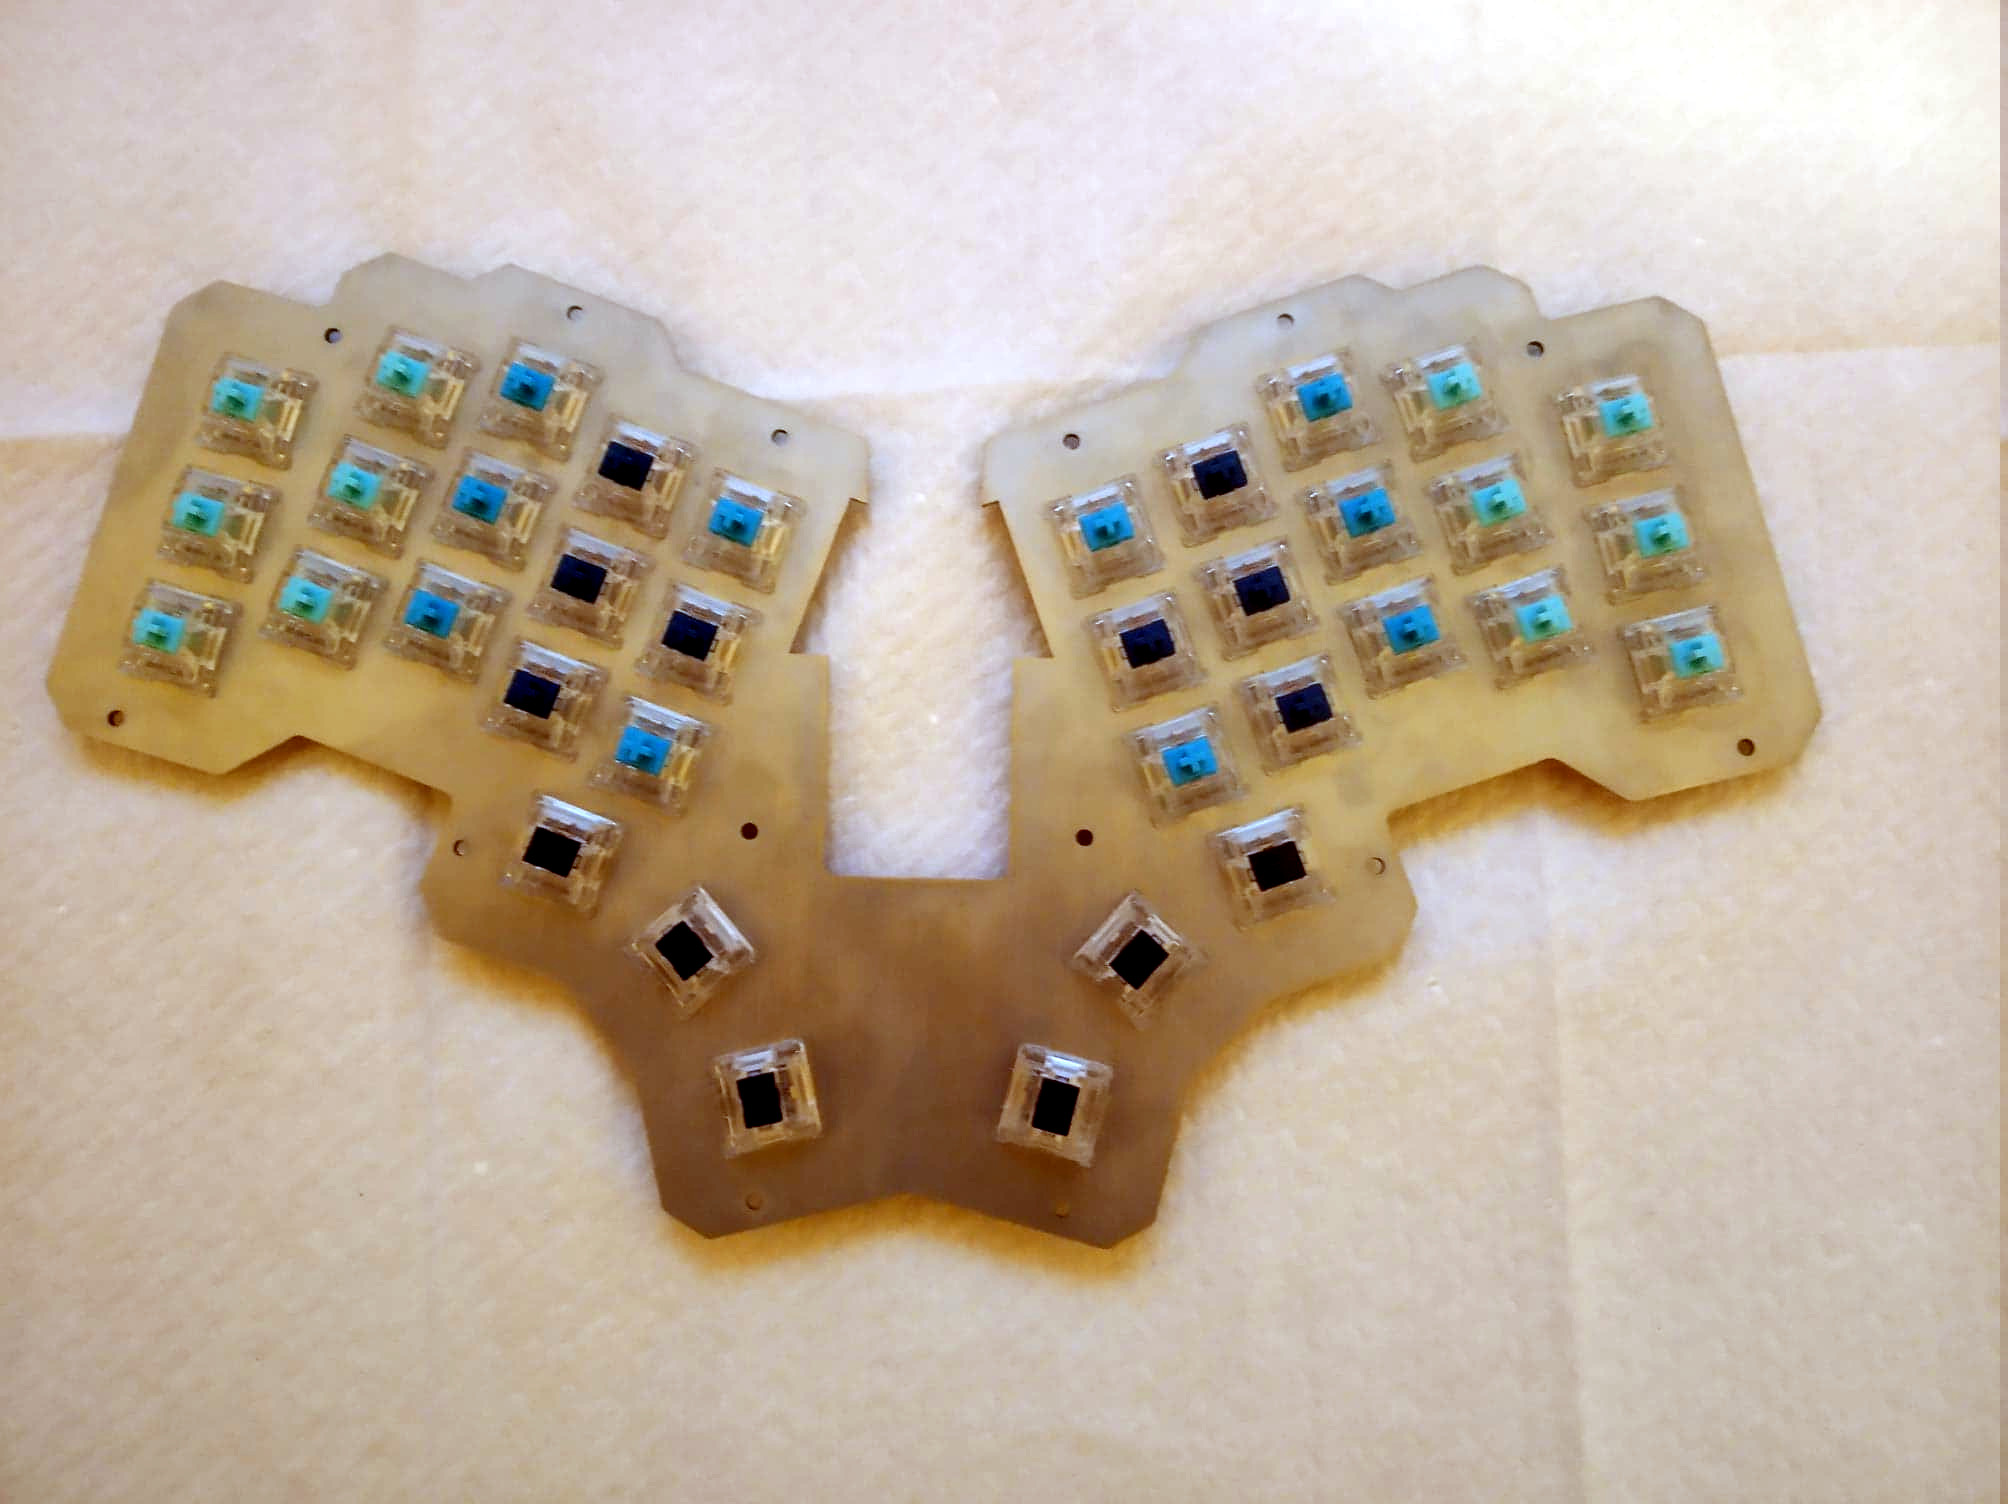
The KeybJr solves this by using an Arduino-based board to turn inputs from other keyboards of the time into something the PCjr expects. These signals are sent out and received either over infrared, or by the PCjr’s “K” port for a wired keyboard link.

Why bother with the IR functionality? Well, the connector and pins on the PCjr are not very rugged, and sometimes they are damaged. In those cases, it is nice to have the option of using a normal (for the time) keyboard over the IR link. Vintage hardware is not always in perfect shape, after all. That’s why things like ATX power supply adapters for the PCjr exist.

Want to give it a shot? There is a GitHub repository for the KeybJr, and you can see it in action in a brief video, embedded below.

Continue reading “IBM PCjr Types Again, Thanks To KeybJr”

Paper Tape Reader Self-calibrates, Speaks USB

Input devices consisting of optical readers for punched paper tape have been around since the earliest days of computing, so why stop now? [Jürgen]’s Paper Tape Reader project connects to any modern computer over USB, acting like a serial communications device. Thanks to the device’s automatic calibration, it works with a variety of paper materials. As for reading speed, it’s pretty much only limited to how fast one can pull tape through without damaging it.

Stacked 1.6 mm PCBs act as an enclosure, of sorts.

While [Jürgen]’s device uses LEDs and phototransistors to detect the presence or absence of punched holes, it doesn’t rely on hardware calibration. Instead, the device takes analog readings of each phototransistor, and uses software-adjusted thresholds to differentiate ones from zeros. This allows it to easily deal with a wide variety of tape types and colors, even working with translucent materials. Reading 500 characters per second isn’t a problem if the device has had a chance to calibrate.

Interested in making your own? The build section of the project has all the design files; it uses only through-hole components, and since the device is constructed from a stack of 1.6 mm thick PCBs, there’s no separate enclosure needed.

Paper tape and readers have a certain charm to them. Cyphercon 4.0 badges featured tape readers, and we’ve even seen the unusual approach of encoding an I2C byte stream directly onto tape.

CAT Is Not Your Average Meow-cropad

Are you completely over the idea of the keyboard in any flattish form and looking for something completely different for inputting your data? Or do you want a mega macropad for 3D design, GIMP or Inkscape work, or to use while relaxing with a nice first-person shooter? Then this ergonomic, double-fistable keyboard/controller mashup named CAT may be what you’re looking for.

Inside each of these slinky felines is pretty much what you’d expect to find — 25 or so switches and an Arduino Pro Micro. Interestingly enough, the switches are all lever-action and not push buttons. There are two breeds of CAT available to build or buy: one has 25 buttons, and the other has a joystick or trackball on the thumb between two upper and two lower buttons. You could have one type for each hand!

More information is available on the Lynx Workshop site, which is where you’ll also find tutorials and instructions for everything from the 3D printing to the electronics to the assembly and coding. There is even a bonus 3D modeling tutorial. Don’t want to invest the time to make your own CAT? These kitties are also available for pre-order. Claw past the break to check them out in action.

Looking for something with regular keyswitches? Oh, we have plenty of those.

Continue reading “CAT Is Not Your Average Meow-cropad”

Custom Macro Keyboard With Sweet Backlighting

From the smallest 60% keyboards for those with no desk space to keyboards with number pads for those doing data entry all day, there’s a keyboard size and shape for just about everyone. The only problem, even with the largest keyboards, is that they’re still fairly limited in what they can do. If you find yourself wishing for even more functionality, you might want to build something like this custom macro keyboard with built-in LED backlighting.

Rather than go with a standard mechanical keyboard switch like a Cherry MX, this build is based around TS26-2 pushbuttons with built-in LED lighting. [atkaper] only really needed one button for managing the mute button on MS Teams, but still built a total of eight switches into this keyboard which can all be individually programmed with different functions. The controller is an Arduino Leonardo and the enclosure was 3D printed.

Paired with the classic IBM Model M keyboard, this new macro keyboard adds plenty of functionality while also having control over LED backlighting. Macro keyboards are incredibly useful, especially with their ability to easily change function with control over the software that runs on them. The key to most builds is the 32U4 chip found in some Atmel microcontrollers which allows it to easily pass keyboard (and mouse) functionality to any computer its plugged in to.

A metal spaceship throttle replica with a spherical knob

Razor Crest Control Lever For The Grogu In Your Life

If you’re looking to add a little more sci-fi authenticity to your gaming setup, you could do much worse than this functional control lever replica that [ZapWizard] has entered into the Hackaday.io Sci-Fi Contest.

Taking inspiration from Disney’s The Mandalorian, this functional prop is almost identical to the throttle seen on the bridge of the Razor Crest gunship, piloted by the television show’s eponymous bounty hunter. The electronic heart of this build is relatively straightforward – a Trinket M0 measures the resistance of an ultra-thin potentiometer, and masquerades as a typical one-axis USB throttle.

The mechanical components and aesthetically pleasing housing is where this project really shines. Helical 3D printed gears smooth out the movement of the solid aluminum throttle shaft, and a simple detent mechanism ‘catches’ the throttle at the middle point. The ballast and baseplate are cut from stainless steel, giving the throttle considerable heft, aiding in its stability on a tabletop (it’s also possible to secure it down using screws or powerful magnets). The throttle case is 3D printed and covered in aluminum foil tape, which is then chemically blackened and aged for that well-loved appearance.

Of course, the most iconic part of this build is the spherical knob, which screws onto the aluminum shaft for Grogu’s convenience. [ZapWizard] put in an order for one over at Custom 3D Stuff, and it absolutely ties the entire build together.

Interested in prop builds from the world of science-fiction, functional or otherwise? Then take a look through the entries in our Sci-Fi Contest. Or better yet, start building your own entry — there’s still about a month to go before the deadline.

Continue reading Razor Crest Control Lever For The Grogu In Your Life”

Building A DIY Flight Yoke For Flight Simulator

Flight yokes are key to getting an authentic experience when playing a flight simulator, but [Michel Rechtin] didn’t want to pay big money for a commercially-available solution. He ended up building a design using a lot of parts he had laying around, which saved money and worked out great.

The build is based around an Arduino Micro, which reads a series of potentiometers from the yoke and pedals to control pitch, roll, and yaw, A series of buttons are then added to control ancillary functions for the plane and simulator software.

Much of the build uses old 3D printer components, including linear bearings and rods for the pitch axis for smooth operation. There’s even a throttle setup and some more buttons and switches for a more complete flying experience.

Files are available on Thingiverse from anyone looking to replicate [Michael]’s build. We love to see a yoke built from scratch, though we’ve also seen creative builds repurpose PlayStation controllers for the same purpose. Video after the break.

Continue reading “Building A DIY Flight Yoke For Flight Simulator”

Absolem Is A Rabbit Hole Keyboard Build

This is usually how it happens — [mrzealot] had been using some awful chiclet-style keyboard without much of a care, and topping out at 50-60 WPM using an enhanced hunt-and-peck method. But he really wanted back-lighting, and so got his first taste of the mech life with a Master Keys Pro S. Hooked, [mrzealot] started researching and building his endgame keyboard, as you do once bitten. It looked as though his type would have as few keys as possible, and thumb keys laid out in arcs.

And so the cardboard prototyping began, with real switches and keycaps and a split design. After getting tired of adjusting the halves’ position on the desk, [mrzealot] threw that plan out the window and started scheming to build a monoblock split. He had a steel switch plate cut for this prototype, and used cardboard for the bottom layer, complete with a little hatch to access the Pro Micro’s reset button.

Now satisfied with the 36-key layout, it was time to go wireless with a Feather nRF52 Bluefruit LE. This is where things get serious and final, with a laser-cut layered oak case and thick, blank, PBT keycaps.

Under all that plastic lies a range of actuation force levels on the key caps that (in our opinion) range from heavy to really heavy — 62 gram switches on the pinkies and ring fingers, 65 g on the middle, 67 g on the index fingers, and a whopping 78 g for the thumb clusters.

We just love the way this ended up looking, and are pretty jealous of that neoprene layer on the bottom. Beauty aside, there is some real utility here to be shared. In designing the layout, [mrzealot] created a keyboard generator called ergogen that will get you closer to your endgame without the need for CAD skills, just YAML.

Those of you who read Hackaday closely may recognize the term ‘ergogen’ from [Matthew Carlson]’s coverage of [Ben Vallack]’s guide to creating a low-profile keyboard. This is something else in the same vein.

Thanks for the tip, [HBBisenieks].