A Turing-Complete CPU From RAM

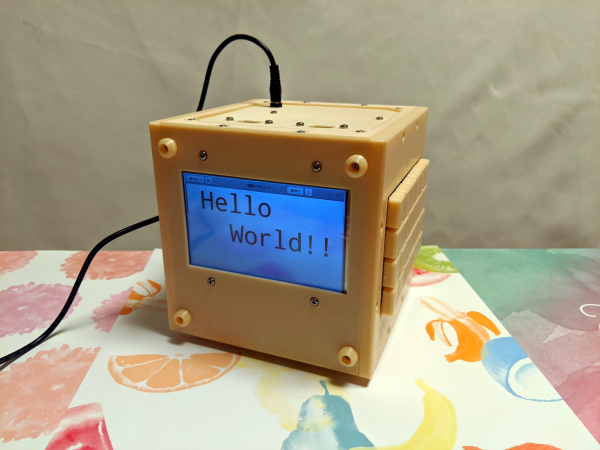
Building a general-purpose computer means that you’ll have to take a lot of use cases into consideration, and while the end product might be useful for a lot of situations, it will inherently contain a lot of inefficiencies. On the other hand, if you want your computer to do one thing and do it very well, you can optimize to extremes and still get results. This computer, built from RAM, is just such an example.

The single task in this case was to build a computer that can compute the Fibonacci sequence.  Since it only does one thing, another part of the computer that can be simplified (besides the parts list) is the instruction set. In this case, the computer uses a single instruction: byte-byte-jump. Essentially all this computer does is copy one byte to another, and then perform an unconditional jump. Doing this single task properly is enough to build every other operation from, so this was chosen for simplicity even though the science behind why this works is a little less intuitive.

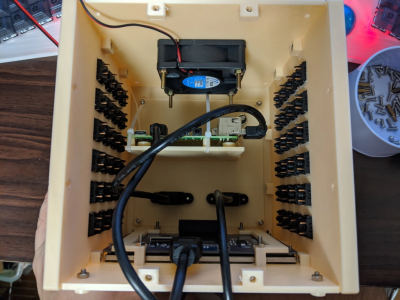
Of course, a single instruction set requires a lot of clock cycles to work (around 200 for a single operation). The hardware used in this build is also interesting and although it uses a Raspberry Pi to handle some of the minutiae, it’s still mostly done entirely in RAM chips, only cost around $15, and is a fascinating illustration of some of the more interesting fundamentals of computer science. If you’re interested, you can build similar computers out of 74-series chips as well.

A Modern Take On The “Paperclip Computer”

Back in 1968, a book titled “How to Build a Working Digital Computer” claimed that the sufficiently dedicated reader could assemble their own functioning computer at home using easily obtainable components. Most notably, the design utilized many elements that were fashioned from bent paperclips. It’s unclear how many readers actually assembled one of these so-called “Paperclip Computers”, but today we’re happy to report that [Mike Gardi] has completed his interpretation of the 50+ year old homebrew computer.

A view behind the computer’s ALU

The purist might be disappointed to see how far [Mike] has strayed from the original, but we see his embrace of modern construction techniques as a necessary upgrade. He’s recreated the individual computer components as they were described in the book, but this time plywood and wheat bulbs have given way to 3D printed panels and LEDs. While the details may be different, the end goal is the same: a programmable digital computer on a scale that can be understood by the operator.

To say that [Mike] did a good job of documenting his build would be an understatement. He’s spent the last several months covering every aspect of the build on Hackaday.io, giving his followers a fantastic look at what goes into a project of this magnitude. He might not have bent many paperclips for his Working Digital Computer (WDC-1), but he certainly designed and fabricated plenty of impressive custom components. We wouldn’t be surprised if some of them, such as the 3D printed slide switch we covered last month, started showing up in other projects.

While the WDC-1 is his latest and certainly greatest triumph, [Mike] is no stranger to recreating early digital computers. We’ve been bringing you word of his impressive replicas for some time now, and each entry has been even more impressive than the last. With the WDC-1 setting the bar so high, we can’t wait to see what he comes up with next.

Continue reading “A Modern Take On The “Paperclip Computer””

China X86 Chips Hitting The Market

Last year, fabless chip maker Zhaoxin announced they were readying a multicore x86-compatible CPU. According to media reports, the chips are showing up on Chinese marketplaces like Taobao shipping around March.

The company is a joint venture between the Shanghai Municipal Government and VIA Technologies, a familiar name in the PC business. It makes even more sense if you remember that VIA bought Centaur who had built simple x86 chips and used the simplicity to add more cache that more complex Intel and AMD chips. These fell out of the hobby market, but they’ve still been pushing forward providing simple designs that are inexpensive and consume low power.

Continue reading “China X86 Chips Hitting The Market”

Slice Through Your Problems With A Shukran

We’d wager most hackers are familiar with FTDI as the manufacturer of the gold standard USB-UART interfaces. Before parts like the ultra cheap CH340 and CP2102 became common, if you needed to turn a USB cable into a TTL UART device, “an FTDI” (probably an FT232RL) was the way to make that happen. But some of the parts in the FT232* family are capable of much more. Wanting to get at more than a UART, [linker3000] designed the Shukran to unlock the full potential of the FT232H.

The FT232H is interesting because it’s an exceptionally general purpose interface device. Depending on configuration it can turn USB into UART, JTAG, SPI, I2C, and GPIO. Want to prototype the driver for a new sensor? Why bother flashing your Teensy when you can drive it directly from the development machine with an FT232H and the appropriate libraries?

The Shukran is actually a breakout for the “CJMCU FT232H” module available from many fine internet retailers. This board is a breakout that exposes a USB-A connecter on one side and standard 0.1″ headers on the other, with a QFN FT232H and all the passives in the middle. But bare 0.1″ headers (in a square!) require either further breadboarding or a nest of jumper wires to be useful. Enter the Shukran. In this arrangement, the CJMCU board is cheap and handles the SMT components, and the Shukran is easy to assemble and makes it simple to use.

The Shukran gives you LEDs, buttons and switches, and a bunch of pull up resistors (for instance, for I2C) on nicely grouped and labeled headers. But most importantly it provides a fused power supply. Ever killed the USB controller in your computer because you forgot to inline a sacrificial USB hub? This fuse should take care of that risk. If you’re interested in building one of these handy tools, sources and detailed BOM as well as usage instructions are available in the GitHub repo linked at the top.

Unlocking Hidden Potential In IvyBridge ThinkPads

Upgrading the BIOS in older computers is a great way to get a few more years of life out of old hardware or improve its performance. ThinkPads are a popular choice around these parts, but often flashing new firmware involves directly programming the chips themselves. Luckily, there’s a new flashing tool for some older Thinkpads that is much simpler.

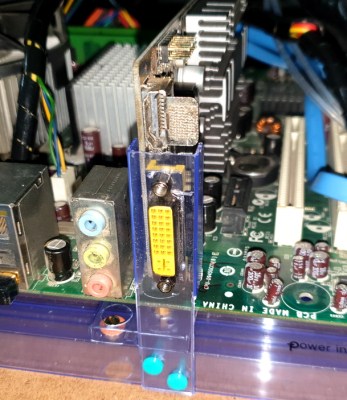
The ThinkPads involved are the xx30 models with IvyBridge processors built around 2012, and a tool called 1vyrain now allows unlocking the bios without disassembling your computer. This means that there’s support for custom BIOS images such as coreboot, and in certain computers this also allows for overclocking, replacing WLAN hardware, and a number of other customizations. It will also allow you to disable the Intel management engine, which is not something we tire of talking about.

If you have one of these older computers floating around, some new RAM, an SSD, and this update will get you well on your way to a computer that feels brand new at virtually no cost, and the upgrades to the BIOS that you can easily make now only add to that. ThinkPads are a popular choice, especially for their hardware, but you do need to make sure that the software on them is trustworthy too.

Header image: Ashley Pomeroy [CC BY-SA 4.0].

A Miniature Laptop You Can Build Yourself

Over the last couple of years, we’ve seen more and more hackers building their own custom computers. We’re not just talking casemods here; enabled by advancements in desktop 3D printing and increasingly powerful boards such as the Raspberry Pi 4, these are machines designed and built from the ground up to meet the creator’s particular set of needs and desires.

A perfect example of this trend is the Rasptop 2.0, a remarkably practical design for a 3D printed miniature laptop. Despite the name, you don’t even need to use the Raspberry Pi if you don’t want to. Creator [Morgan Lowe] has designed the Rasptop to take other single board computers (SBCs) such as the Asus Tinker Board or even the Intel Atom powered Up Board. So whether you want an energy efficient ARM machine running Linux for development, or a mobile Windows box for on the go gaming, you can use the same printed parts.

At the most basic level, the Rasptop 2.0 is just a hollow box with a hinged compartment for a screen mounted on top. You’re free to equip it with whatever hardware you chose. If you’re after maximum runtime you could fill all the free space with batteries, or maybe install multiple hard drives if you’re a data horder in need of a mobile terminal. Even the various SBCs that [Morgan] has tested are really just suggestions. The choice is yours.

Perhaps also our favorite feature of the Rasptop is how he worked a keyboard into the design. Rather than just leaving a big rectangle in the STL for you to shove a mobile keyboard into, the top surface is designed to mount the PCB and membrane keypad of one of those mini wireless keyboards you see on all the import sites. Aside from the fact it’s a good deal chunkier than what we expect from modern mobile devices, it has a very finished and professional overall look.

Of course if you’d rather use all these powerful tools to build a computer that’s somewhat farther off the beaten track, your design could abandon the traditional computer form factors altogether.

Little Hex Tricks Make Little Displays A Little Easier

Depending on the device in hand and one’s temperament, bringing up a new part can be a frolic through the verdant fields of discovery or an endless slog through the grey marshes of defeat. One of the reasons we find ourselves sticking with tried and true parts we know well is that interminable process of configuration. Once a new display controller is mostly working, writing convenience functions to make it easier to use can be very satisfying, but the very first thing is figuring out how to make it do anything at all. Friend of Hackaday [Dan Hienzsch] put together a post describing how to use a particular LED controller which serves as a nice walkthrough of figuring out the right bitmath to make things work, and includes a neat trick or two.

The bulk of the post is dedicated to describing the way [Dan] went about putting together his libraries for a 7-segment display demo board he makes. At its heart the board uses the IS31FL3728 matrix driver from ISSI. We love these ISSI LED controllers because they give you many channels of control for relatively low cost, but even with their relative simplicity you still need to do some bit twiddling to light the diodes you need. [Dan]’s post talks about some strategies for making this easier like preconfigured lookup tables with convenient offsets and masking bits to control RGB LEDs.

There’s one more trick which we think is the hidden star of the show; a spreadsheet which calculates register values based on “GUI” input! Computing the bit math required to control a display can be an exercise in frustration, especially if the logical display doesn’t fit conveniently in the physical register map of the controller. A spreadsheet like this may not be particularly sexy but it gets the job done; exactly the kind of hack we’re huge fans of here. We’ve mirrored the spreadsheet so you can peek at the formulas inside, and the original Excel document is available on his blog.