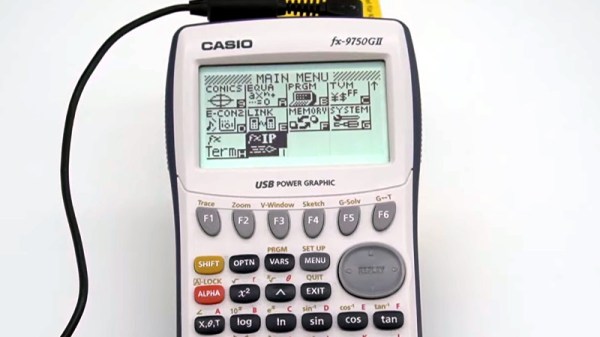
Over the years we’ve become used to seeing some impressive hacks of high-end calculator software and hardware, most often associated with the Z80-based models from Texas Instruments. But of course, TI are far from the only player in this arena. It’s nice for a change to see a Casio receiving some attention. The Casio fx series of graphical calculators can now communicate with the world, thanks to the work of [Manawyrm] in porting a TCP/IP stack to them.
As can be seen in the video below, lurking in the calculator’s menu system is an IRC client, there is also a terminal application and a webserver which you can even visit online (Please be aware that it’s only a calculator though, so an onslaught of Hackaday readers clicking the link may bring it down). The Casio doesn’t have a network interface of its own, so instead, it speaks SLIP over the serial port. In this endeavor, it uses a UART driver sourced from [TobleMiner].
It’s always good to see a neglected platform get some love, and also to note that this is an unusual outing for an SH4 CPU outside its most familiar home in the Sega Dreamcast. It’s a surprise then to read that the SH4 in a calculator of all products, is a custom version that lacks an FPU. This deficiency doesn’t mean it can’t be overclocked though, as this very old Hackaday article describes.
In their heyday, these sorts of devices formed the backbone of audio feedback. Messages from Father Christmas were recorded and could be reached when calling a number. Sound effects in theme parks that were activated when a ride activated some hidden switch. Anything where the sound effect needed to play on some sort of trigger.
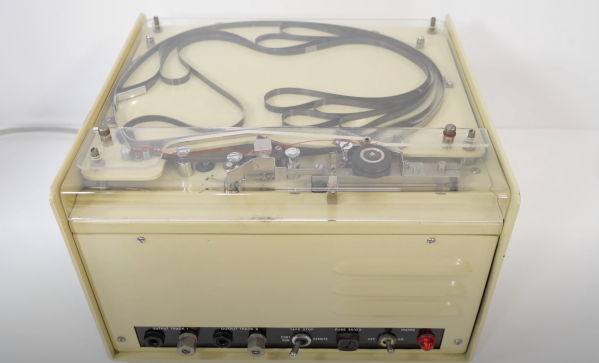
An interesting thing to note is that this is not a reel-to-reel system. The tape is of the standard 1/4″ magnetic variety, perhaps a little thicker for extra durability. It instead sits in the top of the machine; coiling and uncoiling like a two-dimensional lava lamp. Additionally, there’s nothing clever about detecting the beginning or end of the audio loop (as there were four copies of the same recording on this particular tape). In fact, everything about this machine speaks of reliability as the most important design consideration. A reel-to-reel system would just add more points of failure.
After a little bit of diagnosing, [Techmoan] managed to get the device running again and found the message on the tape to be from the phone system, informing the listener that the line is no longer in service. This banal message is perhaps the best testament to the ubiquity of devices like these.
Good news, everyone! The results of the Reinvented Retro contest are in, and the creators of these three groovy projects have each won a $200 online shopping spree to Digi-Key. We asked you to gaze deeply into your stuff piles and come up with a way to modernize a cool, old piece of hardware, and we left it up to you to decide how cool and how old.
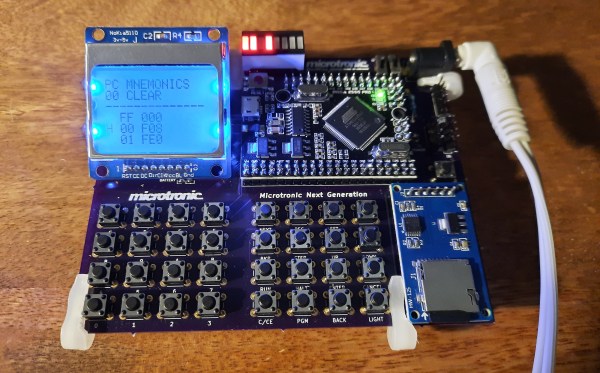
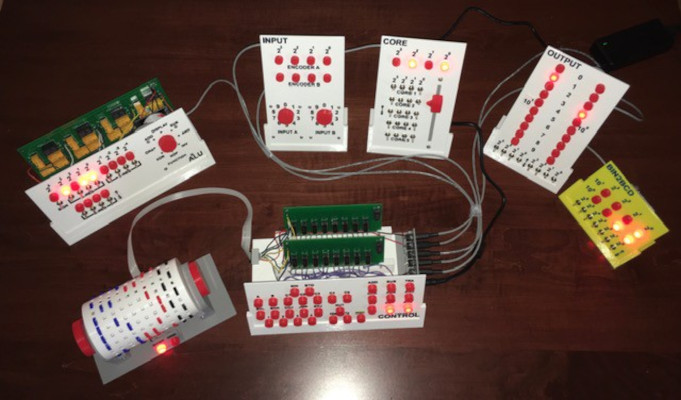
No matter your personal vintage, you have probably used or even built an educational computer like [Michael Wessel]’s next-generation Microtronic. This is a re-creation of an early 1980s West German 4-bit microprocessor trainer called the Busch 2090 Microtronic Computer System. You may have never heard of it, but [Michael] swears it’s one of the best ever made. Years ago, [Michael] made a talking Arduino-based Microtronic emulator and has grown the concept into a prize-winning system that uses an ATMega2560 Pro Mini and a Nokia 5110 display. As a bonus, it doubles as a cassette interface emulator that plugs into the 2090’s expansion port. Take some time to dive into the YouTube videos or go straight for the gerbers and make your own.
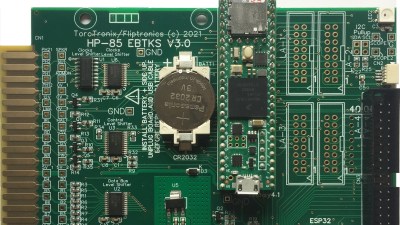
EBTKS – a tape drive replacement for HP Series80 computers
Resurrected MK-52 calculator now does things it could never have dreamed of
Retrocomputing fans will love EBTKS, a project that seeks to circumvent the disintegrating tape drives in HP85A and other early 1980s HP computers by emulating them and delivering 20,000 virtual tapes via SD card. The project began as a solid state replacement using a Teensy and an ESP32, but [Philip] and the team realized they could do a whole lot more than that. The full list of features includes 70 new keywords and both disk and tape drive emulation. Everything is explained in detail on the project’s main documentation site, where you’ll also find a handy user guide.
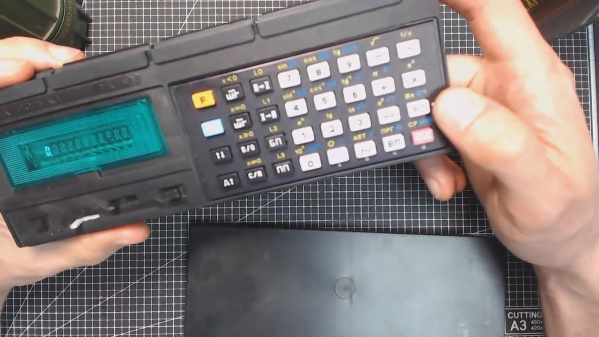
If you have a soft spot for old Soviet gear, check out [ptrav]’s MK-52 Resurrection. [ptrav] took an early 90s-vintage calculator with a busted vacuum fluorescent display and breathed new life into it with an ESP32 and a 320×240 TFT screen. The point isn’t to merely resurrect the MK-52, but rather to create a phoenix of programmable Soviet calculating power that rises from the ashes and realizes its hardware unleashed potential. As part of the software development path, [ptrav] also built a fully-functional simulator in C# which you can check out on GitHub.
A Most Honorable Mention
It’s always so difficult to pick winners from among all the amazing projects we see. For this contest, we’ve chosen [Michael Gardi]’s WDC-1 — aka the Paperclip Computer — for an honorable mention. And that means more than just a published pat on the back — [Michael] has won a $25 gift card for Tindie. Way to go, [Michael]!
This WDC-1 is a bit of an inverse take on the reinvented retro concept. Instead of new tech in an old box, [Michael] employed modern PCB fabrication and 3D printing to house the upgraded homebrew guts of this 50+ year-old computer design.
Congratulations to all the winners, and a big thank you to all 138 entrants for your faux nostalgia-inspiring builds. Take some time this weekend to check them out, and get your alternate reality on.
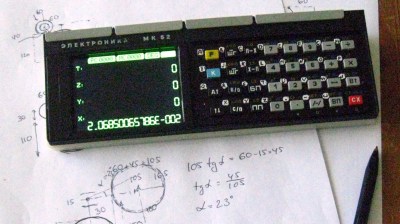
Say what you want about Soviet technology, but you’ve got to admit there was a certain style to Cold War-era electronics. Things were perhaps not as streamlined and sleek as their Western equivalents, but then again, just look at the Nixie tube craze to see where collectors and enthusiasts stand on that comparison.
One particularly interesting artifact from the later part of that era was the lovely Elektronika MK-52 “microcalculator”. [Paul Hoets] has done a careful but thorough teardown of a fine example of this late-80s machine. The programmable calculator was obviously geared toward scientific and engineering users, but [Paul] relates how later versions of it were also used by the financial community to root out banking fraud and even had built-in cryptographic functions, which made encrypting text easy.
[Paul] has put together a video of the teardown, detailing the mostly through-hole construction and the interesting use of a daughter-board, which appears to hold the high-voltage section needed to drive the 11-character VFD tube. The calculator appears to be very well cared for, and once reassembled looks like it would be up for another ride on a Soyuz, where once it served as a backup for landing calculations.
We love the look of this machine and appreciate [Paul]’s teardown and analysis. But you say that the Cyrillic keyboard has you stumped and you need a bilingual version of the MK-52? That’s not a problem.
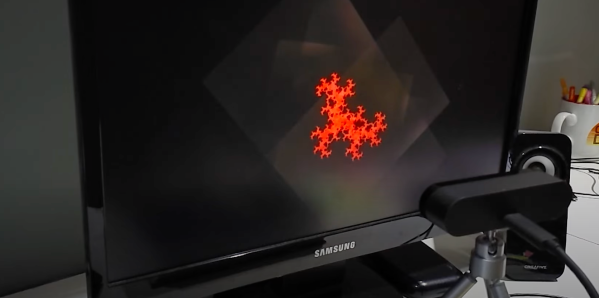
The mesmerizing properties of fractals are surprising as their visual complexity often arises from simple equations. [CodeParade] set out to show how simple a fractal is by creating them using technology from the 1930s. The basic idea is based on projectors and cameras, which were both readily available and widely used in television (CRT projectors were in theaters by 1938, though they weren’t in color until the 1950s).
By projecting two overlapping images on the wall, pointing a camera at the resulting image, and then feeding it back into the projectors, you get some beautiful fractals. [CodeParade] doesn’t have a projector, much less two. So he did what any hacker might do and came up with a clever workaround. He made a simple app that “projects” onto his monitor and all he has to do is point an external webcam at the screen. The resulting analog fractals are quite beautiful and tactile. Rather than tweaking a variable and recompiling, you simply just add a finger or move the camera to introduce new noise that quickly becomes signal.
[Ken Shirriff]’s analysis of a fascinating high-tech paperweight created by GE at the height of the space race is as informative as it is fun to look at. This device was created to show off GE’s thin-film electronics technology, and while it’s attractive enough on its own, there’s an added feature: as soon as the paperweight is picked up, it begins emitting a satellite-like rhythmic beep. It is very well-made, and was doubtlessly an impressive novelty for its time. As usual, [Ken] dives into what exactly makes it tick, and shares important history along the way.
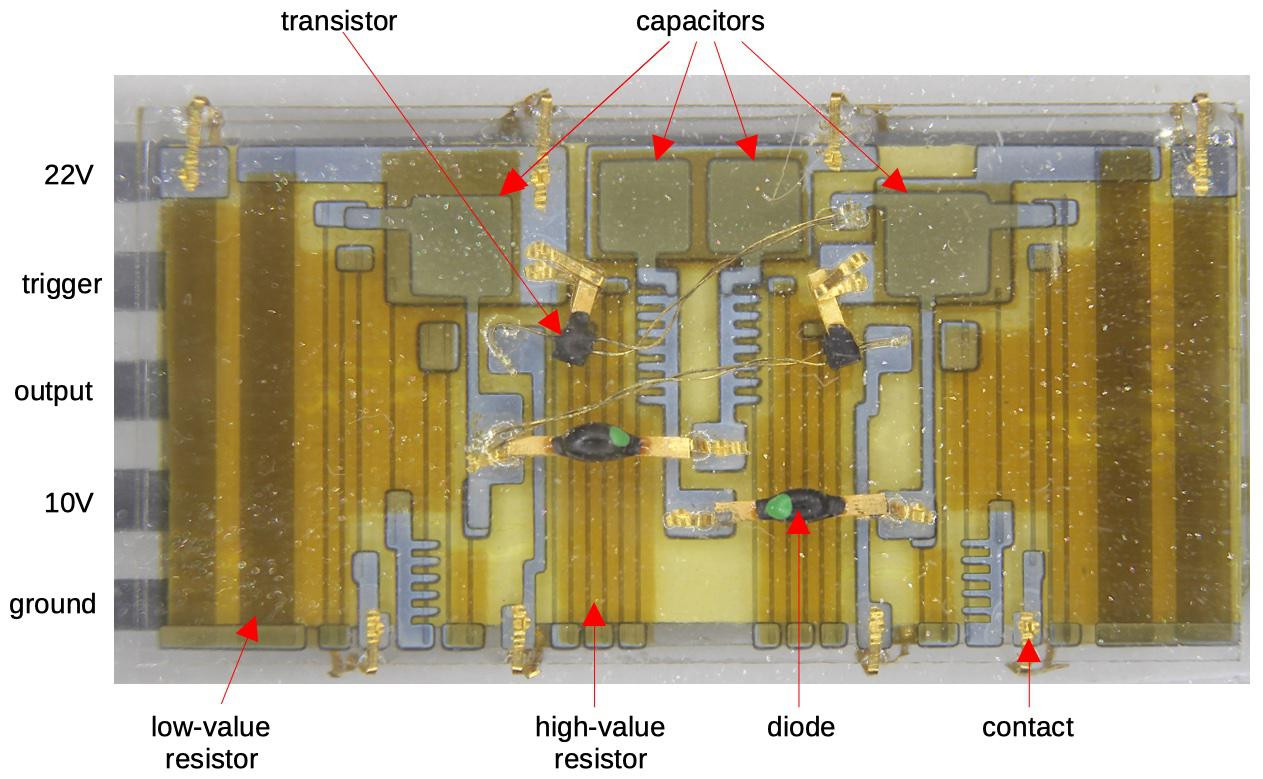
Thin-film module with labels, thanks to [Ken]’s vintage electronics detective work. Click to enlarge.In the clear area of the paperweight is a thin-film circuit, accompanied by a model of an early satellite. The module implements a flip-flop, and the flat conductors connect it to some additional components inside the compartment on the left, which contains a power supply and the necessary parts to create the beeps when it is picked up.
Thin-film electronics reduced the need for individual components by depositing material onto a substrate to form things like resistors and capacitors. The resulting weight and space savings could be considerable, and close-ups of the thin film module sure look like a precursor to integrated circuits. The inside of the left compartment contains a tilt switch, a battery, a vintage earphone acting as a small speaker, and a small block of components connected to the thin-film module. This block contains two oscillators made with unijunction transistors (UJTs); one to create the beep, and one to control each beep’s duration. The construction and overall design of the device is easily recognizable, although some of the parts are now obsolete.
If you’d like a bit more detail on exactly how this device worked, including circuit diagrams and historical context, be sure to click that first link, and pay attention to the notes and references at the end. One other thing that’s clear is that functional electronics embedded in clear plastic shapes simply never go out of style.
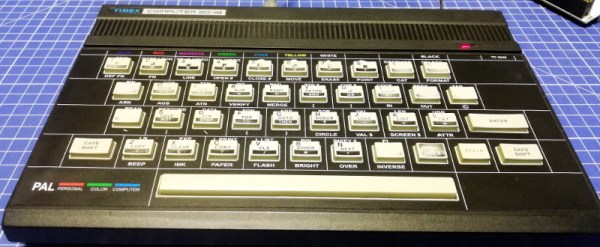
The 1984 Timex Computer 2048 that [Drygol] recently got his hands on was in pretty poor shape. Not only did it have the mangled exterior that comes from several decades of hard use and furious typing, but the internals appeared to be shot as well, with the machine showing nothing but vertical lines when powered up. Thankfully, this retro computer virtuoso was more than up to the challenge of bringing it back from the brink.
After a good cleaning and the installation of a reproduction front panel, the Timex was already looking much better. Unfortunately [Drygol] says he doesn’t currently have the equipment necessary to touch up the graphics and lettering on the key caps, but the fact that he had to qualify that statement with “currently” has us all sorts of excited to see what he’s planning down the line.
A bevy of fresh chips.
Of course beauty is only skin deep, and this particular TC-2048 was still bad to the bone. [Drygol] had a hunch its Z80 processor was dead, but after swapping it and its socket out, the machine still wouldn’t start. Though he did note that the garbled graphics shown on the screen had changed, which made him think he was on the right track. He then replaced all the RAM on the board, but that didn’t seem to change anything.
There isn’t a whole lot else to go wrong on these old machines, so the final step was to try and replace the ROM. Sure enough, after installing a new Winbond W27C512 chip with the appropriate software burned onto it, the nearly 40 year old computer sprang back to life.