E3D has introduced their latest answer to multimaterial printing at the Midwest RepRap Festival this weekend. Their research project into a 3D printer with the ability to change toolheads is the latest advancement in multimaterial printing. It’s a work of engineering brilliance, and they’ve already written up their teardown on how this all came to be.
While milling machines and other fancy industrial CNC have had tool changing for decades, and the subject has been pursued by the RepRap community for a few years now, it really hasn’t caught on. The question then is, what is tool changing on a 3D printer good for? The answer is multimaterial printing, and doing it in a way that doesn’t have the downsides of current methods of printing with multiple materials.
There are three current methods of printing in multiple materials. The first is putting two nozzles on the same extruder, but this has the downside of one nozzle interfering with the other. The second is pushing two different kinds of plastic through the same nozzle, such as in the E3D Cyclops, or Prusa’s multimaterial upgrade. This has the downside of cross-contamination, and you can’t print in materials that require different temperature profiles. The third method is simply using multiple carriages on the same machine, such as the lovely stuff from Autodesk or Project Escher. This last method is horrifically complex.
The answer the problem of multimaterial printing is hot-swapping toolheads, but to do this you need precision and repeatability. The folks at E3D have been working on this for years, and I remember seeing some experiments with electro-permanent magnets a few MRRFs ago, but now they finally have a solution. The answer is simply a cam that’s turned by a cheap hobby servo. This is kinematic coupling that allows the carriage to clamp onto a toolhead with 5 μm precision.
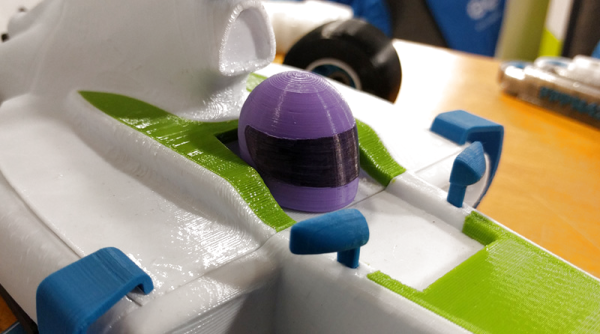
Right now, E3D’s experiments in toolchanging 3D printers have culminated in a single 3D printer featuring their toolchange carriage, four toolheads, some amazing linear rails, and a CoreXY configuration. The prints that are coming off of this printer are spectacular. There are four-color Benchies, and the drivetrain of a remote-controlled car with gears printed in Taulman plastic and a driveshaft printed in ABS. The car was a single print made with multiple hotends, demonstrating most of the problems of multimaterial printing disappear with the E3D swapping toolhead printer.


If you’re interested in purchasing one of these printers, E3D currently has a survey for potential buyers and a deposit queue for any future purchases.