Logic Noise: Ping-pong Stereo, Mixers, And More

So far on Logic Noise, we’ve built up a bunch of sound-making voices and played around with sequencing them. The few times that we’ve combined voices together, we’ve done so using the simplest possible passive mixer — a bunch of resistors. And while that can work, we’ve mostly just gotten lucky. In this session, we’ll take our system’s output a little bit more seriously and build up an active mixer and simple stereo headphone driver circuit.

For this, we’ll need some kind of amplification, and our old friend, the 4069UB, will be doing all of the heavy lifting. Honestly, this week’s circuitry is just an elaboration of the buffer amplifiers and variable overdrive circuits we looked at before. To keep things interesting we’ll explore ping-pong stereo effects, and eventually (of course) put the panning under logic-level control, which is ridiculous and mostly a pretext to introduce another useful switch IC, the 4066 quad switch.

At the very end of the article is a parts list for essentially everything we’ve done so far. If you’ve been following along and just want to make a one-time order from an electronics supply house, check it out.
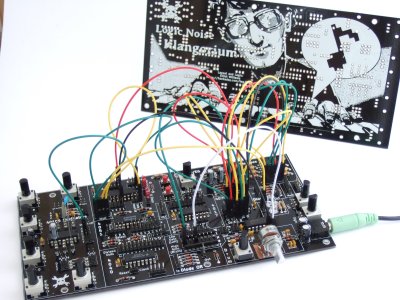
klangoriumIf you’re wondering why the delay in putting out this issue of Logic Noise, it’s partly because I’ve built up a PCB that incorporates essentially everything we’ve done so far into a powerhouse of a quasi-modular Logic Noise demo — The Klangorium. The idea was to take the material from each Logic Noise column so far and build out the board that makes experimenting with each one easy.

Everything’s open and documented, and it’s essentially modular so you can feel free to take as much or as little out of the project as you’d like. Maybe you’d like to hard-wire the cymbal circuit, or maybe you’d like to swap some of the parts around. Copy ours or build your own. If you do, let us know!

OK, enough intro babble, let’s dig in.

Continue reading “Logic Noise: Ping-pong Stereo, Mixers, And More” →

Gates To FPGAs: TTL Electrical Properties

On the path to exploring complex logic, let’s discuss the electrical properties that digital logic signals are comprised of. While there are many types of digital signals, here we are talking about the more common voltage based single-ended signals and not the dual-conductor based differential signals.

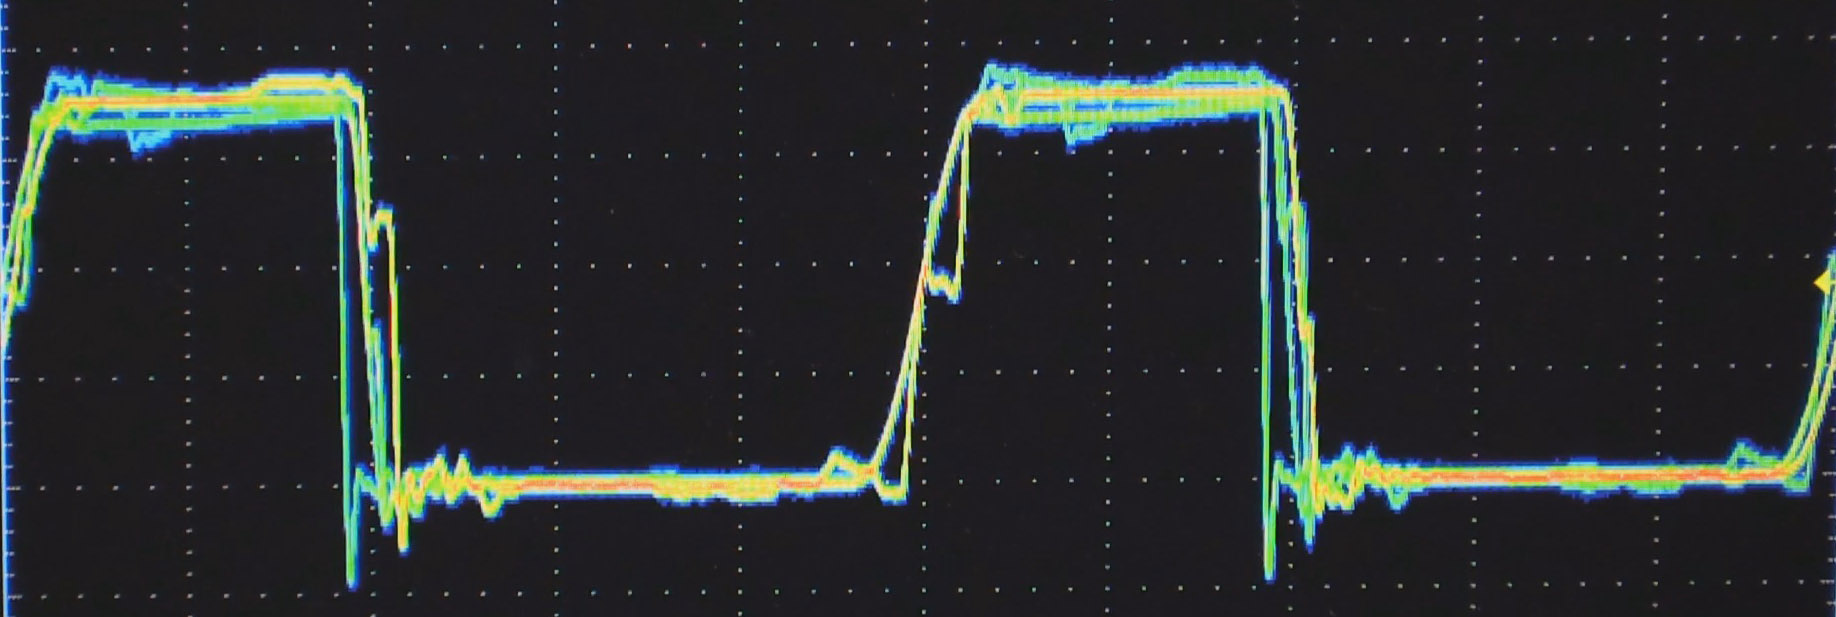
Simulated "Real Life"
Single-ended Logic Signal

I think of most logic as being in one of two major divisions as far as the technology used for today’s logic: Bipolar and CMOS. Bipolar is characterized by use of (non-insulated gate) transistors and most often associated with Transistor Transistor Logic (TTL) based logic levels. As CMOS technology came of age and got faster and became able to drive higher currents it began to augment or offer an alternative to bipolar logic families. This is especially true as power supply voltages dropped and the need for low power increased. We will talk more about CMOS in the next installment.

TTL was a result of a natural progression from the earlier Resistor Transistor Logic (RTL) and Diode Transistor Logic (DTL) technologies and the standards used by early TTL became the standard for a multitude of logic families to follow.

Continue reading “Gates To FPGAs: TTL Electrical Properties” →

True Random Number Generator For A True Hacker

How can you generate random bits? Some people think it’s not easy, others will tell you that it’s pretty damn hard, and then there are those who wonder if it is possible at all. Of course, it is easy to create a very long pseudorandom sequence in software, but even the best PRNG (Pseudorandom Number Generator) needs a good random seed, as we don’t want to get the same sequence each time we switch on the unit, do we? That’s why we need a TRNG (True Random Number Generator), but that requires special hardware.

Some high-end microprocessors are equipped with an internal hardware TRNG, but it is, unfortunately, not true for most low-cost microcontrollers. There are a couple of tricks hackers use to compensate. They usually start the internal free running counter and fetch its contents when some external event occurs (user presses a button, or so). This works, but not without disadvantages. First, there is the danger of “locking” those two events, as a timer period may be some derivative of input scan routine timing. Second, the free running time (between switching on and the moment the unit requests a random number) is often too short, resulting in the seed being too close to the sequence start, and thus predictable. In some cases even, there is no external input before the unit needs a random seed!

Despite what has already been discussed, microcontrollers do have a source of true randomness inside them. While it might not be good enough for crypto applications, it still generates high enough entropy for amusement games, simulations, art gadgets, etc.

Continue reading “True Random Number Generator For A True Hacker” →

Talking Big Changes At SparkFun With Nathan Seidle

SparkFun, you know them, you love them. They list themselves as “an online retail store” but I remember them for well-designed breakout boards, free-day, videos about building electronics, and the Autonomous Vehicle Competition. This week SparkFun turned my head for a different reason with the announcement that [Nathan Siedle], founder and CEO will be stepping down. He’s not leaving, but returning to the Engineering department while someone else takes the reigns. I spoke with him yesterday about what this means for him, the company, and what SparkFun has planned for the future.

Stepping Down Without Saying Goodbye

[Nate] founded Sparkfun in 2003 while still working on his Electrical Engineering degree from the University of Colorado Boulder. He cites wanting to return to his engineering roots as the reason for his title shift, which won’t happen for at least 9 or 10 months. It’s the concept of leaving the CEO position without leaving the company that raises many questions in my mind.

Continue reading “Talking Big Changes At SparkFun With Nathan Seidle” →

An Interview With The CEO Of MakerBot

A few days ago, we posed a question to the Hackaday community. If you could ask the CEO of MakerBot a question, what would it be?

It’s an interesting proposition; there is no company serving the maker community – and those of us who refuse to call ourselves part of the maker community – more hated than MakerBot. They’ve patented ideas uploaded to Thingiverse. They’ve turned their back on the open hardware community they grew out of, They’re undercutting their own resellers, and by all accounts, they don’t know how to make a working extruder. MakerBot was the company that would show the world Open Hardware could be successful, but turned into a company that seemed to reject Open Hardware and Open Source more than any other.

Needless to say, the readers of Hackaday responded. Not with actual questions for the MakerBot CEO, mind you, but oh how you responded. This effort by MakerBot was likened to the hail Mary thrown by Radio Shack  a few years ago. We know how that turned out.

Nevertheless, questions were collected, The MakerBot CEO was interviewed by Lady Ada, and a summary compiled. You can check that interview, originally posted on the Adafruit blog, below.

Continue reading “An Interview With The CEO Of MakerBot” →

Stuff The Ballot Boxes For The Best Hackaday Prize Entry

Last week we started the first round of community voting for The Hackaday Prize, where everyone on Hackaday.io has a voice in choosing the best project for the current theme of the week. To encourage people to vote, we’re giving away a $1000 gift card to The Hackaday Store to one person on hackaday.io if they have voted in the latest round of community voting. How are we doing that? A very, very large die and SQL queries:

https://www.youtube.com/watch?v=j6kbwU76wwA

No, no one won this week. That’s okay, because we’re giving t-shirts away to three random people who did vote. This week, [cgapeart], [Jeff], and [devonelliott] are getting t-shirts from the Hackaday Store, just because they were cool enough to vote.

We’re going to keep this round of community voting going for another week. Everyone registered on Hackaday.io gets 50 votes for each round of voting, and every Friday (around 20:00 UTC), we’ll randomly select one person registered on Hackaday.io. If that person has voted, they get a $1000 gift card for The Hackaday Store. If they haven’t voted — a t-shirt. They’re nice t-shirts, but I’d rather have the gift card.

All you have to do for a chance to win a $1000 gift card is head over to the Community Voting Page and pick which project is most likely to be widely used. There’s no wrong answer; all you have to do is decide between two projects. If you only use up one vote, you’re in the running for a $1000 gift card.

I’ll be doing another round of random, fair die rolls and SQL queries next Friday. Until then, VOTE!

How To Build Beautiful Enclosures From FR4 — Aka PCBs

Most hobbyists say that it is easier to build a functional prototype of an electronic device, than to make the enclosure for it. You could say that there are a lot of ready-made enclosures on the market, but they are never exactly what you need. You could also use a 3D printer to build a custom enclosure, but high-end 3D printers are too expensive, and the cheaper ones produce housings which are often not robust enough, and also require a lot of additional treatment.

Another way is to build the enclosure out of FR4, a material which is commonly used in PCB production. Such enclosures are low-cost, with thin walls but yet very strong, nice looking, pleasant to the touch and have excellent thermal and moisture stability. FR4 offers some more possibilities – efficient wiring with no wires inside the housing, integrated UHF or SHF antennas or RFID coils, capacitive switches, electrical shielding, selective semi-transparency, water or air tightness, and even integration of complex mechanical assemblies.

Here I shall explain the process of building those “magic” enclosures. It is based on nearly fifty years of personal experience and more than a hundred enclosures, built for most of my projects. Here are two examples – this case for a hardware password manager is just a few centimeters long, while the other one (protective transportation cover for my son’s synthesizer) measures 125cm (about 49 inches), and yet both of them are strong enough to withstand a grown man standing on top of them.

The global approach is simple – you take the sheet of single-sided copper clad FR4, cut it and solder the parts together. That sounds simple, but there are a lot of details which should be met if you want to get top results. Please read about them carefully. You might be tempted to skip some of the steps described here, but if you do so, you will most likely end up being disappointed with the results.

Continue reading “How To Build Beautiful Enclosures From FR4 — Aka PCBs” →