Since most people are carrying a camera-equipped computer in their pockets these days, QR codes can be a great way to easily share short snippets of information. You can put one on your business card so people can quickly access your contact information, or on your living room wall with your network’s SSID and encryption key. The design of QR codes also make them well suited to 3D printing, and thanks to a new web-based tool, you can generate your own custom STL in seconds.
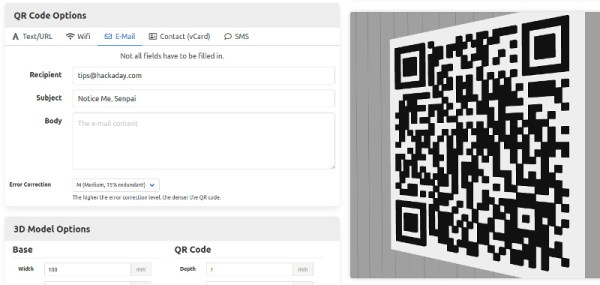
Created by [Felix Stein], the website provides an easy to use interface for the many options possible with QR codes. Obviously you have full control over the actual content of the code, be it a simple URL or a something more specific like a pre-formatted SMS message. But you can also tweak physical parameters like size and thickness.
Once you’re happy with the 3D preview, you can have the website generate an STL for either single or multi-extrusion printers. For those of us who are puttering along with single extruder machines, you’ll need to swap the filament color at the appropriate layer manually. With so many variables involved, you’ll also need figure out which layer the swap should happen on your own.
Incidentally, this is an excellent example of where STL leaves something to be desired. When using a format like 3MF, color and material information could be baked right into the model. Once opened in a sufficiently modern slicer, all the tricky bits would automatically sorted out. Or at least, that’s what Prusa Research is hoping for.