When the need for speed overcomes you, thoughts generally don’t turn to 8-bit computers. Sure, an 8-bit machine is fun for retro gameplay and reliving the glory days, and there certainly were some old machines that were notably faster than the others. But raw computing power isn’t really the point of retrocomputing.
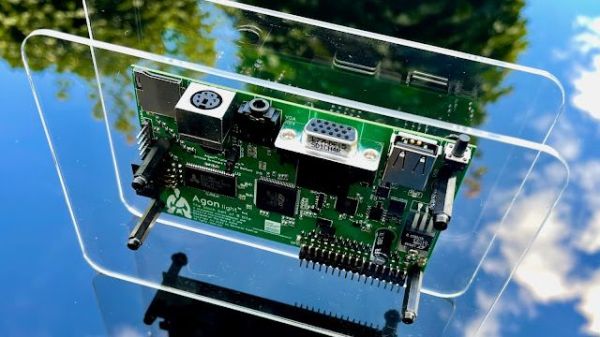
Or is it? [Bernardo Kastrup] over at The Byte Attic has introduced an interesting machine called the Agon Light, an 8-bit SBC that’s also a bit like a microcontroller. The machine has a single PCB that looks about half as big as an Arduino Uno, and sports some of the same connectors and terminals around its periphery. The heart of the Agon Light is an eZ80 8-bit, 18.432 MHz 3-stage pipelined CPU, which is binary compatible with the Z80. It also has an audio-video coprocessor, in the form of an ESP32-Pico-D4, which supports a 640×480 64-color display and two mono audio channels. There’s no word we could find of whether the ESP32’s RF systems are accessible; it would be nice, but perhaps unnecessary since there are both USB ports and a PS/2 keyboard jack. There’s also a pin header for 20 GPIOs as well as I2C, SPI, and UART for serial communication.
The lengthy video below goes into all the details on the Agon Light, including the results of benchmark testing, all of which soundly thrash the usual 8-bit suspects. The project is open source and all the design files are available, or you can get a PCB populated with all the SMD components and just put the through-hole parts on. [Bernardo] is also encouraging people to build and sell their own Agon Lights, which seems pretty cool too. It honestly looks like a lot of fun, and we’re looking forward to seeing what people do with this.
Continue reading “This Snappy 8-Bit Microcomputer Brings The Speed To Retrocomputing”