Real-time Robotic Arm Control With Blender

robotic_arm

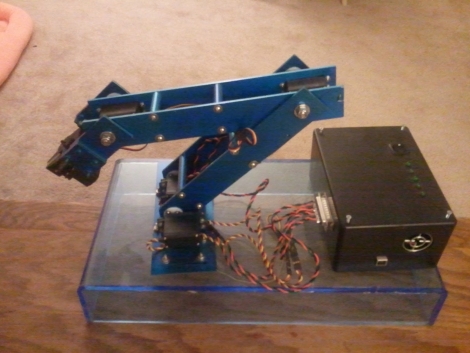
Last year, [Justin Dailey] was coming down the home stretch of his senior year as a Computer Engineering student and needed to build a final design project. He always wanted to construct a robotic arm, and figured that there was no better way to legitimize such a project, than to claim that it was “homework”.

While he originally wanted to control the arm with a joystick, he had been messing with Blender quite a bit leading up to his final project, and thought it would be pretty cool to let Blender do the work. He started out by testing his ability to control a single servo with Blender, then slowly increased the complexity of the project. He prototyped the arm using cardboard, and satisfied with his progress thus far, began constructing the arm out of aluminum.

Once he had all six of his servos attached to the arm’s joints and wired to his Roboduino, he got busy constructing a 3D model in Blender. Using a few Python scripts, the movements inside Blender are translated to serial data in real-time, which is relayed to the Roboduino in order to control the arm.

Check out his site if you get a chance – there’s plenty of code to be had, as well as several videos of the arm in various stages of construction and testing.

Internet-controlled Robotic Arm

internet_robotic_arm

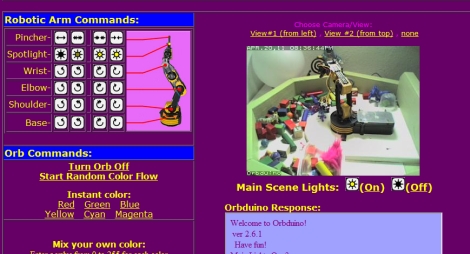
[Trav] was pondering virtual reality and decided it was no longer all that it was cracked up to be, so he created an experience in what he calls “Remote Reality”. While we have seen many installations over the years that allow people to remotely interact with objects across the globe, his Orbduino project consists of more than simply toggling lights on and off (though he’ll let you do that too).

In his house, he has set up a robotic playground of sorts that allows anyone who visits a chance to play around with the robotic arm he has installed there. The arm is situated in a pen filled with random objects which can be stacked and moved around. He also promises to show you something fun, provided you can guide the arm to pick up an object and hold it against the target positioned outside the pen.

He didn’t forget the obligatory remote light controls either. You can turn the overhead lights on and off, as well as control a multi-colored orb situated in the corner of the room. Most of the project’s interface is done with an Arduino Mega, which handles the robot arm interface, as well as messing with the light installations.

If you have some free time, swing by his site and give the robotic arm a try. It’s a fun little time waster that you will likely enjoy.  Just make sure to take it easy on his web server!

TI Adds Some Linux Support For Evalbot – We’ve Got Hardware Coupon Codes For You!

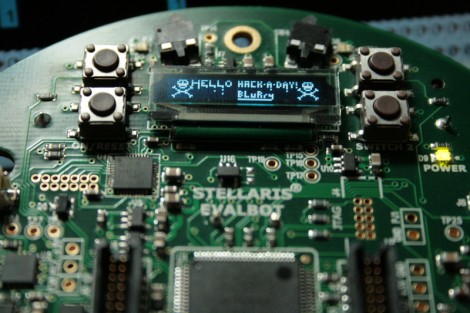
In case you missed it, Texas Instruments sells a little robot called the Evalbot as a development platform for ARM Cortex-M3 microcontrollers. Since its release we’ve seen a few hacks on the hardware; the image above is a proof of concept for developing for the device under Linux. We have criticized TI in the past for not natively supporting Linux with their IDEs. We’re not sure how it will play out, but they have added new software package options to go along with the hardware. You’ll notice on their PR page that there is now an option to use CodeSourcery. It is a trial of the full version, but at least it is a step in the GNU direction from their previous offering.

The Hackaday team has been talking off and on with TI about the hardware. We’re happy to say that they’ve been listening to the Internet community about their likes and dislikes; following various online groups that have sprouted up to talk about Evalbot projects. It sounds like they’re thinking about hosting a contest using the hardware. So maybe you want to get your hands on one so that you can familiarize yourself and hit the ground running if/when that contest starts. You’re in luck, we can help save you a few bucks.

The first time that Texas Instruments tried out a $125-off coupon code the deal got away from them. It had been meant for attendees of the ESC Boston conference. They honored the deals that went through before the proverbial run-on-the-bank got shut down. This time around they’re using serialized deal codes to limit the number of give-aways. We’ve got 200 of them just waiting for our loyal readers to use. One code will let you purchase one Evalbot for just $25 (instead of $150).

Please take a moment to decide if you actually want (and will use) one of these robots, and decide if you are willing to shell out the $25 to order it. You see, we don’t want this deal going to waste. If you decide this is for you, send an email requesting a code to:We’re all out! We’ll dish out the deal on a first-emailed-first-served basis. We will update this post when all 200 have been claimed.

We will not tolerate anyone gaming the system and so we reserve the right to disqualify any email submission for any reason in an attempt to maintain some semblance of fairness. Also… if you’re planning to pick this up just to resell it for cash you’re a loser.

[update: Those who emailed us requesting a code should begin receiving replies this evening or tomorrow.]

[Update 2: here is the specific bot you should be trying to buy. ]

Earthquake Alert System


[Roteno’s] submission for the 555 timer design contest is an Internet connected earthquake alert system. It monitors the USGS website for earthquake data and plays a tune when an earthquake occurs. The data is available as a feed in the form of a TXT file which is pretty easy to parse using cURL. He chose an LPCXpresso board (which is an ARM development platform that can run a Linux kernel) along with an XPORT module to handle the Ethernet traffic.

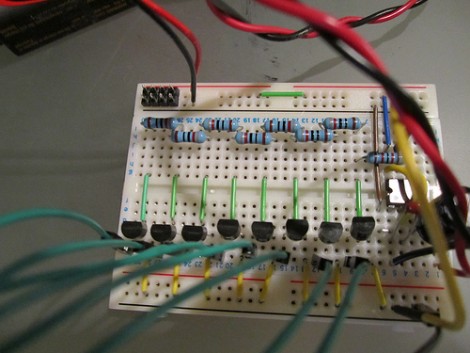
So where does the 555 timer see some action? It is responsible for playing the tone when an earthquake is detected. But playing just one pitch isn’t much fun. Instead, [Roteno] built the circuit above which creates a resistor network switched by a series of transistors. This way he can use GPIO from the microcontroller to choose different pitches. Check out the video after the break to hear the results. At power-up all eight pitches are played as a test, and the alert sound varies in pitch and tempo based on the magnitude of the earthquake.

Continue reading “Earthquake Alert System”

Free (…as In ‘free Beer’) ARM Kit

NXP holds a lot of market share for their ARM based solutions as it is. That’s why we were a little surprised when we found a link on their website announcing that they were giving away free LPCXpresso development boards, based on their Cortex-M0 line.

Catches? Unfortunately there are a few to get the board shipped and running. In order to do so, you must…

  • register with a corporate email address
    …the promo is targeted at engineers
  • use the crippled IDE supplied with the board
    …due to hard to find (non-existent?) documentation for the integrated LPC-Link
  • upload an original video of the physical destruction of a competing board to the NXP website

While killing your Arduino may not sound like the most fun, some qualified readers may be interested in moving up to 32-bits for a price that is hard to beat.

What Development Board To Use? (Part Two)

We asked for responses to our last Development Board post, and you all followed through. We got comments, forum posts, and emails filled with your opinions. Like last time, there is no way we could cover every board, so here are a few more that seemed to be popular crowd choices. Feel free to keep sending us your favorite boards, we may end up featuring them at a later date!

Continue reading “What Development Board To Use? (Part Two)”

Laptop LCD Reused In Beagleboard Project

This daughterboard lets [Matt Evans] drive a laptop LCD using a Beagleboard. Apparently the Beagleboard gained a VGA header when it moved to revision C but [Matt’s] working with revision B4 which is why he had to do all of that ninja soldering with the blue wires. The driver board itself is a thing of beauty, hosting a DS90C363 LVDS serialiser as well as some buffer chips that handle level conversion for it. He’s also included an ATmega48 so that he has some options for future improvements.

The LCD is mounted in a custom acrylic case, with Beagleboard and driver board taped to the back of it. There’s RS232 and a USB hub which opens up the possibility of using a WiFi dongle for communications. So far he doesn’t have much functionality other than displaying images on the screen but there is some talk about using a touchpad for control. We’d love to see a touchscreen overlay, transforming the build into a proper ARM-based tablet.