Hunting Rogue Access Points With The ESP8266

Cantennas outperform every consumer-grade Wi-Fi antenna I’ve had the bad luck of purchasing. Cantenna is a mashup of ‘can’ and ‘antenna’ creating the nickname for a directional waveguide antenna built from re-purposed steel cans. For anyone who has yet to build one, it makes an excellent afternoon project. Here are some build instructions and technical details. I went beyond that, and ended up catching a rogue WiFi access point in the process.

When I needed to extend the range of some ESP8266-based sensors, cantennas were right at the top of my list of things to try. It was easy enough to build one, attach it to a Wemos Mini D1 Pro, and call the job done… leaving me with plenty of time to over-engineer it, and I ended up down a bit of a rabbit hole.

The first thing I did was stop using cans. Canned goods are not only expensive in my corner of the world, but more importantly don’t lend themselves that well to making a standardized antenna in volume. I can also only eat so many beans! The latter reason alone is enough to consider an alternative design like a modular dish reflector.

Continue reading “Hunting Rogue Access Points With The ESP8266”

The WiFi Repeater You Probably Have On Your Bench

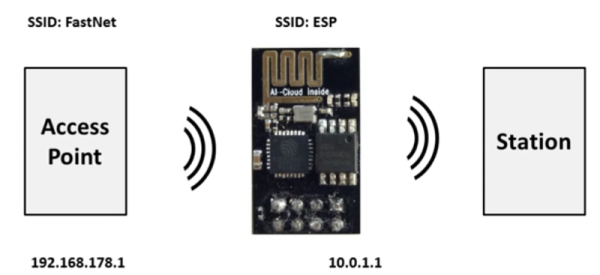
Few things are as frustrating as a WiFi signal that drops in and out. On a public network it is bad enough but at home? Even if you can live with it, your cohabitants will certainly impune your technical abilities if they don’t have solid WiFi.  One solution is a WiFi repeater. You can buy one, of course. But you can also make one out of an ESP8266 and some code from GitHub. There is also a video about the project, below.

[Martin Ger’s] code implements NAT, so it isn’t a true WiFi repeater, but more of a bridge or router. Of course, that means performance isn’t stellar, but tests show it can sustain about 5 Mbps, which isn’t bad for a little board that costs a couple of bucks. There is a limit of 8 clients, but that’s more than enough for a lot of cases. Even if you don’t want to use it as a router, it has a mesh mode that could be a basis for some interesting projects all by itself.

Continue reading “The WiFi Repeater You Probably Have On Your Bench”

Control A Quadcopter Over Websockets

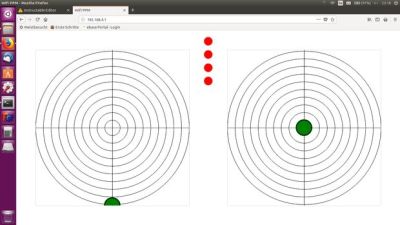
The interface

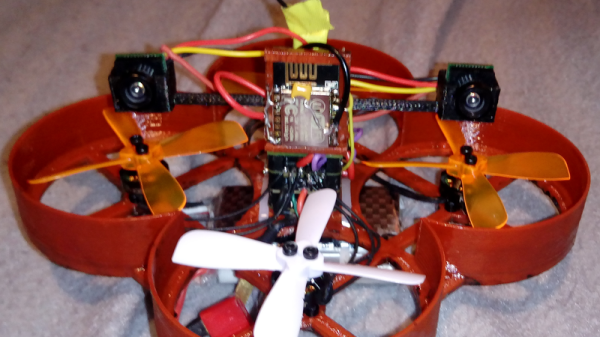
Everyone’s favourite IOT module, the ESP8266, is often the go-to choice for any project that needs quick and cheap control over the web. [Andi23456] wanted to control his quadcopter using the luxury of his mobile phone and thought permanently tethering an ESP12-E module to the quadcopter was exactly what he required.

The ESP8266, really showcasing its all-round prowess, hosts both a web server for a HTML5 based joystick and a Websockets server so that a client, such as a phone, could interact with it over a fast, low latency connection. Once the ESP8266 receives the input, it uses interrupts to generate the corresponding PPM (Pule Position Modulation) code which the RC receiver on the quadcopter can understand. Very cool!

What really makes this realtime(ish) control viable is Websockets, a protocol that basically allows you to flexibly exchange data over an “upgraded” HTTP connection without having to lug around headers each time you communicate. If you haven’t heard of Websockets you really should look really check out this library or even watch this video to see what you can achieve.

Using Gmail With OAUTH2 In Linux And On An ESP8266

One of the tasks I dread is configuring a web server to send email correctly via Gmail. The simplest way of sending emails is SMTP, and there are a number of scripts out there that provide a simple method to send mail that way with a minimum of configuration. There’s even PHP mail(), although it’s less than reliable.

Out of the box, Gmail requires OAUTH2 for authentication and to share user data, which has the major advantage of not requiring that you store your username and password in the application that requires access to your account. While they have an ‘allow less secure apps’ option that allows SMTP access for legacy products like Microsoft Outlook, it just doesn’t seem like the right way forward. Google documents how to interact with their API with OAUTH2, so why not just use that instead of putting my username and password in plaintext in a bunch of prototypes and test scripts?

Those are the thoughts that run through my head every time this comes up for a project, and each time I’ve somehow forgotten the steps to do it, also forgotten to write it down, and end up wasting quite a bit of time due to my own foolishness. As penance, I’ve decided to document the process and share it with all of you, and then also make it work on an ESP8266 board running the Arduino development environment.

Continue reading “Using Gmail With OAUTH2 In Linux And On An ESP8266”

Pogo Pins Make Light Work Of IoT Switches

Living in a condo with inadequate opportunity for fresh light wiring presented a problem for [Raphael Luckom], which he solved by taking a few off-the-shelf ESP8266-based IoT mains switches. That in itself is nothing particularly new these days, but what makes his switches special is that when faced with fiddly soldering to reprogram them, instead he fabricated a pogo pin jig to make the required contacts.

He took inspiration for his work from a Hackaday.io project hacking some Chinese switched outlets. They contain a standard ESP-12 module, so identifying the correct pins to program them was easy enough. He simply had to create a jig for his pogo pins, which he did with his 3D printer. Of course, “simply” is not an appropriate word, because along the way he had to pass through many iterations of the print, but eventually he had his jig secured to the boards with a clamp.

The result: a successful relay, and without the tricky soldering. We know many of our readers will have no problems with a bit of solder, but for those of you that don’t there might be a bit of interest here.

We’ve shown you many ESP8266 switches over the years. This all-in-one socket system was rather clever, but we’ve had some simple switches too.

Feed Your Cat The Modern Way

Feeding the cat should be a moment of magic, in which you bond with your adorable pet as she rubs seductively against your ankles. As you place the saucer of tender and moist meaty chunks on the floor, she bounds the length of your kitchen, excited expression on her little kitty face, and tail in the air.

If Hackaday made television adverts for cat food, we’d have it nailed. But our everyday reality involves the cute-as-heck Hackaday moggy turning into a persistent little pest when she decides it’s feeding time. [ThinkSilicon]’s friends had exactly this problem, with their furry friend’s preferred timing coming early in the morning. His solution? An automated cat feeder (translated) that dispenses kibbles from a hopper into the lucky mouser’s feeding dish.

The mechanical part of this endeavour is pretty straightforward, a servo moves a sliding piece of plywood with a hole cut in it across the bottom of a hopper full of cat food. Move the slide, dispense food down a chute to the waiting happy cat. Behind the scenes is an ESP8266 and a NodeMCU web service, through which feeding time can be either scheduled, or dispensed at will.

A happy cat means a happy owner, especially in the very early morning. Until that is the newly-sated creature decides to spread the love, jumping onto the owner’s bed in thanks and breathing cat-food-breath into their face. You really do have to love ’em!

We’ve shown you many cat food related projects in the past, including this Arduino take on the same idea. But why take the effort to trigger it yourself, when the cat can do it for you.

Minimizing ESP8266 Battery Drain

[Alex Jensen] wanted to build a battery-powered weather station, using an ESP8266 breakout board to connect to WiFi. However, [Alex]’s research revealed that the ESP chip uses around 70mA per hour when the radio is on — meaning that he’d have to change batteries a lot more than he wanted to. He really wanted a low power rig such that he’d only have to change batteries every 2 years on a pair of AAs.

The two considerations would be, how often does the ESP get powered up for data transmissions — and how often the weather station’s ATtiny85 takes sensor readings. Waking up the ESP from sleep mode takes about 16mA — plus, once awake it takes about 3 seconds to reconnect, precious time at 70mA. However, by using a static IP address he was able to pare that down to half a second, with one more second to do the actual data transmission. In addition to the hourly WiFi connection, the Tiny85 must be powered, though its relatively modest 1.5mA per hour doesn’t amount to much, even with the chip awake for 36 hours during the year. All told, the various components came to around 500 mAh per year, so using a pair of AA batteries should keep the rig going for years.

We’re intrigued by stories of hackers eking out every last drop of power to make their projects work. We’ve posted about ESPs low-power mode before, and what can be more low-power than a watch running off a coin cell?