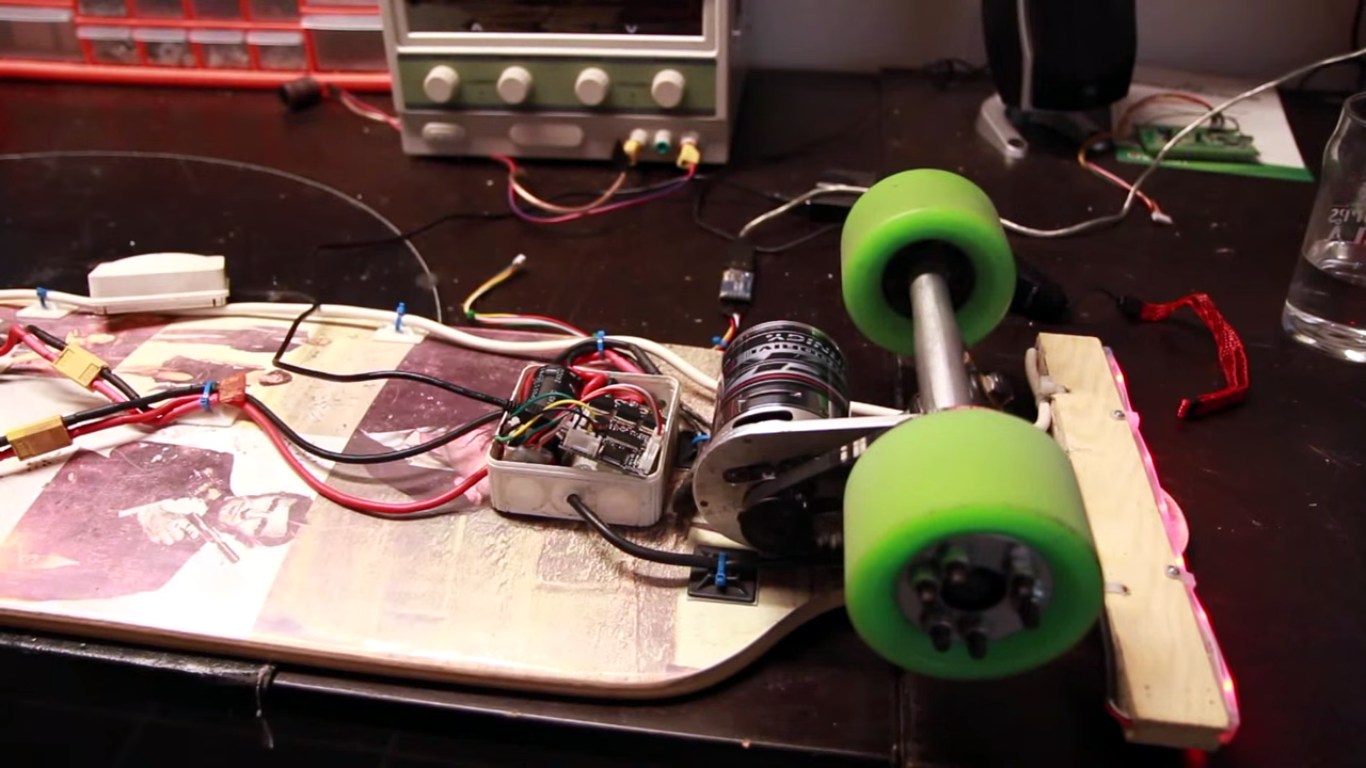
For electric and remote control vehicles – from quadcopters to electric longboards – the brains of the outfit is the Electronic Speed Controller (ESC). The ESC is just a device that drives a brushless motor in response to a servo signal, but in that simplicity is a lot of technology. For the last few months, [Ben] has been working on a completely open source ESC, and now he’s riding around on an electric longboard that’s powered by drivers created with his own hands.
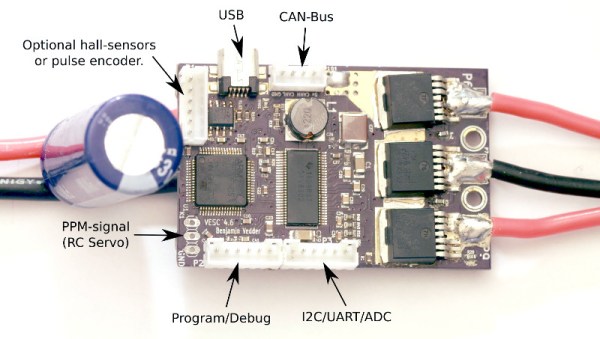
 The ESC [Ben] made is built around the STM32F4, a powerful ARM microcontroller that’s able to do a lot of computation in a small package. The firmware is based on ChibiOS, and there’s a USB port for connection to a sensible desktop-bound UI for adjusting parameters.
While most hobby ESCs are essentially black boxes shipped from China, there is a significant number of high performance RC pilots that modify the firmware on these devices. While these new firmwares do increase the performance and response of off-the-shelf ESCs, building a new ESC from scratch opens up a lot of doors. [Ben]’s ESC can be controlled through I2C, a UART, or even a CAN bus, greatly opening up the potential for interesting electronic flying machines. Even for ground-based vehicles, this ESC supports regenerative braking, sensor-driven operation, and on-board odometry.
While this isn’t an ESC for tiny racing quadcopters (it’s complete overkill for that task) this is a very nice ESC for bigger ground-based electric vehicles and larger aerial camera platforms. It’s something that could even be used to drive a small CNC mill, and certainly one of the most interesting pieces of open source hardware we’ve seen in a long time.
Continue reading “Open Source ESC Developed For Longboard Commute”