The Cake Robot Is No Lie

[52 Skillz] didn’t know anything about building robots. So he decided to not just read about it or make a simple robot. He jumped right in and wanted to build a robot that could make a cake. It took about a year and a half but it now — mostly — works, as you can see in the video below.

Granted it isn’t perfect and it isn’t really all that practical. But as a learning exercise, it was certainly ambitious and successful. Apparently, you still have to scrape the bowl a little by hand to get some of the flour off the bowl walls. Also, loading the ingredients might be more work than just making it by hand, but that really isn’t the point.

Continue reading “The Cake Robot Is No Lie”

Friday Hack Chat: Control Schemes For Robotics

The Hackaday Prize is in full swing if you haven’t heard. It’s the Academy Awards of Open hardware, and the chance for you — yes, you — to create the next great piece of hardware and a better future for everyone. Right now, we’re in the Robotics Module Challenge portion of the prize. This is your chance to build a module that could be used in robotics projects across the world! Show off your mechatronic skills and build a robotics module that’s transferable to other builds!

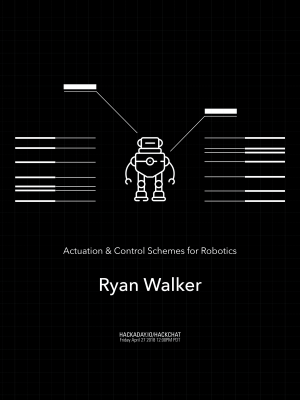
Not coincidentally, for this week’s Hack Chat, we’re talking all about Robotics Modules. We’re taking a deep dive into actuation and control schemes for robotics, and you’re invited to take part. Everyone wants affordable robotics, and stepper and servo motors are no longer the domain of high-budget industrial robots. Everyone can build a robot, but how do you do that? That’s what we’re going to find out this Friday in the Hack Chat!

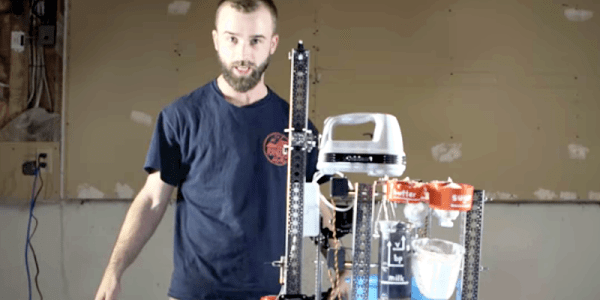
Our guest for this week’s Hack Chat is [Ryan Walker]. He holds a diploma in Mechatronics and Robotics from BCIT. He’s worked on everything from prosthetics to industrial automation, and his current hobbies include designing and building control algorithms that drive electronics and enable cheap hardware to excel! If you want to learn about robotics, this is the Hack Chat for you.

In this chat, we’ll be talking about:

  • Control schemes
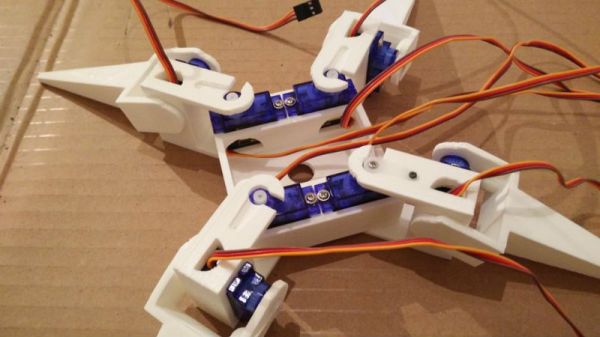
  • How to actuate your projects
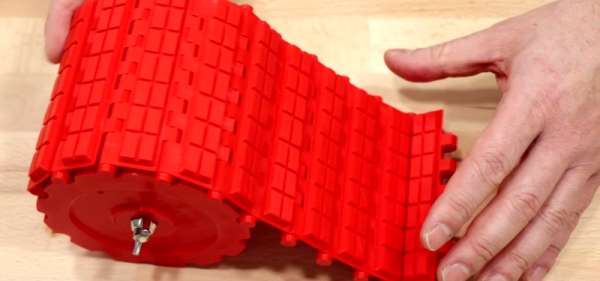
  • Wheels, tweels, and ways to make your project move
  • Automating robotics

You are, of course, encouraged to add your own questions to the discussion. You can do that by leaving a comment on the Hack Chat Event Page and we’ll put that in the queue for the Hack Chat discussion.join-hack-chat

Our Hack Chats are live community events on the Hackaday.io Hack Chat group messaging. This week is just like any other, and we’ll be gathering ’round our video terminals at noon, Pacific, on Friday, April 27th.  Here’s a clock counting down the time until the Hack Chat starts.

Click that speech bubble to the right, and you’ll be taken directly to the Hack Chat group on Hackaday.io.

You don’t have to wait until Friday; join whenever you want and you can see what the community is talking about.

3D Printed Tank Tracks

[Ivan] has been keeping his 3D printers busy with parts he’s experimenting with to build a tracked motion setup for a tank-like vehicle. His design uses several interlocking parts, so if you want to duplicate it, we hope your printer calibration is up to snuff. He’s still printing more parts and promises to release the files once the design proves out.

However, you can see he’s off to a good start. Small pieces fit together and accept a piece of filament as a sort of hinge. Some pins keep the filament from working out. Pads fit into the main parts and hold down with zip ties. The whole flexible tread locks into sprockets and a groove on a drive wheel.

Continue reading “3D Printed Tank Tracks”

Look Upon Eyepot, And Weep For Mercy

Hope you weren’t looking forward to a night of sleep untroubled by nightmares. Doing his part to make sure Lovecraftian mechanized horrors have lease in your subconscious, [Paul-Louis Ageneau] has recently unleashed the horror that is Eyepot upon an unsuspecting world. This Cycloptic four legged robotic teapot takes inspiration from an enemy in the game Alice: Madness Returns, and seems to exist for no reason other than to creep people out.

Even if you aren’t physically manifesting nightmares, there’s plenty to learn from this project. [Paul-Louis Ageneau] has done a fantastic job of documenting the build, from the OpenSCAD-designed 3D printed components to the Raspberry Pi Zero and Arduino Pro Mini combo that control the eight servos in the legs. If you want to play along at home all the information and code is here, though feel free to skip the whole teapot with an eyeball thing.

A second post explains how the code is written for both the Arduino and Pi, making for some very illuminating reading. A Python script on the Pi breaks down the kinematics and passes on the appropriate servo angles to the Arduino over a serial link. Combined with a web interface for control and a stream from the teapot’s Raspberry Pi Camera module, and you’ve got the makings of the world’s creepiest telepresence robot. We’d love to see this one stomping up and down a boardroom table.

Seems we are on a roll recently with creepy robot pals. Seeing a collaboration between Eyepot and JARVIS might be too much for us to handle. Though we have a pretty good idea how we’d want to control them.

Taking Halloween To The Next Level With JARVIS

As an avid “Haunt Hacker”, [Steve Koci] knows a thing or two about bringing high-tech to Halloween. Wanting to build a mobile robot that could accompany him to conventions as a demonstration of the sort of animatronic mechanisms and controls he uses, he came up with the idea of JARVIS. The original plan was to make a more traditional robot, but with the addition of an animated skull and some Steampunk-style embellishments, JARVIS is definitely the kind of thing you don’t want to run into on an October night.

Construction of JARVIS started in 2016, after [Steve] saw the Agent 390 tracked robot chassis from ServoCity. With the addition of extra wheels and a custom track, he converted the Agent 390 into a triangular track arrangement which he said he’s had his eye on since “Johnny 5” sported them back in Short Circuit.

There’s a dizzying array of electronics required to make JARVIS move and talk, not least of which is the “Banshee” prop controller. This device is made to simplify the construction of animatronic heads and provides not only organic-looking randomized movement but automatic jaw synchronization. Using a wireless audio connection, [Steve] is able to talk through a speaker mounted on the chest of the robot, while the skull automatically matches its mouth to his speech in real time. Combined with the GoPro in a two-axis gimbal, this allows JARVIS to function as a fairly robust telepresence platform. Much to the delight/horror of those it’s used on.

Getting JARVIS to move requires not only the two beefy motors and a dedicated controller supplied by the Agent 390 platform, but no less than thirteen servos for the head, arms, and grippers. There’s even a linear actuator used to tilt the skull up and down, presumably for terrifying people of various heights and ages. JARVIS even has a pair of Adafruit’s electronic eyes mounted in the skull, as if you thought you would be spared the horror of seeing glowing eyes following you in the dark.

To control all this hardware, [Steve] uses two RC transmitters in conjunction with a smartphone displaying the video feed coming from the GoPro. It takes some serious finger-gymnastics to get JARVIS doing its thing, which [Steve] says he’s still trying to master.

As many projects that have graced these pages can attest to, hackers seem to delight in coming up with new and exciting ways to terrify the young and old alike. Sometimes they can’t even wait until Halloween.

Continue reading “Taking Halloween To The Next Level With JARVIS”

Nerds Unite: Prosthetics Inspired By Comics And Beyond!

Open Bionics is a company creating prosthetics inspired by heroines, heroes and the fictional worlds they live in. The designs emblazoned on their first set of bionic hands include ones drawn from Queen Elsa from Disney’s Frozen, and Marvel’s Iron Man. The best thing about what they are doing is they offer you, dear reader, a chance to lend your own super powers of design and engineering. Open Bionics offers up 3D print files for several hand designs, hardware schematics and design files for their controller boards, firmware, and software to control the robotic hands with. Other than their website, you can also find all of the files and more on their GitHub account. If you’d like to devote a good amount of time and become a developer, they have a form to contact them through. To help with sourcing parts for your own build, they sell cables for tendons, muscle sensors, and fingertip grips in their online store

 We first came to learn about this company through a tipster [Dj Biohazard] who pointed to a post about their partnership with an 11-year-old Tilly, who is pictured on the left. Her bionic hand is an Open Bionics prototype whose design is based on the video game, Deus Ex. The best way products like these are improved are through the open source community and people like her.

Specific improvements Open Bionics state on their website are:

  • The customised bionic arms are manufactured in under 24 hours and the revolutionary socket adjusts as the child grows.
  • The bionic arms are light and small enough for those as young as eight.
  • The bionic arms use myoelectric skin sensors to detect the user’s muscle movements, which can be used to control the hand and open and close the fingers.

Read more about Tilly’s story and her partnership with Open Bionic’s on Womanthology. Tilly seems to have a dream of her own to “make prosthetics a high fashion piece – something that amputees can be proud to wear.” 

We at Hackaday have written about several open source prosthetic developments such as a five-day event S.T.E.A.M. Fabrikarium program taking place at Maker’s Asylum in Mumbai and the work of [Nicholas Huchet]What superhuman inspired designs would you create? 

This 3D-Printed Robotic Vacuum Sucks

After you’ve taken a moment to ponder the turn of phrase used in the title, take a look at this scratch-built robotic vacuum created by [theking3737]. The entire body of the vacuum was 3D printed, and all of the internal electronics are off-the-shelf modular components. We can’t say how well it stacks up against the commercial equivalents from iRobot and the like, but it doesn’t look like it would be too hard to build one yourself to find out.

The body of this rather concerned-looking robot was printed on a DMS DP5 printer, which is a neat trick as it only has a build platform of 200 mm x 200 mm. Once all the pieces were printed, a 3D pen was used to “weld” the sections together. The final result looks a bit rough, but should give a bond that’s just as strong as the printed parts themselves.

The robot has four sets of ultrasonic range finders to detect walls and obstacles, though probably not in the positions you would expect. The right side of the robot has two sets of sensors, while the left side only gets one. We aren’t sure the reasoning behind the asymmetrical layout, but presumably the machine prefers making right turns.

Control is provided by an Arduino Mega and the ever-reliable HC-05 Bluetooth module. A companion Android application was written which allows configuring the robot without having to plug into the Arduino every time you want to tweak a setting.

We can’t say we’ve seen that many DIY robotic vacuums here at Hackaday, but we’ve certainly featured our fair share of hacks for the commercially available models.