Blacksmithing For The Uninitiated: Your First Time At The Anvil

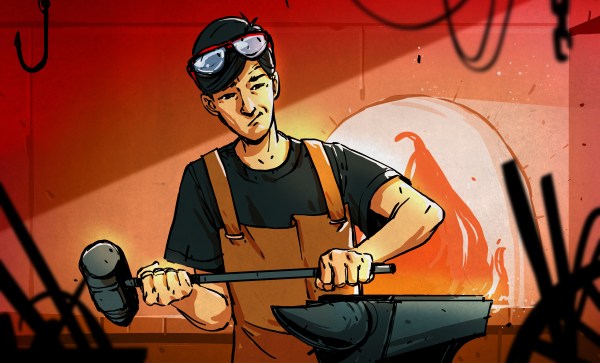
For the past few months we’ve been running this series of Blacksmithing For The Uninitiated posts, exploring the art of forge work for a novice. It’s based upon my experience growing up around a working blacksmith’s business and becoming an enthusiastic if somewhat inexpert smith, and so far we’ve spent our time looking at the equipment you might expect to need were you embarking on your own blacksmith work. Having assembled by now a basic forge of our own it’s now time to fire it up and take to the anvil for our first bit of smithing.

Lighting a forge is easy enough. Some people do it with a gas torch, but I break a piece of firewood into sticks using a hammer with the fuller set in the hardy hole on the anvil as an impromptu splitter. Making a small fire by lighting some paper under my pile of sticks placed on the hearth next to the tuyere I start the blower and then pile coke on top of the resulting conflagration. After about ten minutes I will have a satisfying roar and a heap of glowing coals, and as they burn there will be some slag collecting in the bottom of the fire that I will eventually need to rake out. Continue reading “Blacksmithing For The Uninitiated: Your First Time At The Anvil”

Steel-Reinforced 3D Prints

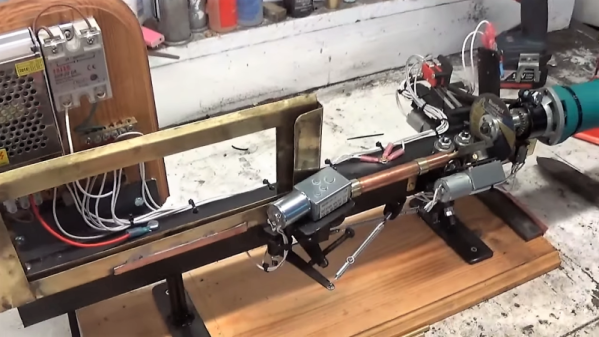
Continuing on the never-ending adventure of how to make a 3D print stronger, [Brauns CNC] is coming at us with a new technique that involves steel-reinforced 3D printed parts.

We’ve seen plenty of methods to create stronger 3D prints, from using carbon fiber filament to simply printing the part in a way that the layers of the print are orthogonal to the direction of force. We’ve even seen casting carbon fiber bars into 3D prints, but of course that will only work with straight parts. [Brauns]’ technique uses steel wire, embedded into the print itself, and from some testing there’s about a 50% increase in strength of the part.

The process of embedding a steel cable into a 3D printed part is simply taking apart the model and putting a channel in for the cable. At a specific layer height, the printer is stopped, the steel cable is embedded with the help of a soldering iron, and the printer continues doing its thing.

There’s a slight amount of Gcode hacking to make this happen, and the process of embedding a steel cable into a print is a bit finicky. Still, if you want stronger 3D prints, there are worse ways to do it, and certainly less effective ways of doing it. You can check out the video for this technique below.

Continue reading “Steel-Reinforced 3D Prints”

Blacksmith Elevates The Craft With This Fabulous Strongbox

For most of human industrial history, the blacksmith was the indispensable artisan. He could fashion almost anything needed, from a simple hand tool to a mechanism as complex as a rifle. Starting with the most basic materials, a hot forge, and a few tools that he invariably made himself, the blacksmith was a marvel of fabrication.

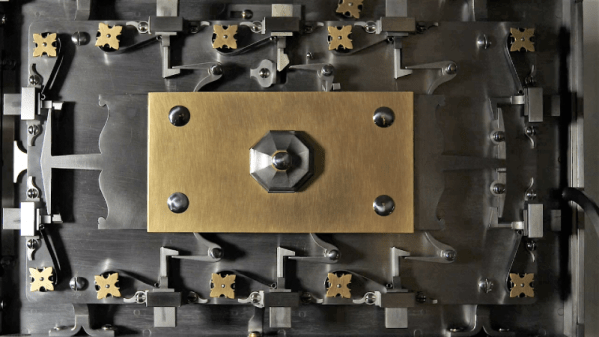
If you have any doubt how refined the blacksmith’s craft can be, feast your eyes on [Seth Gould]’s masterpiece of metalwork. Simply called “Coffer”, [Seth] spent two years crafting the strongbox from iron, steel, and brass. The beautifully filmed video below shows snippets of the making, but we could easily watch a feature-length film detailing every aspect of the build. The box is modeled after the strongboxes built for the rich between the 17th and 19th centuries, which tended to favor complex locking mechanisms that provided a measure of security by obfuscation. At the end of the video below, [Seth] goes through the steps needed to unlock the chest, each of which is filled with satisfying clicks and clunks as the mechanism progresses toward unlocking. The final reveal is stunning, and shows how much can be accomplished with a forge, some files, and a whole lot of talent.

If you’ve never explored the blacksmith’s art before, now’s the time. You can even get started easily at home; [Bil Herd] will show you how.

Continue reading “Blacksmith Elevates The Craft With This Fabulous Strongbox”

Hand-Forged Cases Make Nixie Clocks Into Works Of Art

Both “Nixie” and “Steampunk” are getting a bit overused. It’s hard to count the number of clock projects we’ve seen recently that combine the two, and normally we’d be loath to feature yet another variation on that theme without a good reason. This is a good reason.

The single-digit Nixie clocks that [Claes Vahlberg] built are, simply put, works of art. There’s a small version of the clock, featuring a single IN-16 Nixie, and a larger version that uses a Dalibor Farny custom Nixie, a work of art in its own right. Each clock has features like time and date, temperature and barometric pressure, and even days remaining in the current lunar cycle. The cases for the clocks, though, are the real treat. Hand forged from steel, they remind us of steam whistles on top of a boiler.

[Claes] doesn’t have many details on the build process — we’ve been in contact and he says he’s working on documentation — but it doesn’t matter. As if all that weren’t enough, the clocks are controlled by a remote, which has its own IN-16 tube and is motion controlled. The last bit is a nice touch since there are no buttons to distract from the smooth lines of the hammered metal case.

We gush, but we think this one really shines. That’s not to take anything away from previous Nixie-steampunk mashups, like this single-digit clock or this solar power meter. But these clocks are a step beyond.

Continue reading “Hand-Forged Cases Make Nixie Clocks Into Works Of Art”

A Scratch-Built Drill Press Vise From Scrap

Never underestimate the importance of fixturing when you’re machining parts. No matter what the material, firmly locking it down is the key to good results, and may be the difference between a pleasant afternoon in the shop and a day in the Emergency Room. Flying parts and shattered tooling are no joke, but a lot of times quality commercial solutions are expensive and, well, commercial.  So this scratch-built drill press vise is something the thrifty metalworker may want to consider.

To be sure, [Ollari’s] vise, made as it is almost completely from scrap angle iron, is no substitute for a vise made from precision ground castings. But it’s clear that he has taken great care to keep everything as square and true as possible, and we give him full marks for maximizing his materials. And his tools — nothing more complicated than a MIG welder is used, and most of the fabrication is accomplished with simple hand tools. We like the way he built up sturdy profiles by welding strap stock across the legs of the angle iron used for the jaws, to give them a strong triangular cross-section to handle the clamping force. And using the knurled end of an old socket wrench as the handle was inspired; we’ll certainly be filing that idea away for a rainy day in the shop. Although we might use Acme rather than plain threaded rod.

We always enjoy seeing someone fabricate their own tools, and this one reminds us a bit of the full-size bench vise built up from layers of welded steel we featured a while back. It even looks a little like this 3D-printed vise, too.

Continue reading “A Scratch-Built Drill Press Vise From Scrap”

Sharpies And Glue Sticks Fight The Gummy Metal Machining Blues

“Gummy” might not be an adjective that springs to mind when describing metals, but anyone who has had the flutes of a drill bit or end mill jammed with aluminum will tell you that certain metals do indeed behave in unhelpful ways. But a new research paper seeks to shed light on the gummy metal phenomenon, and may just have machinists stocking up on office supplies.

It’s a bit counterintuitive that harder metals like steel are often easier to cut than softer metals; especially aluminum but also copper, nickel alloys, and some stainless steel alloys. But it happens, and [Srinivasan Chandrasekar] and his colleagues at Purdue University wanted to find out why, and what can be done about it. So the first job was to get up close and personal with the interface between a cutting tool and metal stock, to observe the dynamics of cutting. In a fascinating bit of video, they saw that softer metals tend to fold in sinuous patterns rather than breaking on defined shear planes.

Source: American Physical Society.

Having previously noted that cutting through Dykem, a common machinist’s marking fluid, changes chip formation in soft metals, the researchers tested everything from Sharpies to adhesive tape and even correction fluid, and found that they all helped to reduce the gumming action to some degree. Under their microscope they can clearly see that chips form differently once the cutting edge hits the treated surface, tending to act more brittle and ejecting rather than folding. They also noted a marked decrease in cutting force for the treated metal, and much-improved surface finish to boot.

Will Sharpies and glue sticks enter the book of old machinist’s tricks like gauge-block wringing? Only time will tell. But for now, this is a pretty fascinating bit of research that you might be able to put to the test in your shop. Let us know what you find in the comments.

Continue reading “Sharpies And Glue Sticks Fight The Gummy Metal Machining Blues”

TrackRobot Sports Welded Steel, Not Plastic

Don’t let the knee-high size of [Hrastovc]’s creation fool you. TrackRobot weighs in at a monstrous 60 kg (130 lbs) of steel, motors, and battery. It sports two 48V motors in a body and frame made from pieces of finger-jointed sheet steel, and can reach speeds of up to four meters per second with a runtime of up to an hour. The project’s link has more pictures as well as DXF files of the pieces used for the body.

Currently TrackRobot is remote-controlled, but one goal is to turn it into a semi-autonomous snow plow. You can see TrackRobot going through its first steps as well as testing out a plow prototype in the videos embedded below.

Continue reading “TrackRobot Sports Welded Steel, Not Plastic”