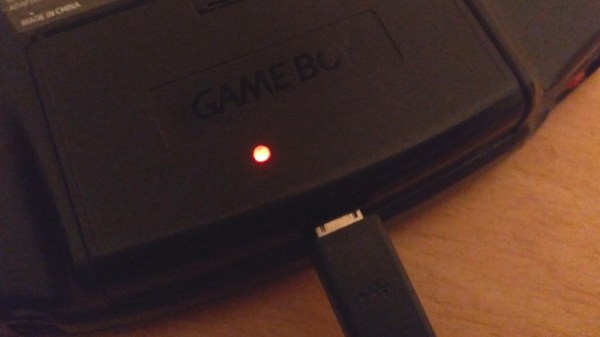
One thing you won’t read in reviews of pricey Sony WH-1000XM3 headphones – if you choose them, you’re going to find yourself in a one-sided abusive relationship. A button press or low-battery notification makes the headphones scream at you, ignoring the actual sound volume of what you’re currently listening to. Once they’re discharged, they suddenly emit loud noises, lecture you about how the battery is low, then shut down. Oh, and you can’t use them as they’re charging – if your voicecall lasts longer than expected, you might find yourself being shouted at and forced to fumble around with wires, silently pleading for call participants to wait while you change over to a different headset.
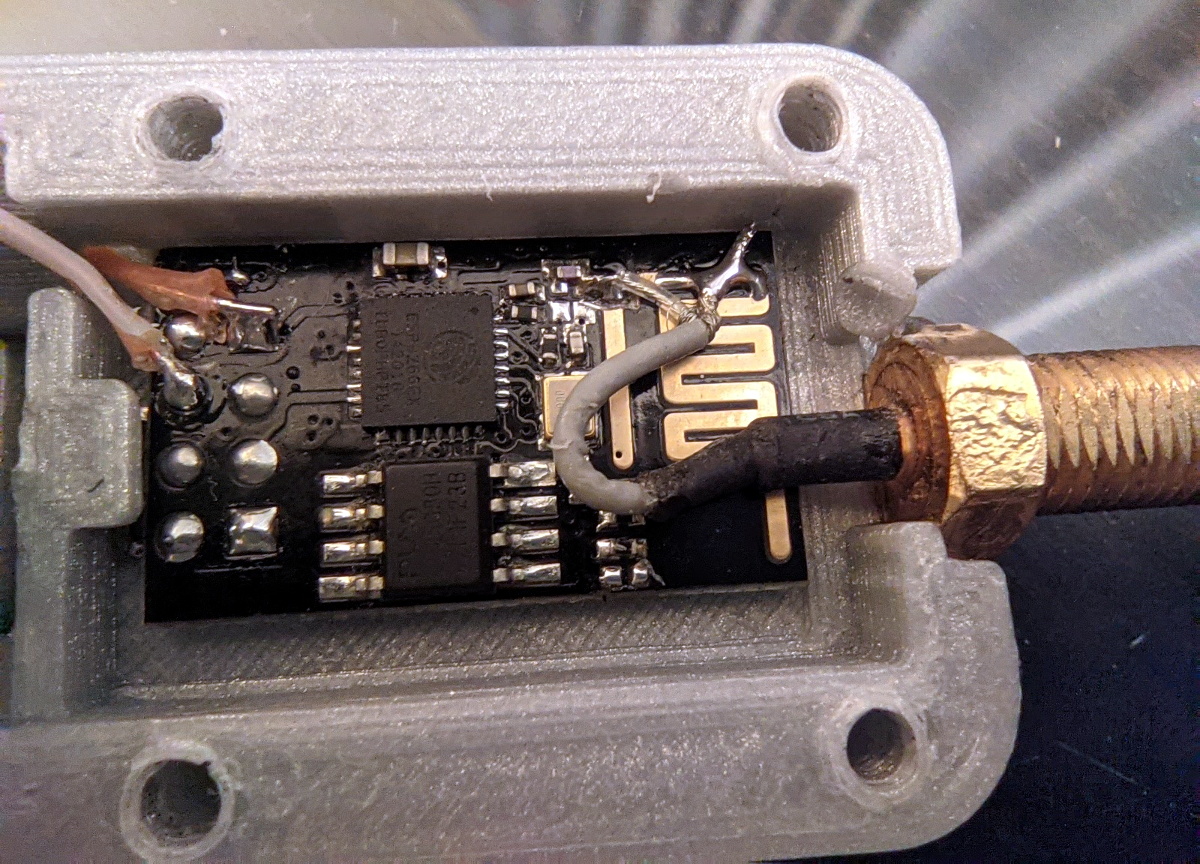
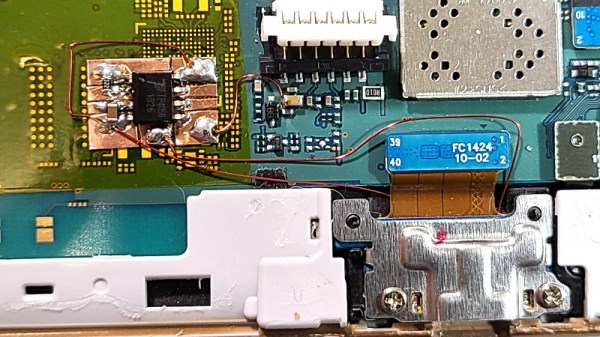
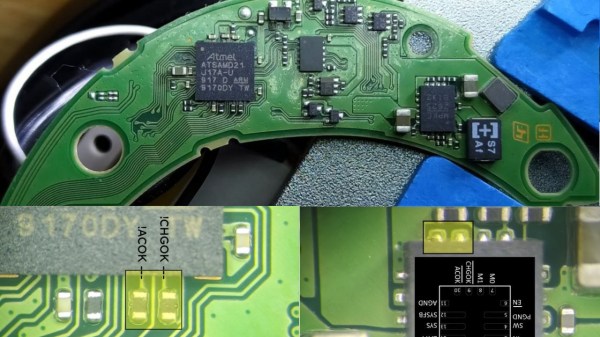
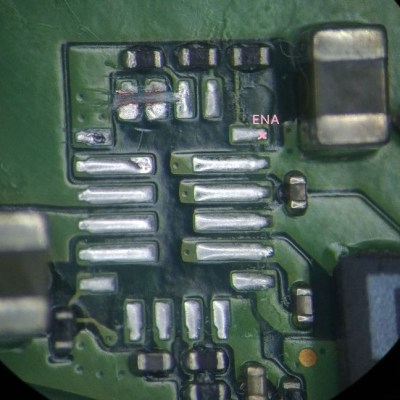 [MisterHW] decided to dig in and figure out how to work around at least some of the shortcomings. Naturally, the “no charge while using” limit looked like low-hanging fruit, and a hefty usability improvement too – plus, he suspected the charge cutoff to be masking noise issues already abundant on these headphones. Some painful disassembly later, he was inspecting the charger IC , the MP2625, responsible for power management. Its signals were connected to the MCU using via-in-pad – and some pads had to be cut in half to disconnect the vias.
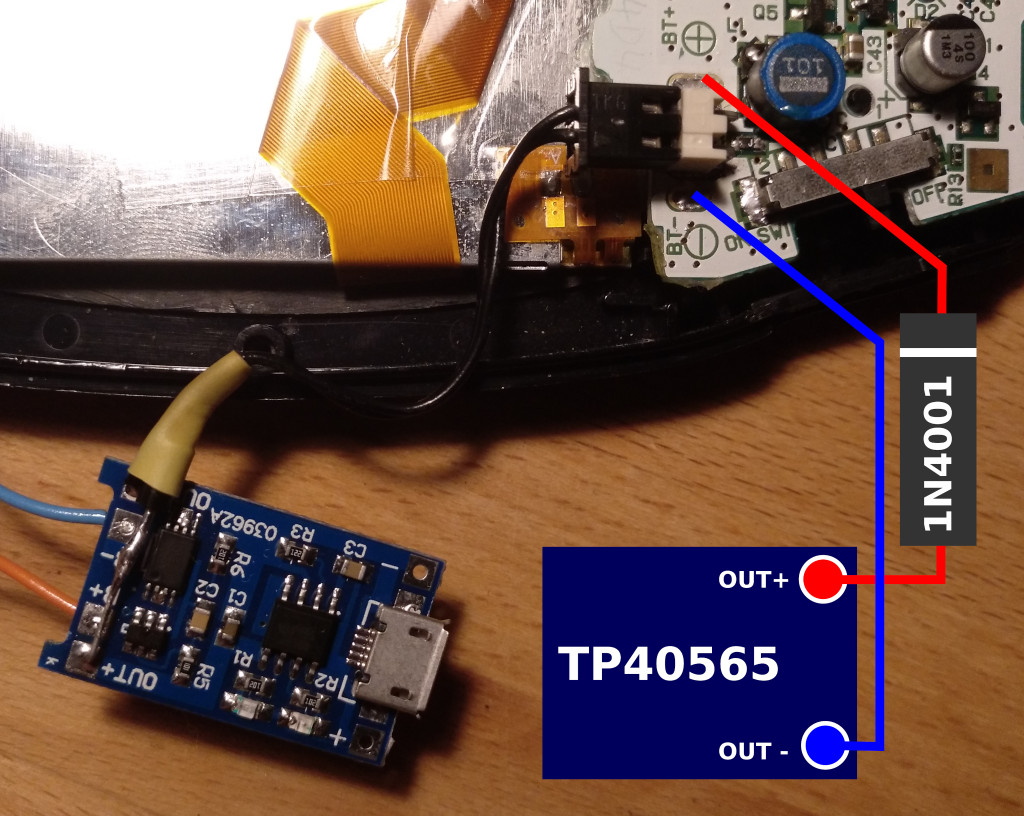
However, the laborious pad cutting and subsequent careful soldering didn’t turn out to be fruitful. Even with external control of the output inhibition pins, the shutoff still continued – something affected the circuit, whether it was VBUS detection, some other unnoticed via-connected pins on the charger, or sensing on D+/D-. About to run out of life force for this mod, [MisterHW] added a Qi charging circuit, powering a TP4056 wired in parallel with the MP2625. The mod, dubbed HW-1000XM3, made these headphones all that more reliable and less annoying – charger and MCU none the wiser.
Now, all that’s needed to charge these headphones is to slap a magnetic charger coil onto them, and it doesn’t interfere with voicecalls as much as the screaming and forced shutoffs do. Hopefully, Sony eventually learns to test their headphones by having humans use them – it’s far from the only gripes with this lineup, after all. We also hope that the voice notifications will be conquered eventually – this summer, we’ve seen a hacker firmware mod a Bluetooth speaker to make the sounds more pleasant. If your headphones are based on a relatively popular module, repurposing them might be even easier than that!
Introducing Sonγ HW-1000XM3 !
– MagSafe Charger support
– low noise charging during(!) conference calls
– the usual USB-C charging that switches them off https://t.co/eqc4xv6lk6 pic.twitter.com/U92b7T3LJO— Helge Wurst (@MisterHW) December 12, 2022