It was with considerable interest last month that I set out to track down where in the world there are still factories making tubes. My research found them in Slovakia, Russia, and China, and it’s fairly certain I didn’t find all the manufacturers by any means. There appeared to be a whole class of mundane tubes still in production that weren’t to be found on their glossy websites. A glance at any outlet through which Chinese modules can be bought will find this type of tube in small audio amplifier projects, and some of them can be astoundingly cheap. When faced with cheap electronics of course I’m tempted to buy some, so I parted with about £10 ($12.50) and bought myself a kit for a two-tube device described as a stereo preamplifier and headphone amplifier.
An Unusual Tube Choice For Audio
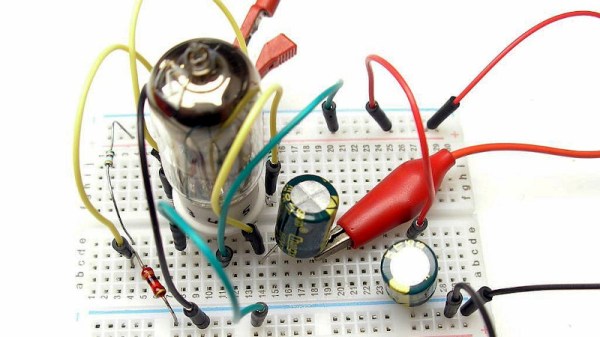
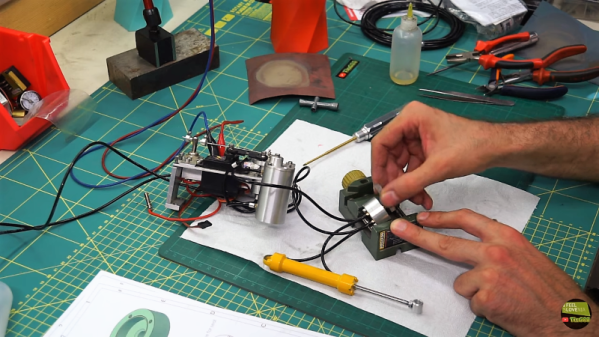
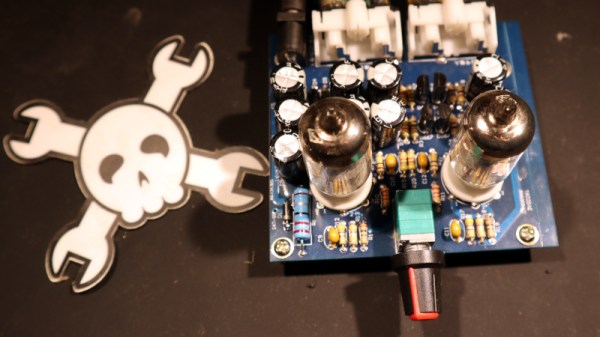
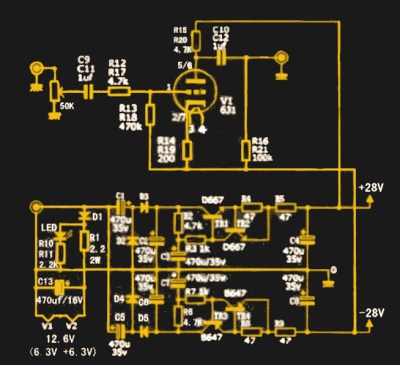 What I received for my tenner was a press-seal bag with a PCB and a pile of components, and not much else. No instructions, which would have been worrisome were the board not clearly marked with the value of each component. The circuit was on the vendor’s website and is so commonly used for these sort of kits that it can be found all over the web — a very conventional twin common-cathode amplifier using a pair of 6J1 miniature pentodes, and powered through a +25 V and -25 V supply derived from a 12 VAC input via a voltage multiplier and regulator circuit. It has a volume potentiometer, two sets of phono sockets for input and output, and the slightly naff addition of a blue LED beneath each tube socket to impart a blue glow. I think I’ll pass on that component.
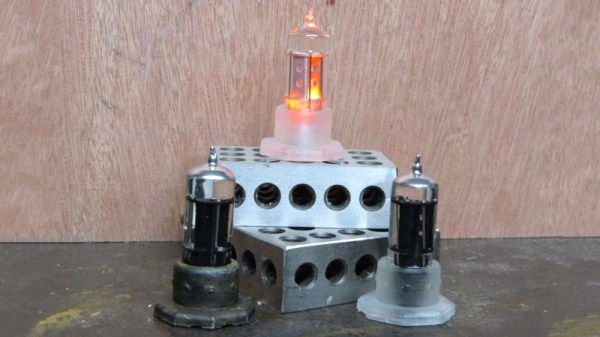
The 6J1 seems to be ubiquitous throughout the Chinese kits, which is surprising when you understand that it’s not an audio tube at all. Instead it’s a small-signal VHF amplifier, a rough equivalent of the European EF95, and would be much more at home in an FM radio receiver or turret TV tuner from the 1950s. I can only assume that somewhere in China there’s a tube factory tooled up for radio tube production that is targeting this market, because another tube you will see in audio power amplifier kits is the FU32 or QQV03-20 in European parlance, a large power beam tetrode that might have been found in a 1950s military radio transmitter. Still just as if you were to use an RF transistor in an audio circuit it would give good account of itself, so it is with an RF tube. There is no reason a 6J1 won’t do an acceptable job in a circuit such as this one.
Continue reading “That Elusive Valve Amp Sound, For Not A Lot! (There Has To Be A Catch)”