The Display For When You Want Nixies Without All The Hassle

If you want to display numbers, just go for Nixies. There’s no better way to do that job, simply because they look so cool. Unfortunately, Nixies require high voltages, controlling them is a tiny bit strange, and they suck down a lot of power. These facts have given us a few Nixie alternatives, and [Dave] is here with yet another one. It’s a light pipe Nixie, made from acrylic rod.

The idea of using lights shining into a piece of acrylic to display a number is probably as old as the Nixie itself. There were a few tools in the 60s that used side-lit plastic panels to display numbers, and more recently we’ve seen a laser-cut version, the Lixie. This display is just ten sheets of acrylic etched with the numbers 0 through 9. Shine a light through the right acrylic sheet, and that number lights up.

You can do just about everything in acrylic, and it’s already used for a light pipe, so [Dave] grabbed some acrylic rod and bent it into the shape of a few numbers. With a little work, he was able to make his own FauxNixie by mounting these numbers in a carefully modified lamp socked wired up with ten individual LEDs. The results make for big, big, big Nixie-style numbers, and the perfect clock for the discerning glowey aficionado.

Continue reading “The Display For When You Want Nixies Without All The Hassle”

Flex PCBs Make Force-Mapping Pressure Sensor For Amputee

What prosthetic limbs can do these days is nothing short of miraculous, and can change the life of an amputee in so many ways. But no matter what advanced sensors and actuators are added to the prosthetic, it has to interface with the wearer’s body, and that can lead to problems.

Measuring and mapping the pressure on the residual limb is the business of this flexible force-sensing matrix. The idea for a two-dimensional force map came from one of [chris.coulson]’s classmates, an amputee who developed a single-channel pressure sensor to help him solve a painful fitting problem. [chris.coulson] was reminded of a piezoresistive yoga mat build from [Marco Reps], which we featured a while back, and figured a scaled-down version might be just the thing to map pressure points across the prosthetic interface. Rather than the expensive and tediously-applied web of copper tape [Marco] used, [chris] chose flexible PCBs to sandwich the Velostat piezoresistive material. An interface board multiplexes the 16 elements of the sensor array to a PIC which gathers and records testing data. [chris] even built a test stand with a solenoid to apply pressure to the sensor and test its frequency response to determine what sorts of measurements are possible.

We think the project is a great application for flex PCBs, and a perfect entry into our Flexible PCB Contest. You should enter too. Even though [chris] has a prototype, you don’t need one to enter: just an idea would do. Do something up on Fritzing, make a full EAGLE schematic, or just jot a block diagram down on a napkin. We want to see your ideas, and if it’s good enough you can win a flex PCB to get you started. What are you waiting for?

Transcending The Stack With The Right Network Protocol

The increase in network-connected devices the past years has been something of a dual-edged sword. While on one hand it’s really nice to have an easy and straight-forward method to have devices talk with each other, this also comes with a whole host of complications, mostly related to reliability and security.

With WiFi, integrating new devices into the network is much trickier than with Ethernet or CAN, and security (e.g. WPA and TLS) isn’t optional any more, because physical access to the network fabric can no longer be restricted. Add to this reliability issues due to interference from nearby competing WiFi networks and other sources of electromagnetic noise, and things get fairly complicated already before considering which top-layer communication protocol one should use. Continue reading “Transcending The Stack With The Right Network Protocol”

Nearly Entirely 3D Printed RC Car Is 4WD Fun

Remote control cars can be great fun, particularly if you’ve got a spare carpark or dirt lot to hoon them around. Any good hobby store will have shelves stocked with all manner of vehicles – buggies, touring cars, prototypes – but you don’t have to settle for what’s already available. Why not 3D print the car of your dreams instead? (YouTube, embedded below.)

The build comes to us from [Engineering Nonsense], now in its third revision. The design is produced in PLA, to make it accessible as possible to printer owners the world over. Almost the entire car is 3D printable – not just the chassis. The gearbox, differentials and driveshafts, and even suspension arms and tie rods are all printed, rather than bought. This also means the car is easier to build, with everything being printed to the correct size, as opposed to using off-the-shelf adjustable parts.

Performance is impressive, with the car showing good grip thanks to its 4WD drivetrain and double wishbone suspension. Files are available on Thingiverse, so there’s nothing to stop you from printing this out and going for a spin this weekend. We’d love to see it take on the water with some 3D printed tyres, too.

[Thanks to Jotham for the tip!]

Continue reading “Nearly Entirely 3D Printed RC Car Is 4WD Fun”

Humanity Creates A Cloud Of Space Garbage, Again

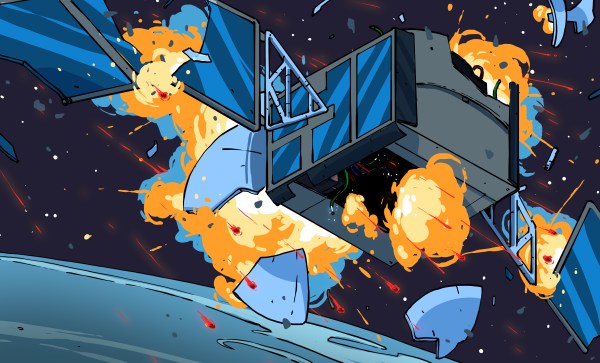
With the destruction of the Microsat-R reconnaissance satellite on March 27th, India became the fourth country in history to successfully hit an orbiting satellite with a surface-launched weapon. While Microsat-R was indeed a military satellite, there was no hostile intent; the spacecraft was one of India’s own, launched earlier in the year. This follows the examples of previous anti-satellite (ASAT) weapons tests performed by the United States, Russia, and China, all of which targeted domestic spacecraft.

Yet despite the long history of ASAT weapon development among space-fairing nations, India’s recent test has come under considerable scrutiny. Historically, the peak of such testing was during the 1970’s as part of the Cold War rivalry between the United States and then Soviet Union. Humanity’s utilization of space in that era was limited, and the clouds of debris created by the destruction of the target spacecraft were of limited consequence. But today, with a permanently manned outpost in low Earth orbit and rapid commercial launches, space is simply too congested to risk similar experiments. The international community has strongly condemned the recent test as irresponsible.

For their part, India believes they have the right to develop their own defensive capabilities as other nations have before them, especially in light of their increasingly active space program. Prime Minister Narendra Modi released a statement reiterating that the test was not meant to be a provocative act:

Today’s anti-satellite missile will give a new strength to the country in terms of India’s security and a vision of developed journey. I want to assure the world today that it was not directed against anybody.

India has always been against arms race in space and there has been no change in this policy. This test of today does not violate any kind of international law or treaty agreements. We want to use modern technology for the protection and welfare of 130 million [1.3 Billion] citizens of the country.

Further, the Indian Space Research Organisation (ISRO) rejects claims that the test caused any serious danger to other spacecraft. They maintain that the test was carefully orchestrated so that any debris created would renter the Earth’s atmosphere within a matter of months; an assertion that’s been met with criticism by NASA.

So was the Indian ASAT test, known as Mission Shakti, really a danger to international space interests? How does it differ from the earlier tests carried out by other countries? Perhaps most importantly, why do we seem so fascinated with blowing stuff up in space?

Continue reading “Humanity Creates A Cloud Of Space Garbage, Again”

Portable Pi Power Pack Makes For Petite Projects

Since the Pi Zero was released, there have been many attempts to add a power bank. Cell phone batteries are about the same size as a Pi Zero, after all, and adding a USB charging port and soldering a few wires to a Pi is easy. The PiSugar is perhaps the cutest battery pack we’ve seen for the Pi Zero, and it comes in a variety of Hats compatible with the Pi, capable of becoming a small display, a keyboard, or any other thing where a small, portable Linux machine is useful.

The core of this build is a small circuit board the size of a Pi Zero. Attached to this board is a 900mAh battery, and the entire assembly is attached to the Pi Zero with a set of two spring clips that match up with with a pair of pads on the back of the Pi. Screw both of these boards together, and you have a perfect, cableless solution to adding power to a Pi Zero.

But the PiSugar doesn’t stop there. There are also cases, for a 1.3 inch LCD top, a 2.13 inch ePaper display, an OLED display, a camera, a 4G module, and something that just presents the pins from the Pi GPIO header. This is an entire platform, and if you print these parts in white plastic, they look like tiny little sugar cubes filled to the brim with electronics and Linux goodness.

Yes, you’ve seen 3D printed Pi cases before, but nothing in the way of an entire platform that gives you a Pi Zero in an extensible platform that can fit in your pocket and looks like sweet, sweet cubes of sucrose.

Arduino Drives Seventeen Stepper Motors, Carefully

It’s fair to say that building electronic gadgets is easier now than it ever has been in the past. With low-cost modular components, there’s often just a couple dozen lines of code and a few jumper wires standing between your idea and a functioning prototype. Driving stepper motors is a perfect example: you can grab a cheap controller board, hook it up to a microcontroller, and the rest is essentially just software. But recently [mechatronicsguy] wondered if even that was more hardware than was technically necessary to get the job done.

It’s not that he was intentionally looking to make things more complicated for himself, of course. His rationale was entirely economic; if you’re looking to drive a dozen or more stepper motors, even the “cheap” controllers can add up. So he started to wonder if he could skip the controller entirely and connect the stepper motor directly to the digital pins of an Arduino. Generally speaking this is a bad idea, but if you’re careful and are willing to take the risk, [mechatronicsguy] is living proof it’s possible

So what’s the trick to running a whopping seventeen individual stepper motors directly from the digital pins of an Arduino Mega? Well, to start with you’re not going to be running the beefy NEMA 17 motors like you might find in a 3D printer. [mechatronicsguy] is using the diminutive (and dirt cheap) 28BYJ-48, a light duty stepper used in many consumer products. Even with this relatively tiny motor, you need to crack open the case and cut a trace on the PCB to switch it from unipolar to bipolar.

Beyond that, you need to be careful. [mechatronicsguy] reports he’s had success running as many as ten of them at once, but realistically the fewer operating simultaneously the better. This is actually made easier due to the relatively poor specs of the 28BYJ-48 motor; its huge eleven degree step size means its not really susceptible to the same kind of slippage you’d get on a NEMA 17 when powered down. This means you can cut power to all but the actively moving motor and be fairly sure they’ll all stay where you left them.

With as popular as the 28BYJ-48 stepper is, there are several projects this “quick and dirty” method of interfacing could potentially work with. This small “barn door” star tracker is an obvious example, but we’ve also seen some very nice robotic arms built with these low-cost motors which could benefit from the technique.