Marian Croak Is The MVP Of VoIP Adoption

If you’ve ever used FaceTime, Skype, own a Magic Jack, or have donated money after a disaster by sending a text message, then you have Marian Croak to thank. Her leadership and forward thinking changed how Ma Bell used its reach and made all of these things possible.

Marian Croak is a soft-spoken woman and a self-described non-talker, but her actions spoke loudly in support of Internet Protocol (IP) as the future of communication. Humans are always looking for the next best communication medium, the fastest path to understanding each other clearly. We are still making phone calls today, but voice has been joined by text and video as the next best thing to being there. All of it is riding on a versatile network strongly rooted in Marian’s work.

Continue reading “Marian Croak Is The MVP Of VoIP Adoption”

Magnetic Couplings Make This Lego Submarine Watertight

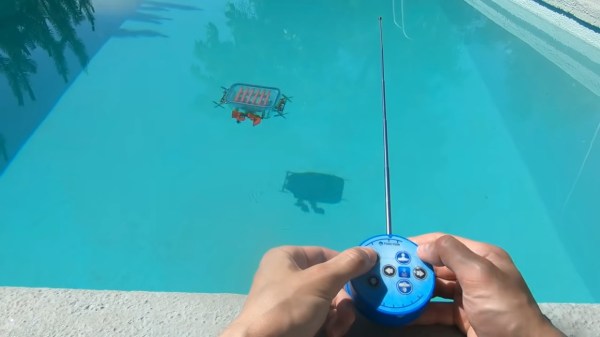
Although you’d be hard-pressed to tell in some areas, it’s summer in the northern hemisphere, which always seems to bring out the projects that require a swimming pool for adequate testing. The [Brick Experiment Channel]’s latest build, a submersible made almost entirely from Lego, is one such project and has us pining for weather that makes a dip sensible rather than suicidal.
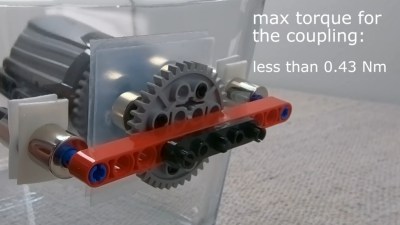
The sub featured in the video below is a significant improvement over the “Sub in a Jug” approach the [Brick Experiment Channel] favored for version 1. Rather than starting with a vessel specifically designed not to hold water, the hull for this vessel is an IKEA food container, with a stout glass body and a flexible lid with silicone seals. And instead of penetrating the hull for driveshafts and attempting to seal them, this time around he built clever magnetic couplings.

The couplings transmit torque from the motors on the inside to gears and props on the outside. And where the first version used a syringe-pump ballast tank to control the depth, this one uses vertical thrusters. The flexible lid proved to be a problem with that scheme, since it tended to collapse as the depth increased, preventing the sub from surfacing. That was solved with some Lego bracing and adjustment of the lead shot ballast used to keep the sub neutrally buoyant.

This looks like a ton of summer fun, and even if you don’t have Legos galore to work with, it could easily be adapted to other materials. There are a ton of other fun [BEC] Lego builds to check out, some of which we’ve covered, including a Lego drone and a playing card shooter.

Continue reading “Magnetic Couplings Make This Lego Submarine Watertight”

Not Just GPS: New Options For Global Positioning

A few weeks ago, China launched the final satellite in its BeiDou-3 satellite positioning system. Didn’t know that China had its own GPS? How about Europe’s Galileo, Russia’s GLONASS, or Japan’s QZSS? There’s a whole world of GPS-alikes out there. Let’s take a look.

Continue reading “Not Just GPS: New Options For Global Positioning”

Designing 3D Printed Enclosures For KiCad PCBs

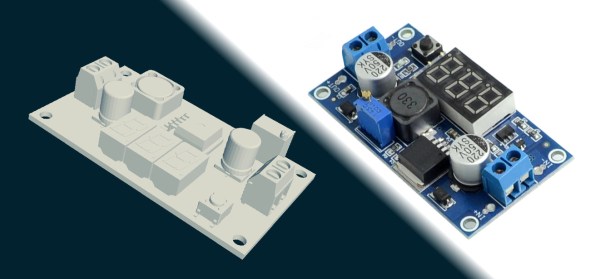
If you’ve used KiCad before, you’re certainly familiar with the handy 3D view that shows you a rendered view of what your assembled board would look like. But as [Vadim Panov] explains, you can take this capability a step further. With a few extra tools and a little bit of know-how, you can leverage KiCad’s PCB renderings to make custom 3D printable enclosures.

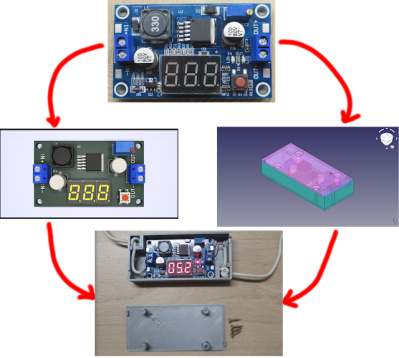
The first step is to design the PCB as you normally would in KiCad. This could be an original PCB of your own invention, or a digital representation of an off-the-shelf model you want to build an enclosure for. If the latter, then the PCB doesn’t need to be 100% accurate; the goal is really just to get the big components into roughly the right areas so you can get the clearances right. Though obviously you’ll want to make sure the board’s outer dimensions and mounting hole locations are recreated as accurately as possible.

From there, [Vadim] recommends a tool called StepUp. This will take your PCB KiCad PCB files and create either a STEP or STL file of the assembled board which can be imported into your CAD package of choice. For the purposes of this demonstration he’s sticking with FreeCAD, as he likes the idea of it being a completely FOSS toolchain from start to finish.

Now that you have a model of the PCB in your CAD software, the rest is up to you. Naturally, there are existing enclosure models you can use such as the ones produced by the “Ultimate Box Maker” that we covered previously, but you could just as easily start building a new enclosure around the digital PCB.

Looking for a bit more guidance? As it so happens, our very own [Anool Mahidharia] will be presenting a class on how you can develop a KiCad + FreeCAD workflow as part of our recently launched HackadayU initiative.

Milling Dies And Injection Moulding Some Acrylic Lenses

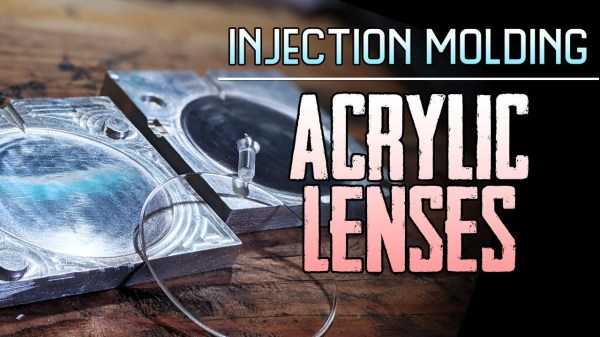
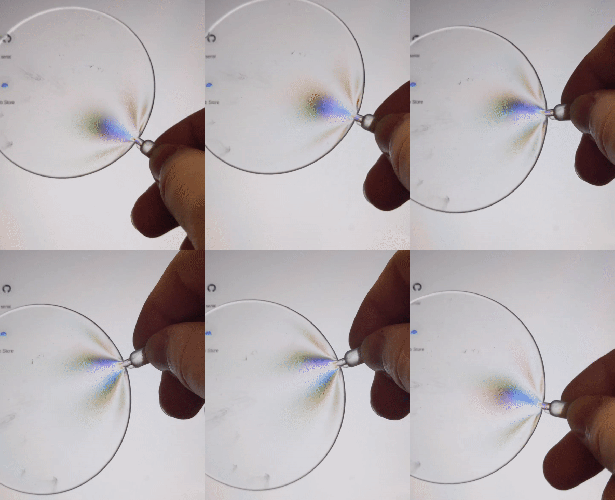
[Zach] over at his channel Breaking Taps has put up an extraordinary account on manufacturing some homemade acrylic lenses. In the end, not only does he produce some beautiful concave lenses, he also covers the complete manufacturing process, from milling the aluminium die used for injection moulding to tweaking the parameters associated with injecting the actual acrylic, he even goes over the limitations of optics produced in this fashion.

What caught our eye in particular, was how [Zach] used the finished product to practically demonstrate photoelasticity originating from the stress induced by the moulding process. You might be familiar with describing the optical properties of a material by a single number, i.e its permittivity. But what happens if in addition to altering speed, the material also alters the polarisation and direction of light depending on the stress distribution within the material? Whilst a quantitative answer gets a bit complicated you can check out [Zach’s] additional videos to visualise the answer in a pretty and colourful way, without resorting to fancy computer simulations! If however, you really want to persist with the simulation route, check out our article on stress analysis in a totally different setting using Finite Element Analysis.

Continue reading “Milling Dies And Injection Moulding Some Acrylic Lenses”

Filmmaking From Home With Projection Mapping

Stuck at home in self-quarantine, artist and filmmaker [Kira Bursky] had fewer options than normal for her latest film project. While a normal weekend film sprint would have involved collaborating with actors, set designers, and cinematographers in a frenzied attempt to finish in less than 48 hours, she instead chose to indulge in her curiosity for projection mapping, a technique that involves projecting visuals onto three-dimensional or flat surfaces.

In order for the images to properly map onto a surface, the surface first has to be mapped so that the projection is able to properly transform the flat image in order to produce the illusion of the light wrapping around the object. The technique is done in layers, in software similar to Photoshop, making it easier for the designer to organize the different interacting components in their animation.

[Kira] used a tool called Lightform to design her projections, which relies on a camera to calibrate the location of the surface and a projector to display the visuals. Her animated figures are drawn with loose lines and characterized by their slow gradients and ethereal movements. In the background of her film, a rhythmic sound plays while she brings the figures closer to view. Their outlines come into greater focus until the figures transform into her physical body, which also dances with the meandering lights.

Check out the short film below.

Continue reading “Filmmaking From Home With Projection Mapping”

Remote Code Execution On The N64

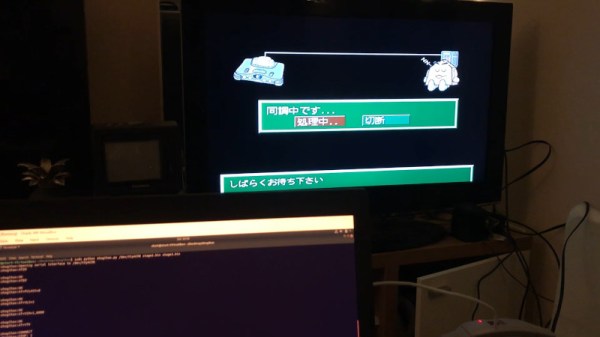
Some like to garden in their spare time, while others prefer to smoke cigars or fold complicated origami figurines. Security researcher [grifter] [CTurt] seems to enjoy cracking consoles instead, and had a go at exploiting the Nintendo 64 over an obscure modem interface.

The 1990s were a wild time, where games shipped in cartridges. This format opened up crazy possibilities to add additional hardware to the cartridge itself. Perhaps most famously, Nintendo packed in the SuperFX chip to enable 3D graphics on the Super Nintendo. Later on, the N64 game Morita Shogi 64 shipped with an entire telephone modem in the cartridge itself.  The resulting exploit is therefore dubbed “shogihax”.

Armed with a dodgy GameShark and a decompiler, [CTurt] set to work. Through careful parsing of the code, they were able to find a suitable overflow bug in the game when using the modem. Unlike more pedestrian savegame hacks, this not only allowed for the execution of arbitrary code but also the modem interface means that it’s possible to continually stream more data to the console on an ad-hoc basis.

It’s a great hack that takes advantage of a relatively accessible cartridge, rather than relying on more obscure hardware such as the N64DD modem or other rarities. We’ve seen other N64 homebrew hacks before, too. Video after the break.

Thanks to [grifter] for the tip!

Continue reading “Remote Code Execution On The N64”