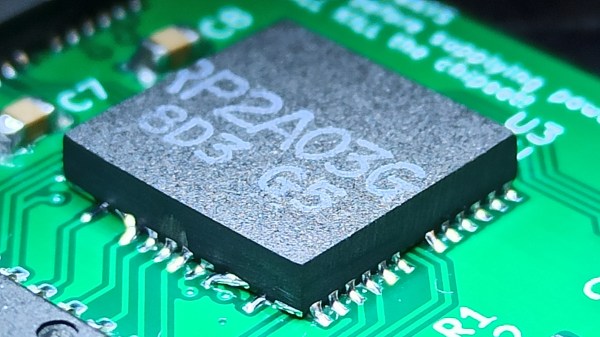
Picture showing the way the cut-down piece of chip is soldered onto the mainboard - looking, indeed, like a QFN package.

Making A Handheld NES By Turning DIP Chips Into…QFN?

You can achieve a lot with a Dremel. For instance, apparently you can slim the original NES down into the hand-held form-factor. Both the CPU and the PPU (Picture Processing Unit) are 40-pin DIP chips, which makes NES minification a bit tricky. [Redherring32] wasn’t one to be stopped by this, however, and turned these DIP chips into QFN-style-mounted dies (Nitter) using little more than a Dremel cutting wheel. Why? To bring his TinyTendo handheld game console project to fruition, of course.

DIP chip contacts go out from the die using a web of metal pins called the leadframe. [Redherring32] cuts into that leadframe and leaves only the useful part of the chip on, with the leadframe pieces remaining as QFN-like contact pads. Then, the chip is mounted onto a tailored footprint on the TinyTendo PCB, connected to all the other components that are, thankfully, possible to acquire in SMD form nowadays.

This trick works consistently, and we’re no doubt going to see the TinyTendo being released as a standalone project soon. Just a year ago, we saw [Redherring32] cut into these chips, and wondered what the purpose could’ve been. Now, we know: it’s a logical continuation of his OpenTendo project, a mainboard reverse-engineering and redesign of the original NES, an effort no doubt appreciated by many a NES enthusiast out there. Usually, people don’t cut the actual chips down to a small size – instead, they cut into the mainboards in a practice called ‘trimming’, and this practice has brought us many miniature original-hardware-based game console builds over these years.

Continue reading “Making A Handheld NES By Turning DIP Chips Into…QFN?” →
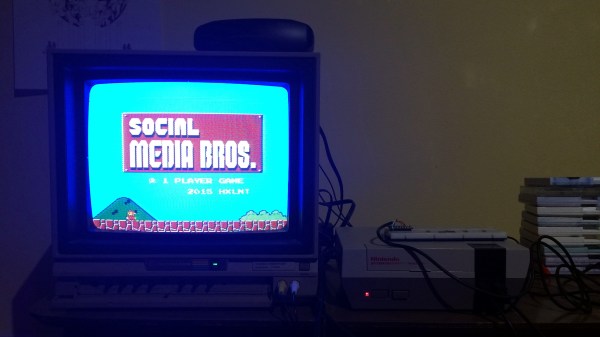
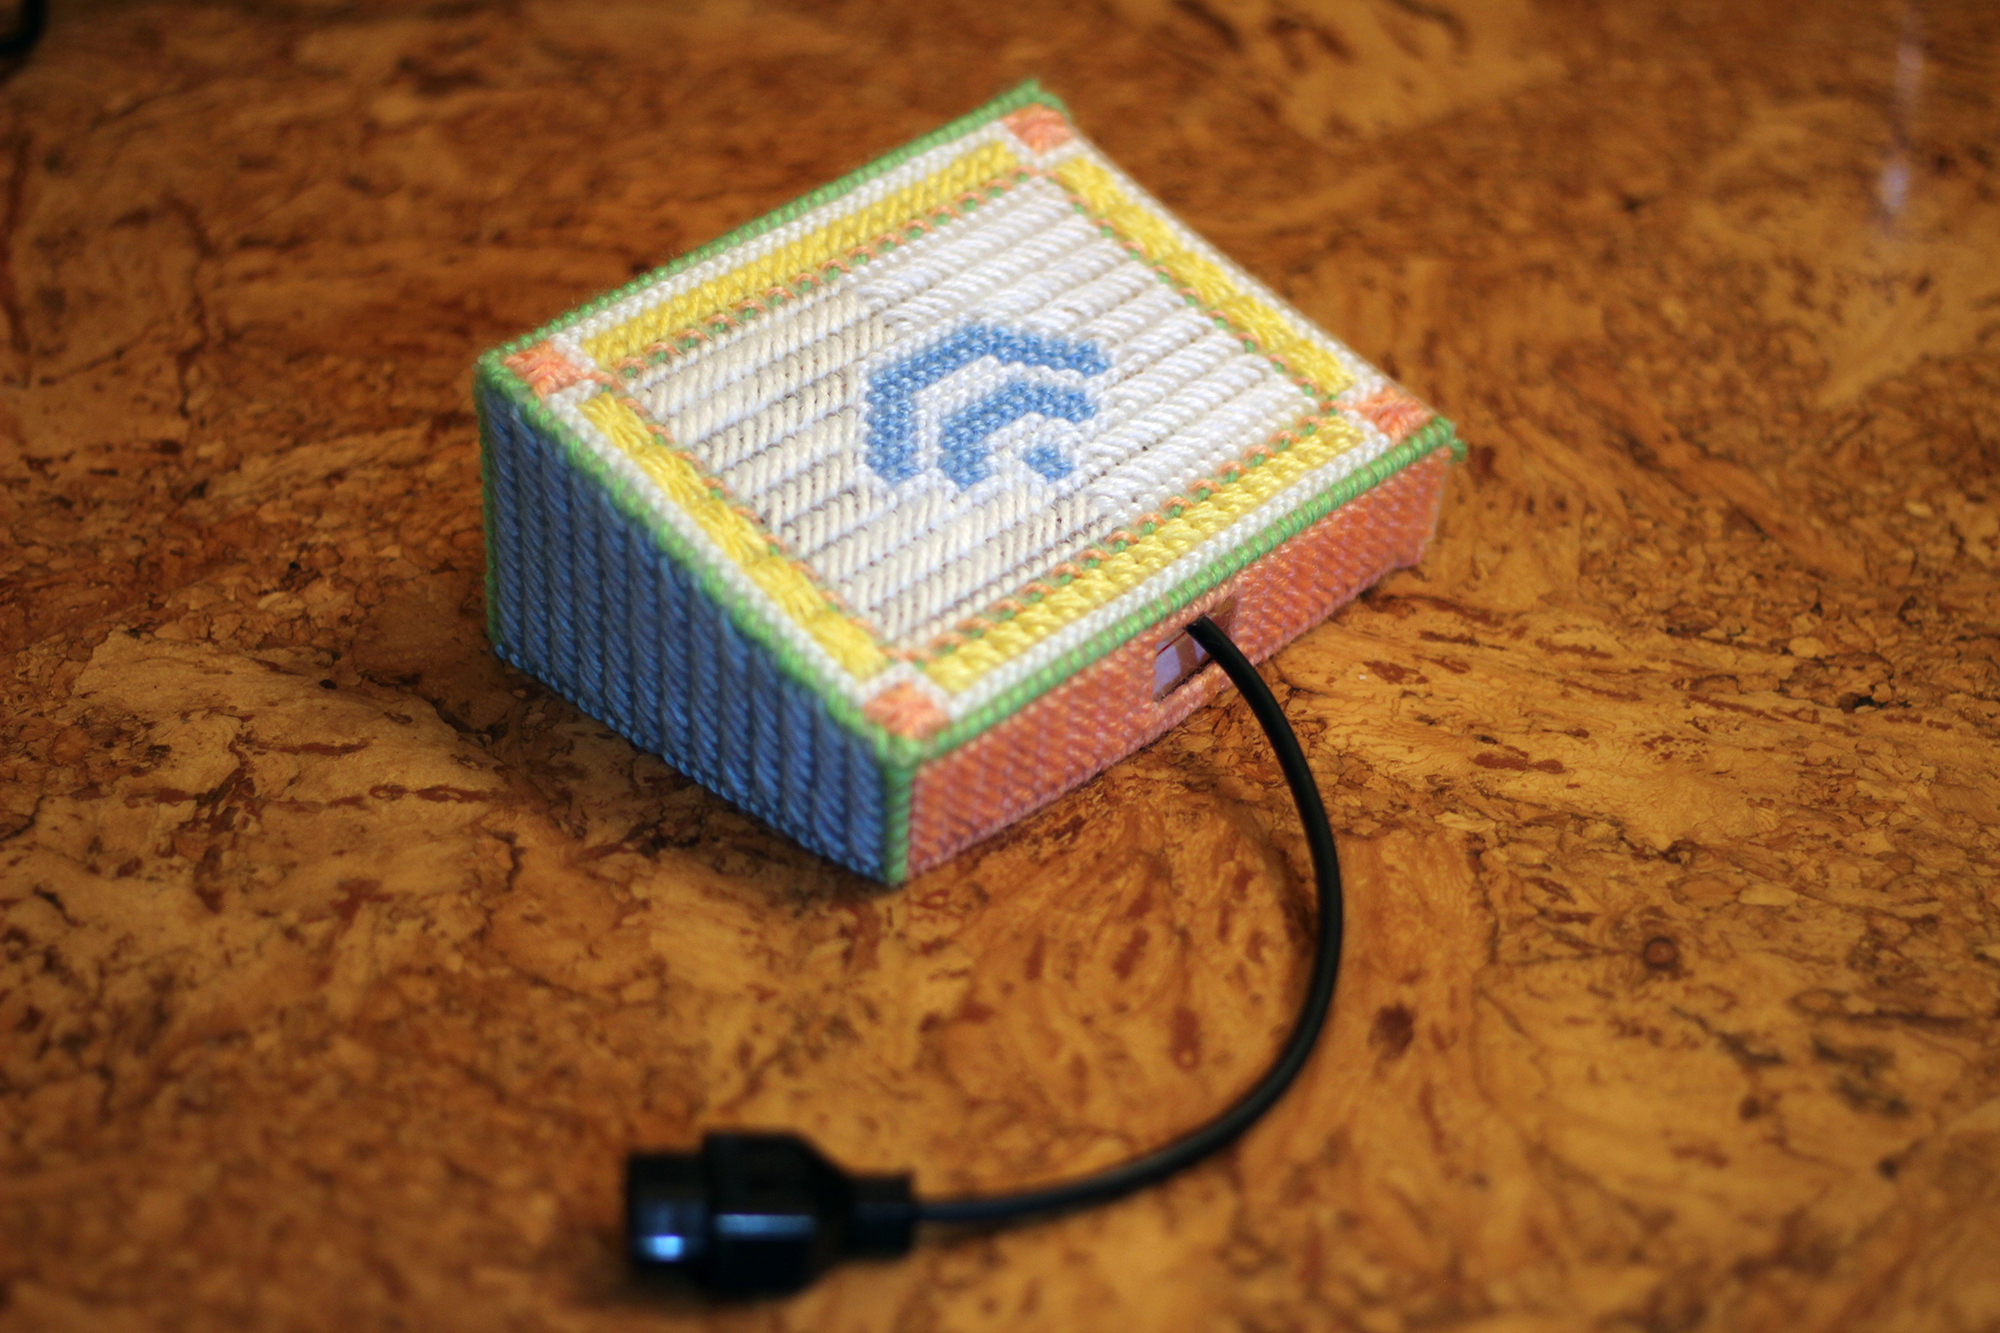
CRT TV screen showing a Super Mario Bros main screen with "Social Media Bros" written on the title screen instead. There's a NES console to the right of it, with a perfboard on top of it, wires going into the console port.

ConnectedNES Brings Twitter Into Super Mario Bros World

Back in 2016, artist and video game historian [Rachel Weil (HXLNT)] was hanging out with her friend and hacking on console stuff, as friends do. [Rachel] was galvanized by the idea of having an iconic game like Super Mario Bros be interrupted by push notifications, and set out to bring a Twitter feed to her NES gaming experience. What she ended up with is ConnectedNES — a charming combination of a custom Twitter modem and a hacked Super Mario Bros ROM, creating a social media experience you have to see for yourself.

The technical side is as immaculate as the visuals. Data is transferred to the NES through the controller port using a Particle Photon that’s emulating a NES controller, and everything is encased in an adorable shell made out of yarn needlework.

The Photon currently taps into the Twitter feed through a proxy server run locally, and listens for tweets with specific keywords, relaying them to the ROM through mimicking controller port inputs. The ROM, now bearing the name Social Media Bros, went through some careful assembly trimming work. In particular, [Rachel] had to sacrifice Green Mario to the bit bucket gods.

Playing this game has to be quite the experience. Thankfully, source code for everything — the proxy server, the Photon firmware and the NES ROM — is on GitHub for all of us NES enthusiasts to hack at. If simply reading the feed is not enough, you can send tweets from your NES as well.

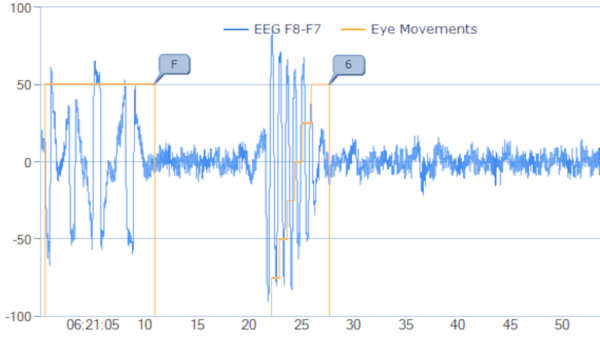
EEG graph with activity sections highlighted, one part highlighted as "F" and other as "6"

DREEMWORK Lets You Code Morse From Inside Your Dream

Lucid dreaming fascinates hackers. Every few years for over a decade now, we’ve seen a serious project dedicated to studying or taking advantage of this phenomenon, and the interest in this topic hasn’t faded still. [Michael] has contacted us to tell about a small and unconventional breakthrough that a few lucid dream hackers have accomplished — communicating in Morse code from their dream using eye movements.

These hackers are using Dreem 2 and 3 headbands, which include clinical-grade polysomnography features like EEG measurements, which is instrumental for decoding eye movements. [Michael] tells us that one of the participants, [Sebastiii], was able to transfer the letter F by looking twice to the left, then right and left again – ..-. in Morse. With an off-the-shelf headband, this information transmission method is quite accessible to anyone willing to learn Morse, and [Michael] himself is now working on an automated decoding solution. We might forget what happens in our dreams fairly quickly, but this unexpected side channel could be a good counter.

[Michael] has tipped us off to many of the projects we’ve covered, and himself has quite a history in the field. His own research into using Morse to communicate out of lucid dreams dates back as far as 2012. If your ham exam preparations have you dream in Morse, perhaps this is the perfect project to join. A lot of projects we’ve seen focus on gaining enough awareness to achieve lucidity first, like the variety of lucid dream-invoking masks we’ve covered over the years. This part being thoroughly explored, it makes sense that communication is the next frontier to be tackled.

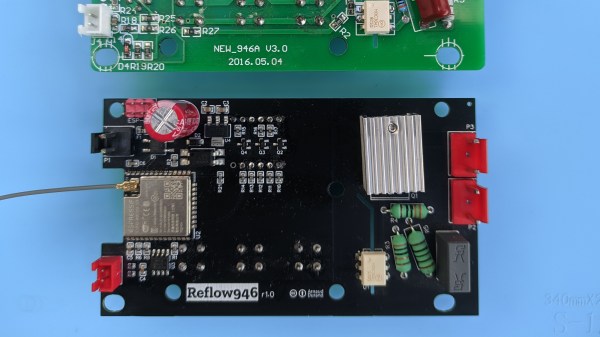
New controller PCB shown below the original one. The new PCB has an ESP module with an antenna, a lot of support circuitry, and all the same connectors that the original board does.

Controller For 946C Hotplate Adds Reflow Profile Upload Over BLE

Reflow hotplates are a wonderful tool for PCB assembly if you can keep your designs single-sided. The 946C hotplate in particular has been on hackers’ radar for a while – a 200x200mm working surface hotplate available for under $100 is a decent investment. As with other reflow tools, it was a matter of time until someone made a replacement controller for it. This one, you’ll want to keep in mind – it’s a replacement controller project by [Arnaud Durand] and [Elias Rodriguez Martin], called Reflow946.

Keeping to best practices, the board is a drop-in replacement for the stock controller – swap cables over and go. The host processor is an ESP32, and it lets you can program reflow profiles in using BLE, with a Python application to help. The whole design is open-source and on GitHub, of course – keeping with best 3D printing traditions, you can already order the parts and PCBs, and then assemble them using the hotplate you’re about to upgrade. As far as aftermarket controllers go, here’s no doubt this board gives you way more control in reflow and lets you compensate for any possible subpar calibration while at it. Continue reading “Controller For 946C Hotplate Adds Reflow Profile Upload Over BLE” →

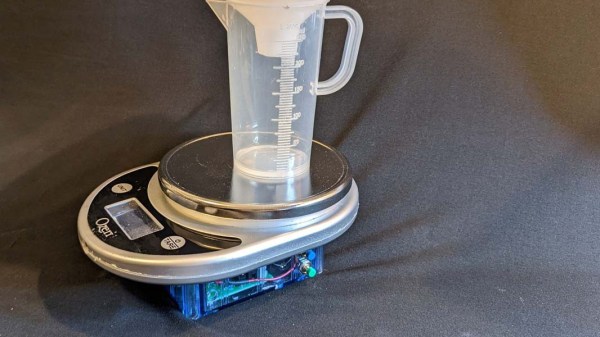
picture showing the re-built scale with an extra blue box with electronics on the bottom of it. on the scale, there's a transparent food-grade plastic glass with measurement marks on the side.

Urine Flow Measurement Made Accessible With UroFlow

If you’re dealing with a chronic illness, the ability to continuously monitor your symptoms is indispensable, helping you gain valuable insights into what makes your body tick – or, rather, mis-tick. However, for many illnesses, you need specialized equipment to monitor them, and it tends to be that you can only visit your doctor every so often. Thankfully, we hackers can figure out ways to monitor our conditions on our own. With a condition called BPH (Benign Prostate Hyperplasia), one of the ways to monitor it is taking measurements of urinary flow rate. Being able to take these measurements at home provides better insights, and, having found flow rate measurement devices to be prohibitively expensive to even rent, [Jerry Smith] set out to build his own.

This build is truly designed to be reproducible for anyone who needs such a device. Jerry has intricately documented the project and its inner workings – the 31-page document contains full build instructions, BOM for ordering, PCB description and pinout diagrams, calibration and validation instructions, and even software flowcharts; the GitHub repo has everything else you might need. We’re pleasantly surprised – this amount of documentation isn’t typically seen in hacker projects, and is even more valuable considering that this is a medical device that other hackers in need will want to reproduce.

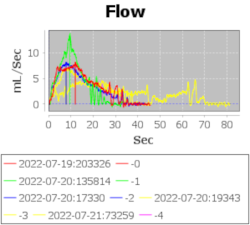
Graph titled "Flow", with X axis saying "seconds" and Y axis saying "ml/Sec". There's differently colored plots on the graph, each apparently corresponding to a different measurement.For the hardware, [Jerry] took a small digital scale of a certain model and reused its load cell-based weighing mechanism using an HX711 amplifier, replacing the screen and adding an extra box for control electronics. With an Arduino MKR1010 as brains of the operation, the hardware’s there to log flow data, initially recorded onto the SD card, with WiFi connectivity to transfer the data to a computer for plotting; a DS3234 RTC breakout helps keep track of the time, and a custom PCB ties all of these together. All of these things are easy to put together, in no small part due to the extensive instructions provided.
Continue reading “Urine Flow Measurement Made Accessible With UroFlow” →

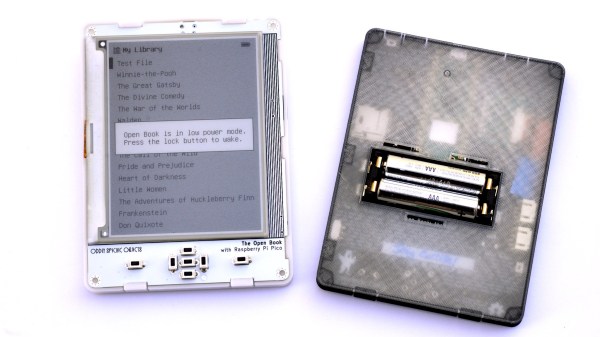
Two e-readers side to side. On the left, you can see the frontal view, showing text on the e-ink screen. On the right, you can see the backside with a semi-transparent 3D-printed cover over it, and two AAA batteries inside a holder in the center.

Open Book Abridged: OSHW E-Reader Now Simplified, Pico-Driven

If you ever looked for open-source e-readers, you’ve no doubt seen [Joey Castillo]’s Open Book reader, but you might not yet have seen the Abridged version he’s building around a Raspberry Pi Pico.

The Open Book project pairs a 4.2″ E-Ink screen with microprocessors we all know and love, building a hacker-friendly e-reader platform. Two years ago, this project won first place in our Adafruit Feather contest — the Feather footprint making the Open Book compatible with a wide range of MCUs, giving hackers choice on which CPU their hackable e-reader would run. Now, it’s time for a RP2040-based reboot.

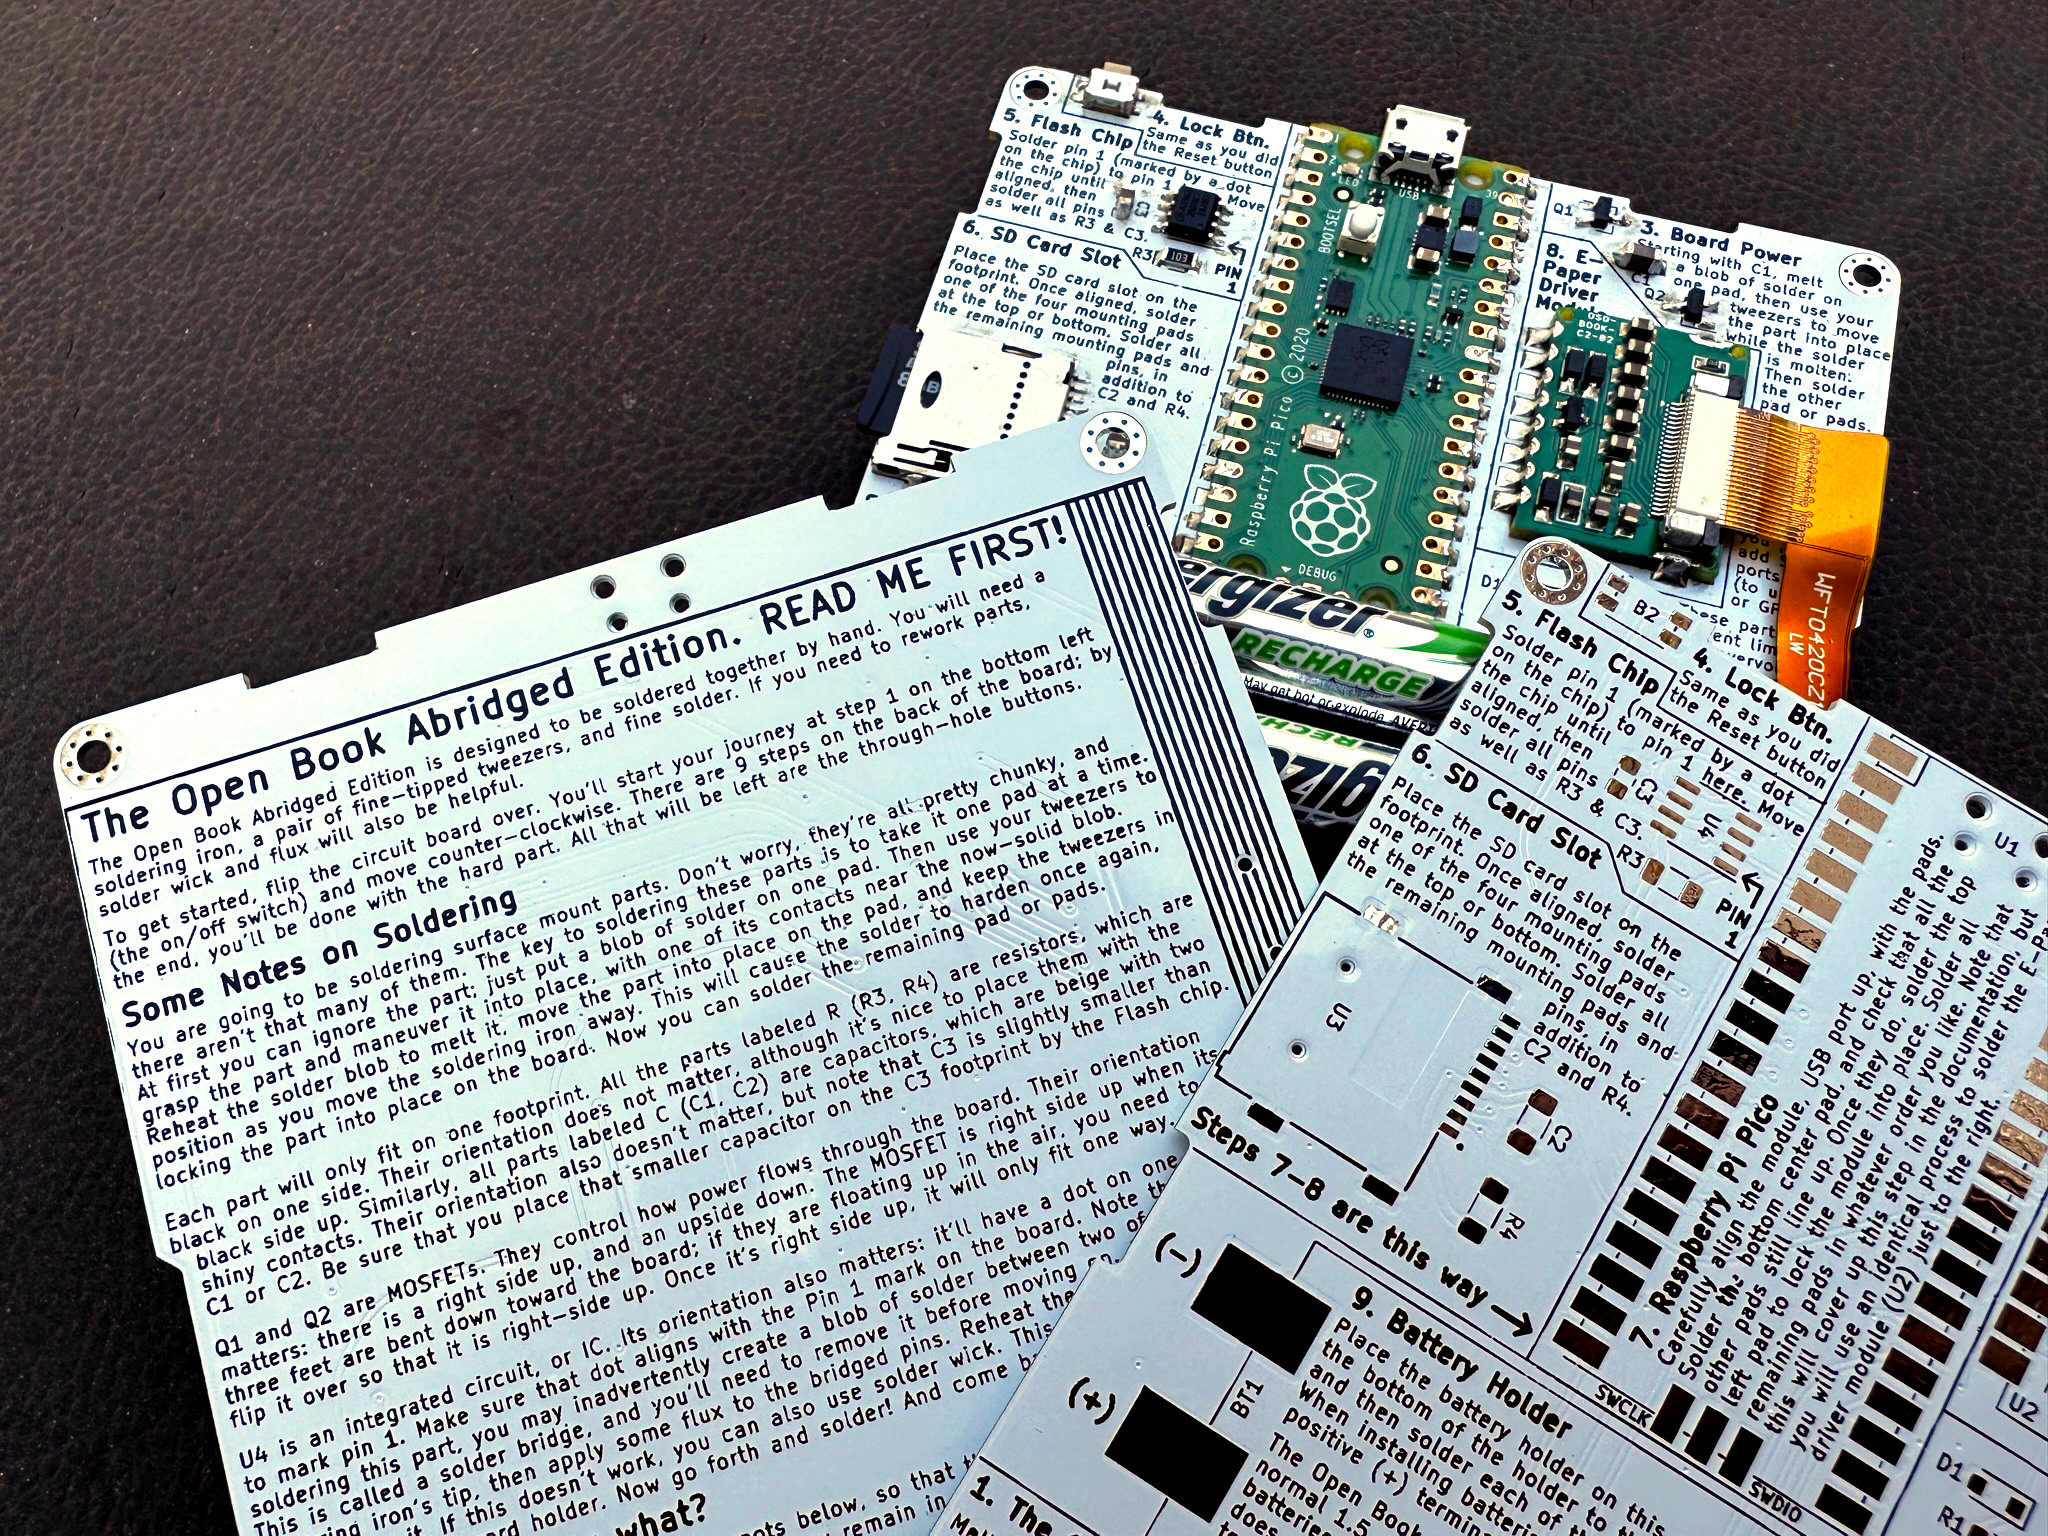
three PCBs being shown - one soldered-together version with a Pico on it, and two upopulated PCBs, showing front and back, on the populated PCB, you can see the Raspberry Pi Pico and other components soldered on. On the unpopulated PCBs, you can see there's a lot of text helping you understand and assemble this e-reader.This project is designed so that you can assemble it on your own after sourcing parts and PCBs. To help you in the process, the PCB itself resembles a book page – on the silkscreen, there is explanations of what each component is for, as well as information that would be useful for you while hacking on it, conveying the hardware backstory to the hacker about to dive into assembly with a soldering iron in hand. There’s simple but quite functional software to accompany this hardware, too – and, as fully open-source devices go, any missing features can be added.

Joey has recorded a 30-minute video of the Pi Pico version for us, assembling and testing the newly ordered boards, then showing the software successfully booting and operational. The Pi Pico-based revision has been greatly simplified, with a number of self-assembly aspects improved compared to previous versions – the whole process really does take less than half an hour, and he gets it done with a pretty basic soldering iron, too!

If you’re looking for updates on this revision as development goes on, following [Joey] on Twitter is your best bet. He’s no stranger to making devices around us more free and then sharing the secret sauce with all of us! During the 2021 Remoticon he showed off a drop-in replacement mainboard for the Casio F-91W wristwatch, and told us all about reverse-engineering its controller-less segment LCD — worth a listen for any hacker who’s ever wanted to bend these LCDs to their will.

Continue reading “Open Book Abridged: OSHW E-Reader Now Simplified, Pico-Driven” →

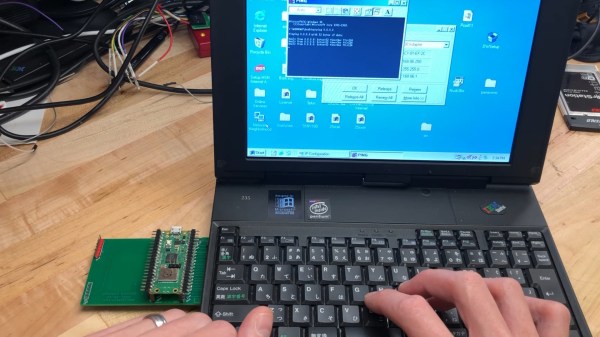
Card's author typing on the IBM PC110's keyboard, with the Pico W-based card plugged into the PCMCIA slot on the left. PC110's screen shows successful ping 8.8.8.8.8.

Pi Pico W Does PCMCIA, Gets This IBM PC110 Online

Bringing modern connectivity to retro computers is an endearing field- with the simplicity of last-century hardware and software being a double-edged sword, often, you bring a powerful and tiny computer of modern age to help its great-grandparent interface with networks of today. [yyzkevin] shows us a PCMCIA WiFi card built using a Pi Pico W, talking PCI ISA. This card brings modern-day WiFi connectivity to his IBM PC110, without requiring a separate router set up for outdated standards that the typical PCMCIA WiFi cards are limited by.

The RP2040 is made to talk PCI ISA using, of course, the PIO engine. A CPLD helps with PCI ISA address decoding, some multiplexing, and level shifting between RP2040’s 3.3V and the PCI 5 V levels. The RP2040 software emulates a NE2000 network card, which means driver support is guaranteed on most OSes of old times, and the software integration seems seamless. The card already works for getting the PC110 online, and [yyzkevin] says he’d like to improve on it – shrink the design so that it resembles a typical PCMCIA WiFi card, tie some useful function into the Pico’s USB port, and perhaps integrate his PCMCIA SoundBlaster project into the whole package while at it.

This is a delightful project in how it achieves its goal, and a pleasant surprise for everyone who’s been observing RP2040’s PIO engine conquer interfaces typically unreachable for run-of-the-mill microcontrollers. We’ve seen Ethernet, CAN and DVI, along many others, and there’s undoubtedly more to come.

We thank [Misel] and [Arti] for sharing this with us!