Liquid Cooling Keeps This Electronic Load’s MOSFETs From Burning

Problem: your electronic load works fine, except for the occasional MOSFET bursting into flames. Solution: do what [tbladykas] did, and build a water-cooled electronic load.

One can quibble that perhaps there are other ways to go about preventing your MOSFETs from burning, including changes to the electrical design. But he decided to take a page from [Kerry Wong]’s design book and go big. [Kerry]’s electronic load was air-cooled and capable of sinking 100 amps; [tbladykas] only needed 60 or 70 amps or so. Since he had an all-in-one liquid CPU cooler on hand, it was only natural to use that for cooling.

The IXYS linear MOSFET dangles off the end of the controller PCB, where the TO-247 device is soldered directly to the copper cold plate of the AiO cooler. This might seem sketchy as the solder could melt if things got out of hand, but then again drilling and tapping the cold plate could lead to leakage of the thermal coupling fluid. It hasn’t had any rigorous testing yet – his guesstimate is 300 Watts dissipation at this point – but as his primary endpoint was to stop the MOSFET fires, the exact details aren’t that important.

We’ve seen a fair number of liquid-cooled Raspberry Pis and Arduinos before, but we can’t find an example of a liquid-cooled electronic load. Perhaps [tbladykas] is onto something with this design.

3D-Printed Tools Turn Bench Vise Into Expedient Press Brake

Chances are pretty good that most of us have used a bench vise to do things far beyond its intended use. That’s understandable, as the vise may be the most powerful hand tool in many shops, capable of exerting tons of pressure with the twist of your wrist. Not taking advantage of that power wouldn’t make any sense, would it?

Still, the clamping power of the vise could sometimes use a little finesse, which is the thinking behind these 3D-printed press brake tools.  [Brauns CNC] came up with these tools, which consist of a punch and a die with mating profiles. Mounted to the jaws of the vise with magnetic flanges, the punch is driven into the die using the vise, forming neat bends in the metal. [Braun] goes into useful detail on punch geometry and managing springback of the workpiece, and handling workpieces wider than the vise jaws. The tools are printed in standard PLA or PETG and are plenty strong, although he does mention using his steel-reinforced 3D-printing method for gooseneck punches and other tools that might need reinforcement. We’d imagine carbon-fiber reinforced filament would add to the strength as well.

To be sure, no matter what tooling you throw at it, a bench vise is a poor substitute for a real press brake. Such machine tools are capable of working sheet metal and other stock into intricate shapes with as few setups as possible, and bring a level of power and precision that can’t be matched by an improvised setup. But the ability to make small bends in lighter materials with homemade tooling and elbow grease is a powerful tool in itself.

Continue reading “3D-Printed Tools Turn Bench Vise Into Expedient Press Brake”

Creating A Custom Engagement Ring With 3D-Printing

Even if you’re pretty sure what the answer will be, a marriage proposal is attended by a great deal of stress to make the event as memorable and romantic as possible. You’ve got a lot of details to look after, not least of which is the ring. So why not take some of the pressure off and just 3D-print the thing?

No, a cheesy PLA ring is probably not going to cut it with even the most understanding of fiancees, and that’s not at all what [Justin Lam] did with this DIY engagement ring. He took an engineer’s approach to the problem – gathering specs, making iterative design changes in Fusion 360, and having a prototype ring SLA printed by a friend. That allowed him to tweak the design before sending it off to Shapeways for production. We were surprised to learn that jewelry printing is a big deal, and Shapeways uses a lost-wax process for it. First a high-resolution wax SLA printer is used to make a detailed positive, which is then used to make a plaster mold. The mold is fired to melt the wax, and molten gold is poured in to make the rough casting, which is cleaned and polished before shipping.

Once he had the ring, [Justin] watched a few jewelry-making videos to learn how to set the family heirloom stone into the bezel setting; we admit we cringed a bit when he said he used the blade shaft of a screwdriver to crimp the edge of the bezel to the stone. But it came out great, even if it needed a bit of resizing. The details of the proposal are left to the romantically inclined, but TL;DR – she said yes.

Congratulations to the happy couple, and to [Justin] for pulling off a beautiful build. Most of our jewelry hacks are of the blinkenlight variety rather than fine jewelry, although we have featured a machinist’s take on the subject before.

Hackaday Links Column Banner

Hackaday Links: January 5, 2020

It looks like the third decade of the 21st century is off to a bit of a weird start, at least in the middle of the United States. There, for the past several weeks, mysterious squads of multicopters have taken to the night sky for reasons unknown. Witnesses on the ground report seeing both solo aircraft and packs of them, mostly just hovering in the night sky. In mid-December when the nightly airshow started, the drones seemed to be moving in a grid-search pattern, but that seems to have changed since then. These are not racing drones, nor are they DJI Mavics; witnesses report them to be 6′ (2 meters) in diameter and capable of staying aloft for 90 minutes. These are serious professional machines, not kiddies on a lark. So far, none of the usual government entities have taken responsibility for the flights, so speculation is all anyone has as to their nature. We’d like to imagine someone from our community will get out there with radio direction finding gear to locate the operators and get some answers.

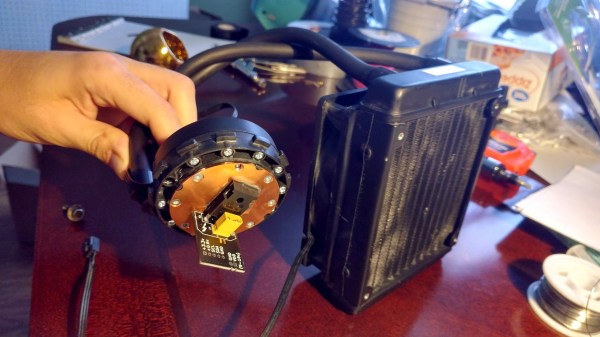
We all know that water and electricity don’t mix terribly well, but thanks to the seminal work of White, Pinkman et al (2009), we also know that magnets and hard drives are a bad combination. But that didn’t stop Luigo Rizzo from using a magnet to recover data from a hard drive. He reports that the SATA drive had been in continuous use for more than 11 years when it failed to recover after a power outage. The spindle would turn but the heads wouldn’t move, despite several rounds of percussive maintenance. Reasoning that the moving coil head mechanism might need a magnetic jump-start, he probed the hard drive case with a magnetic parts holder until the head started moving again. He was then able to recover the data and retire the drive. Seems like a great tip to file away for a bad day.

It seems like we’re getting closer to a Star Trek future every day. No, we probably won’t get warp drives or transporters anytime soon, and if we’re lucky velour tunics and Spandex unitards won’t be making a fashion statement either. But we may get something like Dr. McCoy’s medical scanner thanks to work out of MIT using lasers to conduct a non-contact medical ultrasound study. Ultrasound exams usually require a transducer to send sound waves into the body and pick up the echoes from different structures, with the sound coupled to the body through an impedance-matching gel. The non-contact method uses pulsed IR lasers to penetrate the skin and interact with blood vessels. The pulses rapidly heat and expand the blood vessels, effectively turning them into ultrasonic transducers. The sound waves bounce off of other structures and head back to the surface, where they cause vibrations that can be detected by a second laser that’s essentially a sophisticated motion sensor. There’s still plenty of work to do to refine the technique, but it’s an exciting development in medical imaging.

And finally, it may actually be that the future is less Star Trek more WALL-E in the unlikely event that Segway’s new S-Pod personal vehicle becomes popular. The two-wheel self-balancing personal mobility device is somewhat like a sitting Segway, except that instead of leaning to steer it, the operator uses a joystick. Said to be inspired by the decidedly not Tyrannosaurus rex-proof “Gyrosphere” from Jurassic World, the vehicle tops out at 24 miles per hour (39 km/h). We’re not sure what potential market for these things would need performance like that – it seems a bit fast for the getting around the supermarket and a bit slow for keeping up with city traffic. So it’s a little puzzling, although it’s clearly easier to fully automate than a stand-up Segway.

2D-Platform Seeks Balance With A Touch Screen

It’s the [Bruce Land]-iest season of all, when the Cornell professor submits the projects his microcontroller class students have been working on all semester. Imagination does not seem to be in short supply with these students, and we always look forward to these tips this time of year.

[Greg] and [Sam]’s touch-screen two-dimensional ball balancer is a good example of what [Land]’s students turn out. The resistive touch screen is supported by a 3D-printed gimballed platform and tilted in two axes by hobby servos. [Greg] and [Sam] chose to read the voltage outputs from the touch screen directly using the ADC on a PIC32, toggling between the two axes at 2 kHz. Two PID control loops were implemented to keep the ball as centered as possible on the platform, and the video below shows that there’s still some loop tuning to do. But given the positional inaccuracies of hobby servos and the compliance in the gimbal, we’re impressed that they were able to keep the system under control at all.

Of course we’ve seen ball-balancers before, but most of them have closed the loop using either cameras or microphones. Seeing direct sensing on the platform like this is a nice change of pace. Continue reading “2D-Platform Seeks Balance With A Touch Screen”

The Fun Is On The Christmas Tree With This Playable Duck Hunt Decoration

‘Tis the season for leftovers, be they food, regifted presents, or the decorations left behind in the wake of the festivities. Not to mention the late tips we get for holiday-themed builds, like this Duck Hunt ornament that’s completely playable.

Details are sparse in [wermy]’s video below, but there’s enough there to get the gist. The game is based on the Nintendo classic, where animated ducks fly across the screen and act as targets for a light pistol. Translating that to something suitable for decorating a Christmas tree meant adding an Arduino and an IR LED to the original NES light pistol, and building a base station with a Feather and a small LCD screen into a case that looks like [The Simpsons] TV. An LED on each 3d-printed duck target lights in turn, prompting you to blast it with the gun. An IR sensor on each duck registers hits, while the familiar sound effects are generated by the base, which also displays the score. Given a background of festive blinkenlights, it’s harder than it sounds – see it in action briefly below.

[wermy] has done some interesting builds before, like a RetroPie in an Altoids tin and a spooky string of eyes for Halloween. We hope he’ll come through with a more detailed build video for this project at some point – we’re particularly interested in those beautiful multi-color 3D-prints.

Continue reading “The Fun Is On The Christmas Tree With This Playable Duck Hunt Decoration”

Roll The Bones Chernobyl Style

We’re suckers for the Fallout aesthetic, so anything with a post-apocalyptic vibe is sure to get our attention. With a mid-century look, Nixie tubes, a brushed metal faceplate, and just a touch of radioactivity, this quantum random number generator pushes a lot of design buttons, and it pushes them hard.

Charmingly named “Chernobyl Dice”, this little gadget comes to us from [Nathan Griffith], and appears to be one of those “Why not?” builds we love so much. The heart of any random number generator is a source of entropy, for which [Nathan] chose to use six slightly radioactive uranium glass marbles. Those feature prominently in the front panel of the device, occasionally made to fluoresce with a few UV LEDs just because it looks cool. A Geiger tube inside the case is used to look for decay events from the marbles every millisecond. After some adjustment for the bias toward zeroes due to the relative rarity of decay events, the accumulated bits are displayed on eight Nixies. The box can be set to generate a stream of random numbers up to 31 bits long and send it over a USB port, or make random throws of a die with a settable number of sides. And when it’s not doing random stuff, it can just be a cool Nixie clock.

There are lots of ways to generate the entropy needed for truly random number generation, from a wall of lava lamps to bubbles in a fish tank. They’ve all got style, but something about this one just works.

Continue reading “Roll The Bones Chernobyl Style”