Found Footage: Elliot Williams Talks Nexus Technologies

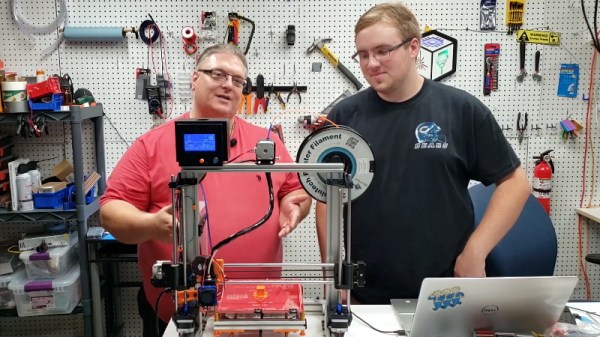
Back at the 2017 Superconference, Hackaday Managing Editor Elliot Williams started his talk about the so-called “Internet of Things” by explaining the only part he doesn’t like about the idea is the Internet… and the things. It’s a statement that most of us would still agree with today. If anything, the situation has gotten worse in the intervening years. Commercial smart gadgets are now cheaper and more plentiful than they’ve ever been, but it seems like precious little has been done to improve their inherent privacy and security issues.

But his talk doesn’t serve to bash the companies producing these devices or even the services that ultimately folded and left their customers with neigh useless gadgets. That’s not his style. The central theme of Nexus Technologies: Or How I Learned to Love WiFi” is that a smart home can be wonderful thing, assuming it works the way you want it to. Elliot argues that between low-cost modular hardware and open source software, the average hacker has everything they need to build their own self-contained home automation ecosystem. One that’s not only cheaper than what they’re selling at the Big Box electronics store, but also doesn’t invite any of the corporate giants to the party.

Of course, it wasn’t always so. A decade ago it would have been all but impossible, and five years ago it would have been too expensive to be practical. As Elliot details his journey towards a truly personal smart home, he explains the advances in hardware and software that have made it not just possible on the DIY level, but approachable. The real takeaway is that once more people realize how cheap and easy it is to roll your own smart home gadgets, they may end up more than willing to kick Big Brother to the curb and do IoT on their own terms.

This previously unpublished recording somehow slipped between the cracks of the editing room floor but upon recent discovery, it’s still just as relevant today. Take a look at Elliot’s view on Nexus Technologies, then join us after the break for a deeper dive. Make sure to subscribe to Hackaday’s YouTube channel to get in on the 2019 Hackaday Superconference live stream starting Saturday, November 16th.

Continue reading “Found Footage: Elliot Williams Talks Nexus Technologies”

An Open Hardware Laser Engraver For Everyone

Right now, you can get a diode laser engraver on eBay for around $100 USD. That sounds like a deal, but it’ll probably use some arcane proprietary software, won’t be terribly accurate, and the laser itself will almost certainly be fully exposed. Of course there’s no shortage of DIY builds which improve upon this situation greatly, but unfortunately the documentation and instructions to replicate them yourself often leave a lot to be desired.

To get a safe and accurate laser platform into the hands of hackers everywhere, we need more well documented open source designs that are actually built with community in mind. Projects like the Engravinator from [Adam Haile]. This isn’t a one-off design with documentation thrown together after the fact, it’s a fully open hardware engraver with a concise assembly guide that’s built from 3D printed parts and readily available components. You’re free to source and print the parts yourself or, eventually, purchase everything as a kit.

Pen-equipped Engravinator

The microwave-sized Engravinator is built from standard 2020 aluminum extrusion, and offers a workable area of 130mm x 130mm. There’s a hatch on the front of the enclosure for objects that are small enough to fit inside the machine, but the open bottom and handles on the top also allow the user to place the Engravinator directly onto the work surface. [Adam] says this feature can be especially useful if you’re looking to burn a design into a tabletop or other large object.

Outside of the aluminum extrusion and miscellaneous hardware that make up the frame, most of the other parts are 3D printed. Released under the CERN Open Hardware License v1.2 and distributed as both STL and STEP files, the printable parts for the Engravinator are ripe for modification should you be so inclined. The same goes for the DXF files for the enclosure panels, which will need to be cut out of orange acrylic with a CNC or (ironically) a laser.

Continue reading “An Open Hardware Laser Engraver For Everyone”

Projector And NES Mini Hide Out Inside The Real Thing

Taking a page out of the Xzibit Engineering Handbook, [Geeksmithing] recently decided that the gutted carcass of an original Nintendo Entertainment System would make a perfect home for…a smaller NES. Well, that and two wireless controllers. Plus a projector. Oh, and batteries so it can be used on the go. Because really, at that point, why not?

The video after the break starts with a cleverly edited version of a legitimate NES commercial from the gaming glory days of the 1980s, and segues into an rundown of all the modern hardware [Geeksmithing] crammed into the case of this legendary console. It helps that the official NES Classic used for the project is so much smaller than its more than thirty year old predecessor, leaving plenty of room inside to get creative. We particularly like the dual wireless controllers which are conveniently hiding inside the original cartridge slot.

Frankly, that alone would have made this project worthwhile in our book, but [Geeksmithing] didn’t stop there. He also added in a pico projector that’s normally covered up by the black facia on the rear of the console, complete with a “kickstand” to tip the system up to the appropriate angle. Continuing with the theme of enabling ad-hoc NES play sessions, he also packed in enough batteries to keep the system running for a respectable amount of time. There’s even put an inductive charging coil in the bottom of the system so he can top off the batteries just by dropping the system on a modified SNES mousepad.

Last time [Geeksmithing] checked in, he was embedding a Raspberry Pi into a Super Mario Thwomp that was made from real concrete. We can’t wait to see what he comes up with next.

Continue reading “Projector And NES Mini Hide Out Inside The Real Thing”

A USB-C Bench Power Supply

A bench power supply is one of those things that every hacker needs, and as the name implies, it’s intended to occupy a place of honor on your workbench. But with the addition of USB-C support to his DPH5005 bench supply, [Dennis Schneider] is ready to take his on the road should the need ever arise.

The build started with one of the common DPH5005 bench power supply kits, which [Dennis] says he was fairly happy with aside from a few issues which he details in the post on his blog. Even if you aren’t looking to modify your own kit with the latest and greatest in the world of Universal Serial Bus technology, it’s interesting to read his thoughts on the power supply kit if you’ve been considering picking one up yourself.

Under normal circumstances you are supposed to give the DPH5005 DC power via the terminals on the back panel of the supply, which in turn is regulated and adjusted via the front panel controls. To add support for USB-C, all [Dennis] had to do was install a USB-PD trigger module configured to negotiate 20 VDC in the back of the case and connect it to the DC input. To hold it in place while isolating it from the metal case, he used a piece of scrap PCB carefully cut and wrapped in Kapton tape.

This actually isn’t the first portable bench power supply we’ve seen. Last year we saw one that got its input power from Makita portable tool batteries, but we think all things considered, the USB-C option is probably a bit more convenient.

Rise And Shine With This Japanese-Inspired Clock

On the Hackaday.io page for his gorgeous “Sunrise Alarm Clock”, [The Big One] is quick to point out that his design is only inspired by Japanese lanterns, and does not use authentic materials or traditional woodworking techniques. Perhaps that’s an important fact to some, but we’ll just say that the materials used seem far less important when the end result looks this good.

Unfortunately [The Big One] hasn’t provided any interior shots of his clock, as it sounds like the aesthetics of the internal wiring isn’t quite up to the standard set by the outside of it. But he has provided a concise parts list, a wiring diagram, and source code, so we’ve got a pretty good idea of what’s under the hood.

The clock is powered by the uBBB 32u4, an ATMega32u4 development board that [The Big One] developed in conjunction with [Warren Janssens]. It uses the popular MAX7219 LED matrix for the display, and a DS3231 RTC module to help keep the time. There’s also a DFPlayer Mini module onboard that allows him to play whatever sound effects or music he wants when the alarm goes off.

Of course the star of the show is the LED strips which illuminate the shōji-style column. These have apparently been wrapped around a coffee can of all things, which not only serves as a convenient way of holding the strips, but [The Big One] says actually makes the speaker sound a bit better. Hey, whatever works.

This isn’t the first “lantern” clock to grace these pages, but compared to the high-tech presentation of previous projects, we can’t help but be impressed by the grace and elegance of this wooden masterpiece.

Atari Tape Drive Turned Security DVR

We know that a lot of our beloved readers don’t take kindly to abuse of vintage hardware, so the Atari fans in the audience may want to avert their eyes for this one. Especially if they’re particularly keen on spinning up their Jawbreaker cassette on authentic hardware, as [iot4c] has gutted an Atari XC12 Program Recorder to turn it into an enclosure for a Raspberry Pi video storage device.

Step one of this conversion was, as you might expect, removing all the original hardware from the cassette recorder case. From there, [iot4c] fitted the Raspberry Pi, a USB hard drive, and a YDS-5A DC-DC converter to power them. Depending on what the drive setup looks like, it might also make sense to add a USB powered hub. A length of Ethernet cable was left hanging out the back of the Atari XC12 so it could be plugged into the network, but a panel mount RJ45 connector could spruce things up a bit.

Of course, gutting an old piece of hardware and sticking a Pi into it isn’t exactly breaking any new ground at this point. But we did appreciate that [iot4c] went the extra mile to wire it up so the “Save” LED now doubles as a network activity indicator. Which pretty much brings it full circle in terms of functionality for a network-attached video recorder.

Earlier in the year [iot4c] converted a 65XE into a USB keyboard with the help of an Arduino Leonardo, but the vintage Atari aficionados will be happy to note that at least in that case the donor machine remained fully functional.

Adding USB-C To The TS100

The TS100 is a popular entry into the new breed of small temperature-controlled soldering irons that, at least for some of us, have started to replace the bulky soldering stations of old. Unfortunately, one downside of this particular model is the need to plug it into a fairly ungainly laptop-style power supply, which certainly hinders its otherwise portable nature. But [Dennis Schneider] has come up with a very slick solution to that problem by adding a USB-PD module to his TS100.

The idea here is very simple: just remove the original DC barrel connector, and in its place install a USB-PD trigger module. In practice it took more than a little fiddling, cutting, persuasion, and creative soldering (ironically, with a soldering station), but the end result does look quite professional.

It helps that the USB-PD module [Dennis] used was almost the exact same width as the TS100 PCB, meaning that the modified iron could go back into its original case. Though as we saw not so long ago, there’s a growing community of 3D printed replacement cases should you select a trigger module that doesn’t so neatly fit the footprint of the original board. Or if you didn’t want to modify the iron at all, you could always just make an external adapter.

Those that have some experience with these irons might be wondering what the point of modifying the TS100 to take USB-C is when we already have the TS80. As it turns out, while the TS80 is using a USB-C connector it doesn’t actually use USB-PD, so its not taking advantage of the enhanced power delivery capabilities. We know, it’s all kind of confusing.