Hacking This Smart Bulb Is Almost Too Easy

The regular Hackaday reader no longer needs to be reminded about how popular the ESP8266 is; they see the evidence of that several times a day. But what might not be quite so obvious is that it isn’t just us hacker types that are in love with the inexpensive IoT microcontroller, it’s also popping up more and more frequently in commercial products.

As [Majenko] demonstrates, one of those ESP-powered devices is the LOHAS Smart LED Bulb. Upon cracking one open, he found that these relatively low-cost bulbs are little more than a standard ESP8266 chip and a couple of LED drivers. He wanted to see how hard it would be to get his own code running on the bulb, and by the looks of it, it took longer to get the thing open then it did to load it up with a custom firmware.

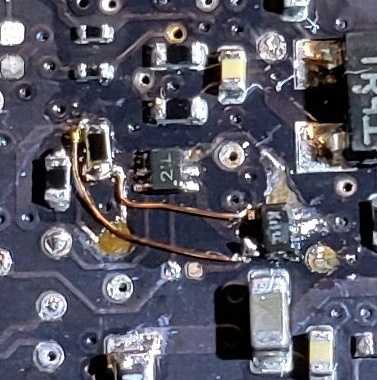
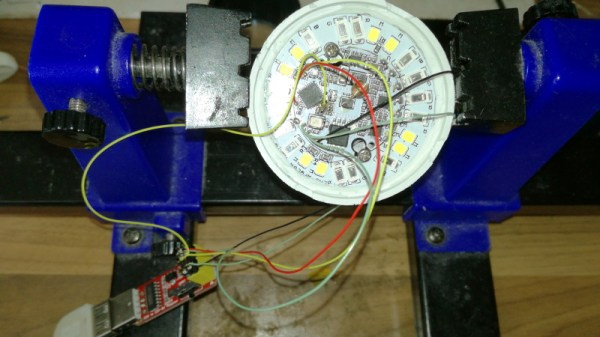
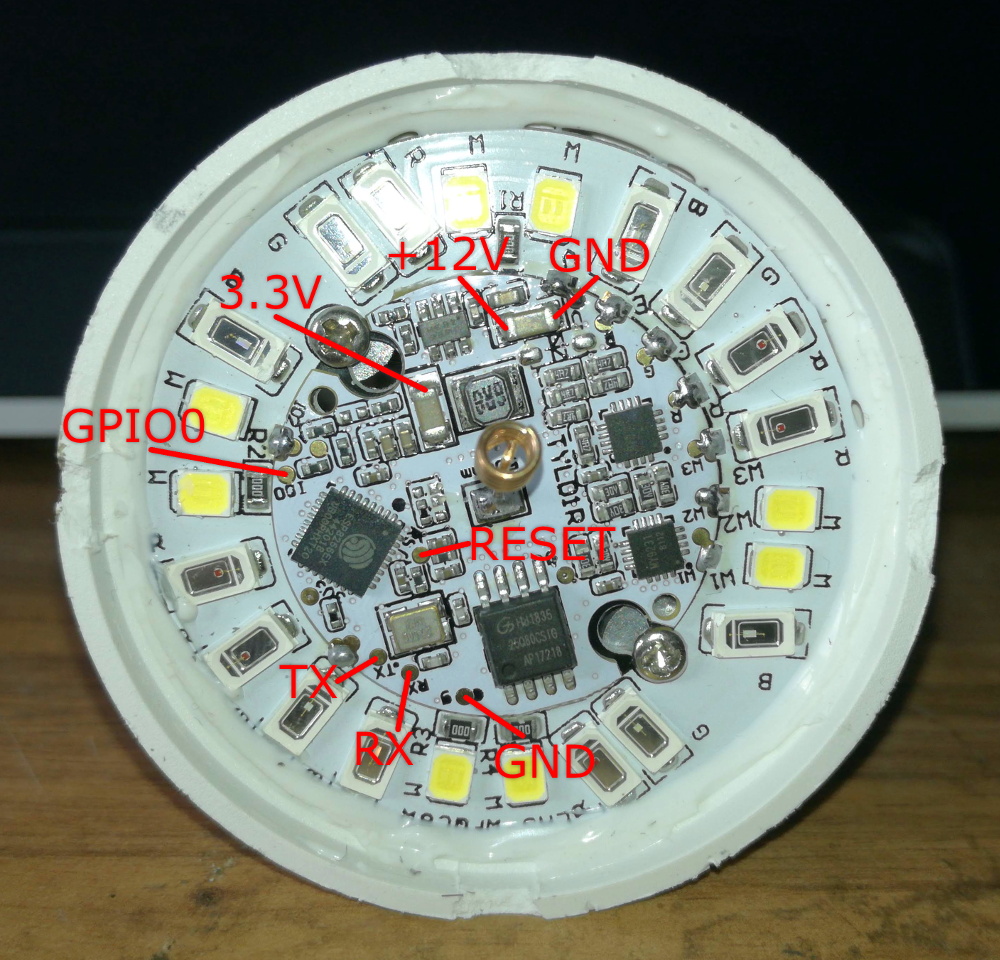
The bulb’s PCB features the aforementioned ESP8266, a 1MB 25Q80 flash chip, and MY9231 LED drivers. Whoever put the board together was nice enough to label the RX, TX, and GPIO test points, though [Majenko] notes that what’s labeled as 3.3 V appears dead. With a ESP-01 programmer wired up to the board and the appropriate board settings (which he provides), you can use the Arduino IDE to upload whatever you like to it.

Running “Hello World” on a smart bulb is fun and all, but what about kicking on those LEDs? [Majenko] found a library that works with the MY9231 drivers, and it didn’t take long to figure out which of the ESP’s pins were used to communicate with them. All in all, he said it was far easier than he expected.

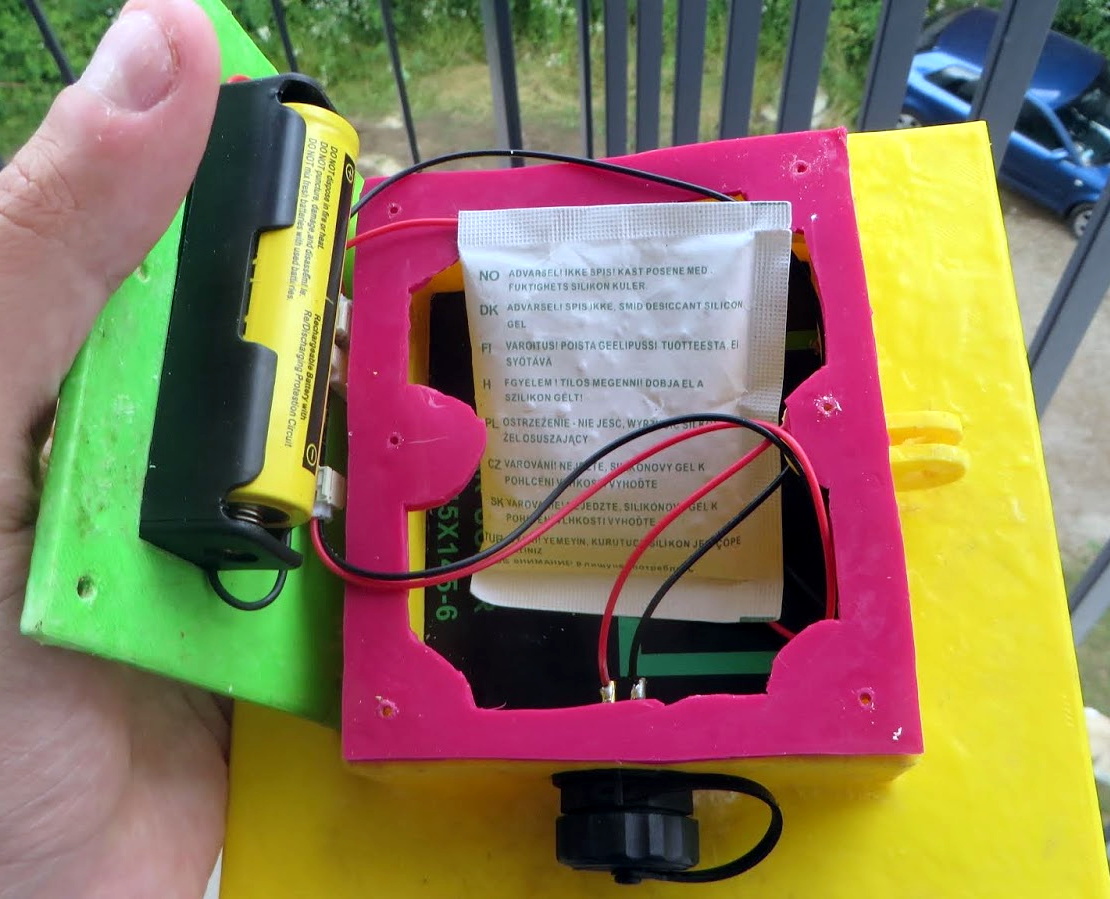
You’ll probably want to put this bulb back into service after reprogramming, so [Majenko] advises caution when cracking open the shell. There are clips holding on the diffuser which he assures us are going to break no matter what you do, plus some silicone adhesive. He suggests super glue to hold it together when you’re done programming it, and using an OTA firmware so you don’t need to get back in there.

In the past we’ve shown how some hackers are rolling their own smart bulb hardware, but with cheap commercial offerings that are so easily hackable, it frankly doesn’t seem worth the effort. On the other hand, an influx of cheap ESP-powered bulbs isn’t all good news.

Raspberry Pi Cyberdeck Inspired By Rare MSX

When we see these cyberdeck builds, the goal is usually to just make something retro-futuristic enough to do William Gibson proud. There’s really no set formula, but offset screens coupled with large keyboards and a vague adherence to 1980s design language seem to be the most important tenets.

Granted the recent build by [lewisb42] still leans heavily on those common tropes, but at least there’s a clear lineage: his Raspberry Pi retro all-in-one is styled after a particularly rare bright red variant of the MSX that Sony released in Japan. Known as the HIT-BIT HB-101, some aficionados consider the circa-1984 machine to be the peak of MSX styling. Since getting his hands on a real one to retrofit wasn’t really an option, he had no choice but to attempt recreating some of the computer’s unique design elements from scratch.

The faceted sides were 3D printed in pieces, glued together, and then attached to a 1/4″ thick backplate made out of polycarbonate. For the “nose” piece under the keyboard, [lewisb42] actually used a piece of wood cut at the appropriate angles with a table saw. The top surface of the computer, which he calls the FLIPT-BIT, is actually made of individual pieces of foamed PVC sheet.

If all this sounds like a big jigsaw puzzle, that’s because it basically is. To smooth out the incongruous surfaces, he used a combination of wood putty, body filler, spot putty, and more time sanding then we’d care to think about. For the 3D printed surface details such as the screen bezel and faux cartridge slots, he used a coat of Smooth-On’s XTC-3D and yet more sanding. While [lewisb42] says the overall finish isn’t quite as good as he hoped, we think the overall look is fantastic considering the combination of construction techniques hiding under that glossy red paint job.

As for the electronics, there’s really no surprises there. The FLIPT-BIT uses a keyboard and touchpad from Perixx, a seven inch TFT display, and of course the Raspberry Pi 3. The display runs at 12 V so [lewisb42] used a combination of a generic laptop-style power supply and a 5 V step-down converter to keep everyone happy. While it doesn’t currently have a battery, it seems like there’s more than enough room inside the case to add one if he ever wants to go mobile.

If this build doesn’t properly scratch your Neuromancer itch, never fear. Just take a look at this decidedly less friendly-looking build that even includes a VR headset for properly jacking yourself into the matrix.

New Space Abort Systems Go Back To The Future

Throughout the history of America’s human spaceflight program, there’s been an alternating pattern in regards to abort systems. From Alan Shepard’s first flight in 1961 on, every Mercury capsule was equipped with a Launch Escape System (LES) tower that could pull the spacecraft away from a malfunctioning rocket. But by the first operational flight of the Gemini program in 1965, the LES tower had been deleted in favor of ejection seats. Just three years later, the LES tower returned for the first manned flight of the Apollo program.

Mercury LES Tower

With the Space Shuttle, things got more complicated. There was no safe way to separate the Orbiter from the rest of the stack, so when Columbia made its first test flight in 1981, NASA returned again to ejection seats, this time pulled from an SR-71 Blackbird. But once flight tests were complete, the ejector seats were removed; leaving Columbia and all subsequent Orbiters without any form of LES. At the time, NASA believed the Space Shuttle was so reliable that there was no need for an emergency escape system.

It took the loss of Challenger and her crew in 1986 to prove NASA had made a grave error in judgment, but by then, it was too late. Changes were made to the Shuttle in the wake of the accident investigation, but escape during powered flight was still impossible. While a LES would not have saved the crew of Columbia in 2003, another seven lives lost aboard the fundamentally flawed Orbiter played a large part in President George W. Bush’s decision to begin winding down the Shuttle program.

In the post-Shuttle era, NASA has made it clear that maintaining abort capability from liftoff to orbital insertion is a critical requirement. Their own Orion spacecraft has this ability, and they demand the same from commercial partners such as SpaceX and Boeing. But while all three vehicles are absolutely bristling with high-tech wizardry, their abort systems are not far removed from what we were using in the 1960’s.

Let’s take a look at the Launch Escape Systems for America’s next three capsules, and see where historical experience helped guide the design of these state-of-the-art spacecraft.

Continue reading “New Space Abort Systems Go Back To The Future”

Homekit Compatible Sonoff Firmware Without A Bridge

Generally speaking, home automation isn’t as cheap or as easy as most people would like. There are too many incompatible protocols, and more often than not, getting everything talking requires you to begrudgingly sign up for some “cloud” service that you didn’t ask for. If you’re an Apple aficionado, there can be even more hoops to jump through; getting your unsupported smart home devices working with that Cupertino designed ecosystem often involves running your own HomeKit bridge.

To try and simplify things, [Michele Gruppioni] has developed a firmware for the ubiquitous Sonoff WIFI Smart Switch that allows it to speak native HomeKit. No more using a Raspberry Pi to act as a mediator between your fancy Apple hardware and that stack of $4 Sonoff’s from AliExpress, they can now talk to each other directly. In the video after the break you can see that the iPad identifies the switch as unofficial device, but since it’s compliant with the HomeKit API, that doesn’t prevent them from talking to each other.

Not only will this MIT licensed firmware get your Sonoff Basic, Sonoff Slampher, or Sonoff S26 talking with your Apple gadgets, but it also provides a web interface and REST API so it retains compatibility with whatever else you might be running in your home automation setup. So while the more pedestrian users of your system might be turning the porch light on with their iPhones, you can still fire it up with a Bash script as nature intended.

Of course, if you don’t mind adding a Raspberry Pi bridge to the growing collection of devices on your network, we’ve got plenty of other HomeKit-enabled projects for you to take a look at.

Continue reading “Homekit Compatible Sonoff Firmware Without A Bridge”

Liquid Damaged MacBook Saved With A Keen Eye

Even among those of us with a penchant for repairing electronics, there are some failures which are generally considered too severe to come back from. A good example is liquid damage in a laptop; with so many components and complex circuits crammed into such a small area, making heads or tails of it once the corrosion sets in can be a real nightmare. Especially in the case of an older laptop, the conventional wisdom is to try and recover your files and then buy a new one.

But as we’ve come to learn, [Jason Gin] is not a man who often finds himself concerned with conventional wisdom. After finding an older MacBook with suspected liquid damage, he decided to see what it would take to restore it to working order. According to a note on the device, the screen was dead, the USB ports were fried, the battery didn’t take a charge, and it wouldn’t boot. No problem then, should be easy.

Upon opening up the circa-2012 laptop, [Jason] found the machine to be riddled with corrosion. We’re not just talking surface gunk either. After giving everything a good cleaning with isopropyl alcohol, the true extent of the damage became clear. Not only had traces on the PCB rotted away, but there were many components that were either damaged or missing altogether. Whatever spilled inside this poor Mac was clearly some nasty stuff.

[Jason] used OpenBoardView to pull up schematics and diagrams of the motherboard, and started the arduous task of visually comparing them to his damaged unit. In some areas, the corrosion was so bad he still had trouble locating the correct traces and pads. But with time and effort, he was able to start probing around and seeing what components had actually given up the ghost.

For the USB ports it ended up being a bad 10-microfarad ceramic capacitor, but for the LCD, he ended up having to replace the entire backlight driver IC. The prospect of working on this tiny BGA-25 device might have been enough for some to throw in the towel, but compared to the hand-soldered magnet wire repairs required elsewhere on the board, [Jason] says the installation of the new LP8550 chip was one of the easier aspects of the whole operation.

The write-up is a great read if you like a good repair success story, and we especially like the way he documented his diagnosis and resulting work on a per-system basis. It makes it much easier to understand just how many individual fires [Jason] had to put out. But if you’re more interested in feats of steady-handed soldering, check out his recent project to add a PCI-E slot to the Atomic Pi.

Soak Up The Sun With This 3D Printed Solar Harvester

At first glance, adding solar power to your project might seem easy. Get a photovoltaic panel, point it towards the big ball of burning gas in the sky, and off you go. But in reality, there’s a bit more to it than that. Especially when you’re trying to do something on a small scale. Without a rooftop full of panels pumping out power, you’ve got to take what you can get.

If you’re looking to power small electronic devices such as sensors with a single solar panel, [Vadim Panov] has put together a very concise write-up and video on building a low-cost solar harvester. It combines a relatively small photovoltaic panel, a charging circuit, and a battery for energy storage into a easily mountable package. He’s provided all the details necessary to create your own version, all you have to do now is come up with the application for it.

As far as the electronics go, this project is about as straightforward as it gets. The three watt panel is connected up to a simplistic charging circuit, which in turn feeds into a single 18650 cell. You might be wondering why a charge controller is even necessary in such a simple set up. One problem is that the output voltage of the panel is higher than that of the battery. You also need a blocking diode that will prevent the battery from discharging into the cell during the night or in cloudy conditions.

While the electronics might seem elementary to some readers, we think the 3D printed case alone is worth taking a look at. Not only has [Vadim] come up with a design that perfectly encloses the fragile solar panel and associated electronics, but in the video after the break, he also explains how the entire thing can be made waterproof with an epoxy coating. As 3D prints can have a tendency to be porous, this technique is definitely something you should file away mentally if you’ve been thinking of deploying a printed enclosure outdoors.

Whether you’re looking to power environmental sensors for as near a century as is technically possible or a portable OpenWRT router for mobile anonymity, these small solar panels hold a lot of promise if you know how to work around their limitations.

Continue reading “Soak Up The Sun With This 3D Printed Solar Harvester”

The Saga Of 32-Bit Linux: Why Going 64-Bit Raises Concerns Over Multilib

The story of Linux so far, as short as it may be in the grand scheme of things, is one of constant forward momentum. There’s always another feature to implement, an optimization to make, and of course, another device to support. With developer’s eyes always on the horizon ahead of them, it should come as no surprise to find that support for older hardware or protocols occasionally falls to the wayside. When maintaining antiquated code monopolizes developer time, or even directly conflicts with new code, a difficult decision needs to be made.

Of course, some decisions are easier to make than others. Back in 2012 when Linus Torvalds officially ended kernel support for legacy 386 processors, he famously closed the commit message with “Good riddance.” Maintaining support for such old hardware had been complicating things behind the scenes for years while offering very little practical benefit, so removing all that legacy code was like taking a weight off the developer’s shoulders.

The rationale was the same a few years ago when distributions like Arch Linux decided to drop support for 32-bit hardware entirely. Maintainers had noticed the drop-off in downloads for the 32-bit versions of their distributions and decided it didn’t make sense to keep producing them. In an era where even budget smartphones are shipping with 64-bit processors, many Linux distributions have at this point decided 32-bit CPUs weren’t worth their time.

Given this trend, you’d think Ubuntu announcing last month that they’d no longer be providing 32-bit versions of packages in their repository would hardly be newsworthy. But as it turns out, the threat of ending 32-bit packages caused the sort of uproar that we don’t traditionally see in the Linux community. But why?

Continue reading “The Saga Of 32-Bit Linux: Why Going 64-Bit Raises Concerns Over Multilib”