A Cloned Bluetooth Tracker Meets Its Maker

The holidays bring us many things. Family and friends are a given, as is the grand meal in which we invariably overindulge. It’s a chance for decades old songs and movies to somehow manage to bubble back up to the surface, and occasionally a little goodwill even slips in here or there. But perhaps above all, the holidays are a time for every retailer to stock themselves to the rafters with stuff. Do you need it? No. Do they want it? No. But it’s there on display anyway, and you’re almost certainly going to buy it.
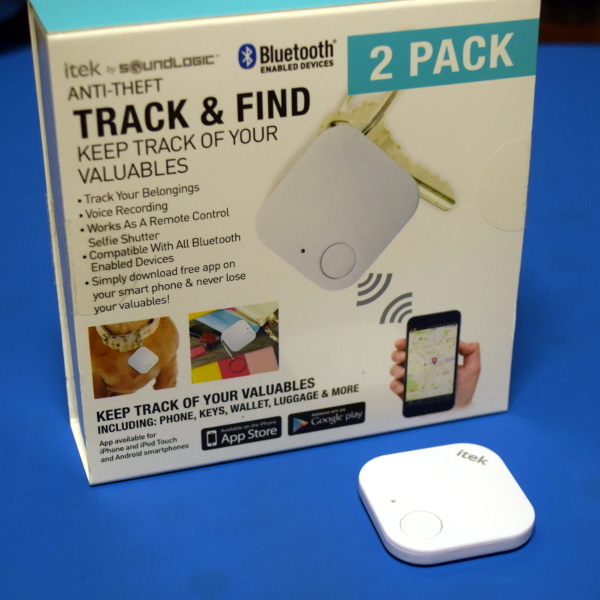
Which is precisely how I came to purchase a two pack of Bluetooth Low Energy (BLE) “trackers” for the princely sum of $10 USD. I didn’t expect much out of them for $5 each, but as this seemed an exceptionally low price for such technology in a brick and mortar store, I couldn’t resist. Plus there was something familiar about the look of the tracker that I couldn’t quite put my finger on while I was still in the store.

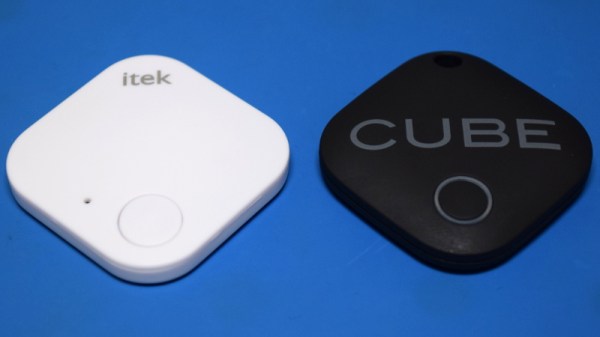
That vague feeling of recollection sent me digging through my parts bin as soon as I got home, convinced that I had seen something among the detritus that reminded me of my latest prize. Sure enough, I found a “Cube” Bluetooth tracker which, ironically, I had received as a Christmas gift some years ago. Putting them side by side, it was clear that the design of these “itek” trackers took more than a little inspiration from the better known (and five times as expensive) product.

The Cube was a bit thicker, but otherwise the shape, size, and even button placement on the itek was nearly identical. Reading through their respective manuals, the capabilities also seemed in perfect parity, down to being able to use the button on the device as a remote camera control for your smartphone. Which got me thinking: just how similar would these two devices be internally? Clearly they looked and functioned the same, but would they be built the same as well? They would have to cut costs somewhere.

Determined to find out how a company can put out what for all the world looks like a mirror image of a competitor’s device while undercutting them by such a large margin, I cracked both trackers open to get a bit more familiar with what makes them tick. What I found on closer inspection of these two similar gadgets is perhaps best summarized by that age old cautionary adage: “Don’t judge a book by its cover.”

Continue reading “A Cloned Bluetooth Tracker Meets Its Maker”
Blowing The Dust Off Of An IBM AS/400 Server

If you’ve never seen an IBM AS/400 machine, don’t feel bad. Most people haven’t. Introduced in 1988 as a mid-range server line, it used a unique object-based operating system and was geared specifically towards business and enterprise customers. Unless you’re a particularly big fan of COBOL you probably won’t have much use for one today, but that doesn’t mean they aren’t worth playing around with if the opportunity presents itself.

So when a local IT company went belly up and was selling their old hardware, including a late 90’s era IBM AS/400e Series, [Rik te Winkel] jumped at the chance to take this unique piece of computing history home. He knew it was something of a risk, as maintenance and repair tasks for these machines were intended to be done by IBM certified technicians rather than the DIYer, leaving little in the way of documentation or even replacement parts. But in the end it worked out, and best of all, he documented the successful process of dragging this 90’s behemoth into the blinding light of the twenty-first century for all the world to see.

After getting the machine home and sitting through its thirty minute boot process, [Rik] was relieved to see the code 01 B N pop on the server’s display. This meant the system passed all the internal checks and was ready to go, he just had to figure out how to talk to the thing. Built to be a pure server, the machine didn’t offer any video output so he’d have to log into it over the network.

[Rik] noted that there was no new DHCP entry in his router for the server, but of course that was hardly surprising as the machine would have certainly had a static IP when it was in use. So he shut the server down, plugged it directly into his laptop’s Ethernet port, and watched the output of Wireshark as it went through its arduous boot sequence. Eventually he started to pick up packets coming from the IP address 10.10.10.9, and he had his target.

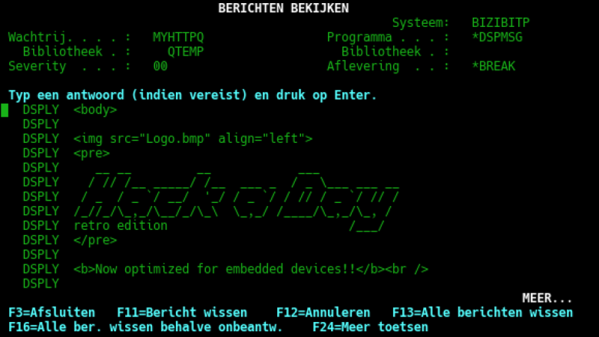
There are a few clients out there that allow you to remotely log into an AS/400, so he downloaded one and pointed it to the server’s IP. He was surprised to see the operating system was apparently in Dutch, but at least he was in. He tried a few common usernames and passwords, helped along by the fact that this OS from a somewhat more innocent era will actually tell you if you have the username right or wrong, and eventually managed to hack the Gibson with the classic admin/admin combo.

So he was in, but now what? [Rik] decided that he couldn’t truly call this machine bested until he could pull up the Hackaday Retro Edition, so he started work on writing a program to let him pull down the page directly on the AS/400 in IBM’s proprietary Report Program Generator (RPG) programming language. You know, as one does. He didn’t quite feel up to writing a whole HTML parser, but he got as far as generating a HTTP GET request, downloading the page’s source, and opening it up as a local file. That’s good enough for us.

Our very own [Al Williams] documented his adventures poking around an Internet-connected AS/400 machine, which might serve as a helpful primer if you ever find one of these delightfully oddball computers kicking around the local recycling center.

ESP8266 AC Controller Shows Whats Possible

People often get the impression that home built hardware is destined to have a certain amateurish look or feel to it. It’s as though just because you didn’t buy it in a store, it will look cheap or thrown together. While it’s true a hacked together device could look like it was built from the parts bin (and to be fair, sometimes it is), there are plenty of examples of DIY hardware that could give commercial offerings a run for their money.

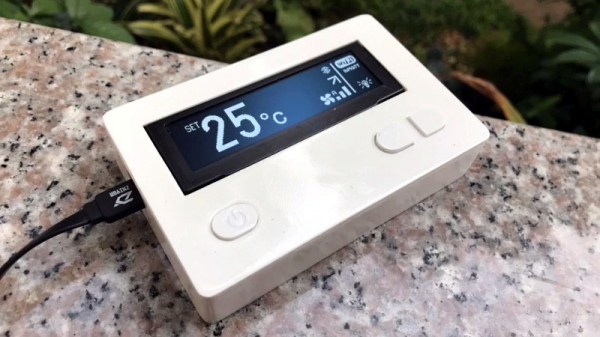
A case in point is this fantastic ESP8266 air conditioner controller created by [Sitinut Waisara] (Google Translate). Between the simple yet elegant 3D printed enclosure to the very slick user interface on its OLED screen, this project could easily pass as a commercial device. In fact, we’ve seen commercial offerings that didn’t look half this good, let alone offer the same features for what this cost in components and printer filament. It’s a perfect example of what the modern hacker or maker is capable of with the wide array of tools and components currently available to us.

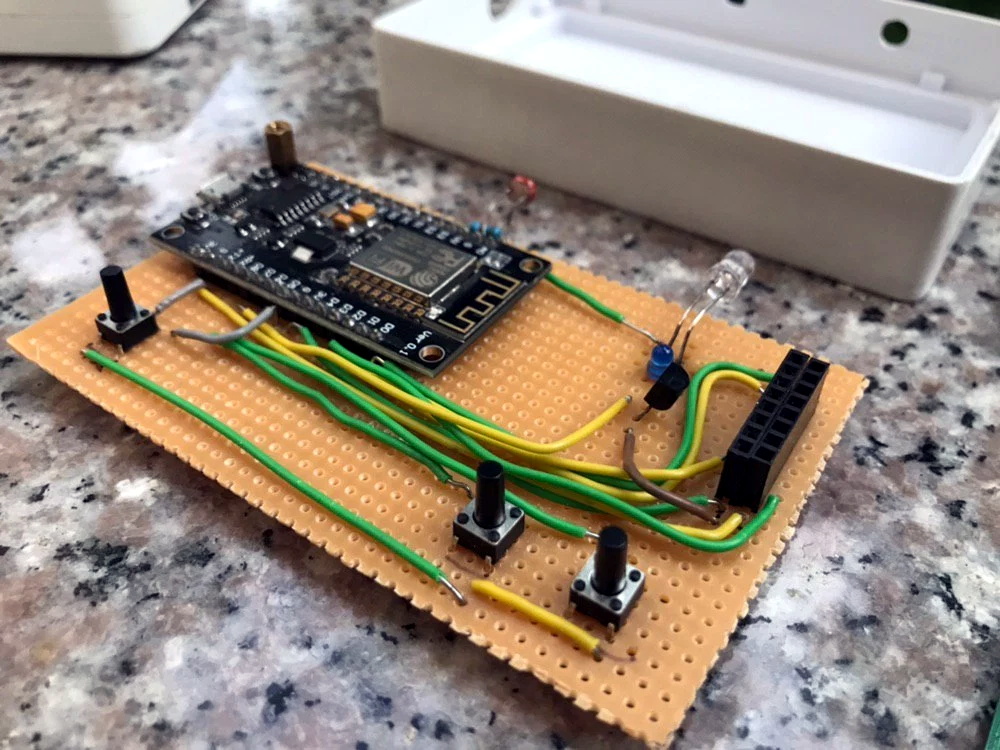
What’s perhaps the most impressive about this project, especially given how good it looks on the outside, is how little there really is on the inside. Beyond the NodeMCU board and SSD1332 OLED display, the only components inside the device are the three tactile buttons, a photoresistor so it can dim the display’s brightness based on ambient light level, an IR LED so it can send commands to the AC unit, and a handful of passives. The hardware side of this design is so simple that [Sitinut] was able to put the whole thing together on a scrap of perfboard. Not that you’d be able to tell when it gets installed into the 3D printed wall-mount enclosure, complete with printed button caps.

While the hardware side of the project might be rather light, the software is anything but. [Sitinut] really went all-in writing his code for the ESP, adding in the little features like the automatic screen dimming and pulling the current time from NTP that often get overlooked in our rush to get a project out the door. He even included a whole collection of icons to display on the OLED screen, which goes a long way towards selling that professional look. But his effort wasn’t limited to cosmetics or clever features, there was also plenty of work put into decoding the IR signals used to control the AC unit and getting all the features and functions plugged into MQTT.

We’ve seen a number of projects that aimed at dragging an existing HVAC system kicking and screaming onto the “Internet of Things”, some considerably less complex than others. But few have had the level of polish that [Sitinut] has put into his controller, so we take our hats off to him.

Continue reading “ESP8266 AC Controller Shows Whats Possible”

Pac-Man Fever Comes To The Pano Logic FPGA

If you’ve been reading Hackaday for a while now, you might recall the tale of Pano Logic that we first covered all the way back in 2013. They were a company that put out some very interesting FPGA-based thin clients, but as occasionally happens in situations like this, the market wasn’t ready and the company went belly up. These thin clients, now without official support, invariably got dumped onto the second-hand market. Shame for Pano Logic and their staff, but good news for hackers like [Skip Hansen].

After seeing a few posts about the Pano Logic devices and general FPGA hacking, he decided to grab a few on eBay and dive in. Using open source tools and the wealth of information that’s available [Skip] was able to get a Pac-Man simulator up and running over his holiday break, and he tells us his life may never be the same again. FPGA hacking is a fascinating subject with a lot of activity right now, and since you can get these Pano Logic boxes on eBay for less than $10 USD in some cases, now is as good a time as ever to get your feet wet.

Like many open source projects, [Skip] says his code is built upon the existing work of a number of other programmers, which let him get up and running much faster than if he had to start from scratch. He describes his code as the “glue” that mashes these projects together, but we think he’s being somewhat modest there. It took more than copying and pasting some code into an IDE to get Blinky, Pinky, Inky and Clyde doing their thing on the Pano Logic.

The biggest challenge was the lack of I/O. The Pano Logic thin clients have USB ports, but it seems nobody has quite figured out how to get them working yet. To talk to the outside world, you’ve got to get a little more creative. Eventually [Skip] was able to track down four lines he could effectively use as GPIO: two which are used to drive the LEDs on the device, and two which are used for the VGA port’s Display Data Channel (DDC) pins. Soldering jumpers from the LEDs to the unused pins in the device’s VGA connector meant he was even able to get these four GPIO lines accessible from the outside of the Pano Logic without having to cut any holes in the case.

Anyone with a Pano Logic client that has a VGA port, an Atari 2600 joystick, and who doesn’t mind soldering a couple of wires can now play Pac-Man with the bitstream [Skip] has provided. But where do we go from here? How long until we see DOOM running on it? Perhaps one of you fine readers should pick one up and see what you can do to advance the state of Pano Logic hacking. Just be sure to let us know about it.

We’ve previously covered one of the projects used to get this Pac-Man simulator off the ground, a very cool ray tracing demo for the Pano Logic developed by [Tom Verbeure]. In fact, [Skip] says that project was what got him interested in FPGA hacking in the first place. If you’re thinking of following his lead, you might also want to check out our FPGA Boot Camp.

Electrifying A Vintage Outboard Motor

Clamped or bolted to the stern of the boat, outboard motors offer a very easy and (relatively) economical way of powering small craft. The vast majority of these outboards are gasoline powered, with electric models generally limited to so-called “trolling motors” which are often used to move slowly and quietly during fishing. That might be fine for most people, but not [Olly Epsom].

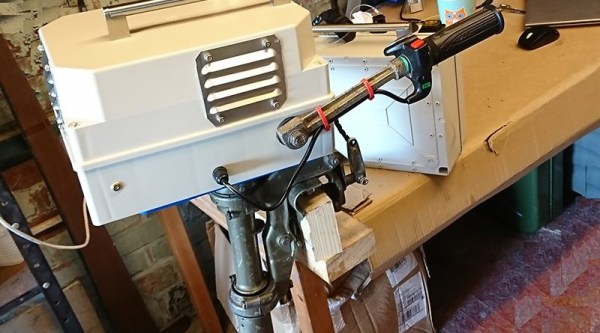
An engineer focusing on renewable energy by profession, [Olly] wanted to equip his small inflatable dinghy with a suitably powerful “green” propulsion system. Deciding nothing on the market quite met his requirements, especially for what manufacturers were charging, he decided to convert an old gas outboard to electric. Not only did he manage to do it for less money than a turn-key system would have cost, but he ended up with a system specifically geared to his exact requirements. Something he says will come in handy if he ever gets around to converting the dinghy to remote control so he can use it as a wildlife photography platform.

Put simply, an outboard motor consists of a gasoline engine with a vertical shaft that’s coupled to a right-angle gearbox with a propeller on the end. Beyond that they’re a fairly “dumb” piece of gear, so replacing the engine on top with something else should be (at least in theory) a pretty simple job. Especially on the small older model that [Olly] decided to use as a donor unit. The 1974 Johnson 2 HP motor didn’t have any tricky electronics in it to contend with; the thing didn’t even have a clutch.

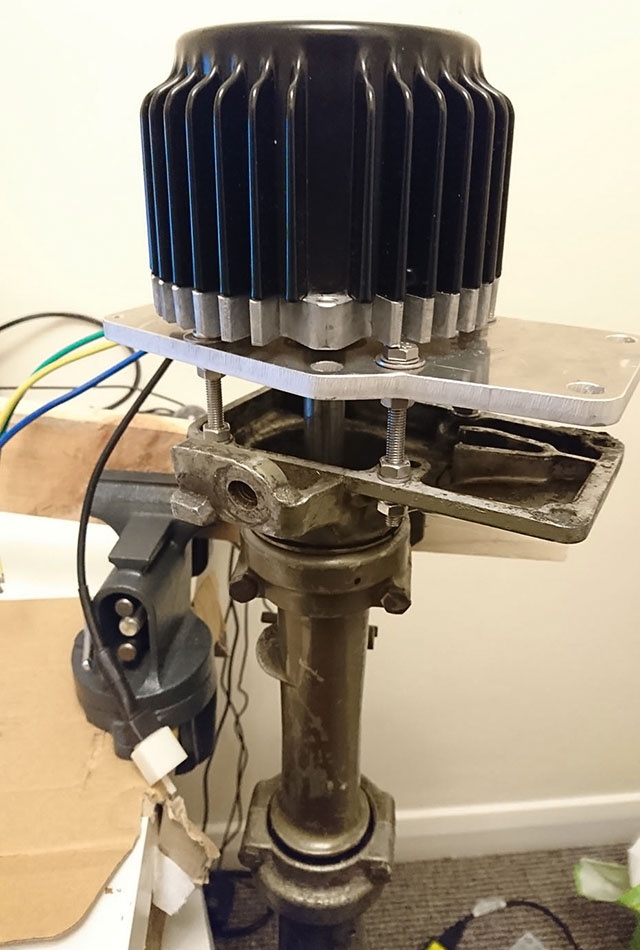
Once [Olly] had removed the old gas engine from the top of the outboard, he designed an adapter plate in OnShape and had it cut out of aluminum so he could mount a beefy 1 kW 48 V brushless electric motor in its place. Connecting the new electric motor to the carcass of the outboard actually ended up being simpler than putting the original motor on, as this time around he didn’t need to reconnect the cooling pumps which would usually pull water from down by the propeller and recirculate it through the engine.

While the mechanical aspects of this project are certainly cool, we’re especially interested in the control system for this newly electric outboard. It uses a 3.2 inch Nextion color touch screen and Arduino Nano to provide a very slick looking digital “dashboard” which can convey motor status and other information at a glance. Unfortunately, [Olly] says the details on that part of the project will be saved for a future post, leaving us with only a single picture of the system’s interface for us to drool over until then.

We’ve seen the occasional seafaring project that made use of an electric trolling motor, and we’ve even seen an electric drill put in some overtime spinning a prop in the water. Converting gasoline boat over to electric is however a rarity. But much like electric car conversions, such projects may become more common as the cost and complexity of powerful electric propulsion systems continues to fall.

[Thanks to Alex for the tip.]

Is Baking A Raspberry Pi The Recipe For Magic Smoke?

No, Hackaday hasn’t become a baking blog. We’re just here to give you a bit of advice: if [MickMake] ever offers you one of his fresh-baked Pis, proceed with caution. While we have no doubt that there will be some interesting smells wafting out of his kitchen, these aren’t the tasty pies you’re looking for. There’s no delicious home-baked treat when that timer dings, just a handful of Raspberry Pis that have had an exceptionally hard day.

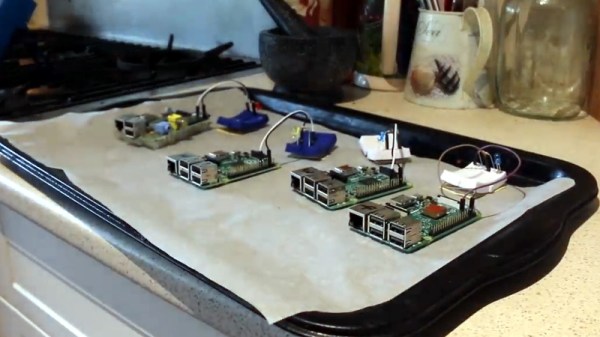
To properly explain the odd sight of some Raspberry Pis laid out on a cookie sheet, we need to take a step back. [MickMake] originally set out to see how everyone’s favorite Linux SBC would handle the harsh Australian heat, and thought that setting them up on his car’s dashboard would be a suitable torture test. But as luck would have it, a storm rolled in while he was making the video which brought temperatures down to a “cool” 30 C (86 F); basically jacket weather at the bottom of the world. So naturally, he decided to put them in his oven instead.

Placed on an insulating sheet and with a thermocouple between them to get an accurate idea of the temperature they were experiencing, an original Pi, a Pi 2, and a pair of Pi 3s were sent on the ride of their lives. In addition to monitoring them over the network, he also added a “heartbeat” LED to each Pi so he’d be able to tell at a glance if any of them had given up the ghost. As if these poor little Pis didn’t have it bad enough already, [MickMake] decided to take things a step farther and run sysbench on them while they took their trip through Hades.

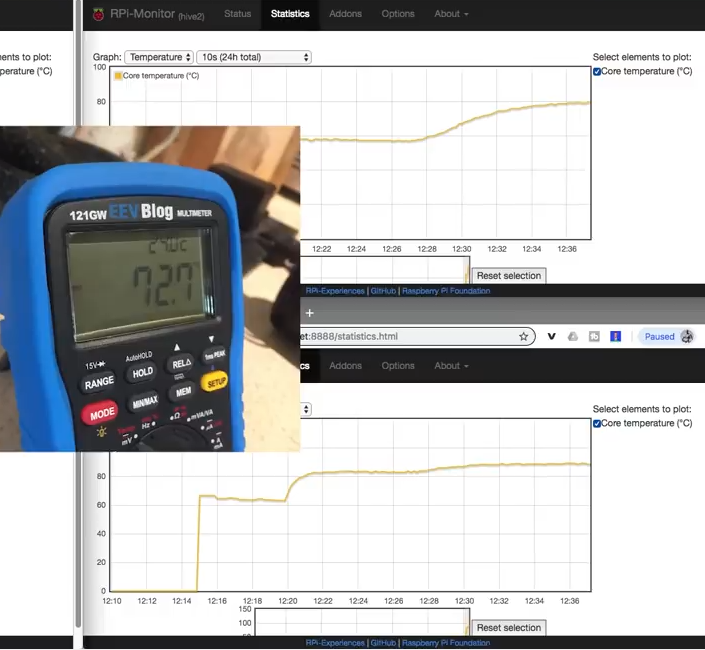
The Pis are actually rated for temperatures up to 85C, and all the participants of the experiment hit that point without any issues. At 87.3 C (~190 F) the original Pi dropped off the network, but its LED was seen bravely blinking on. At 105.7 C (~222 F) it finally breathed its last, followed by the pair of Pi 3s tapping out at 112 C (233 F). The Pi 2 fought on, but it fell right at the 119 C (246 F) mark.

But what about when they cooled off? Somewhat surprisingly, [MickMake] successfully powered all four back up and was unable to find any damage to the Pis, either physically or operationally. Even the SD cards survived, and the Pis popped right back onto the network and were ready for another round of Silicon Chef. Not bad considering they were subjected to temperatures three times higher than the official limit.

Testing electronics in your home oven might seem a bit suspect, and admittedly we’d probably turn down a slice of the next few frozen pizza’s [MickMake] runs through it, but it’s not really so far removed from how proper reliability testing is performed.

Continue reading “Is Baking A Raspberry Pi The Recipe For Magic Smoke?”

Vintage Programmer Gets Modern Chip Adapter

While trying to revive a Donkey Kong Jr arcade board, [Jelmer Bruijn] found himself in the market for an EPROM programmer and became the proud owner of a 1990’s era Dataman S4. Despite its age, it’s a fairly nice tool which allows you to read and write a laundry list of different EPROM types, all without being tied to a computer. The only catch is that a few types of chips need an adapter to work in the Dataman S4, some of which are unsurprisingly no longer available.

After some above and beyond support from the current crew at Dataman set him on the right track, [Jelmer] decided to try his hand at reverse engineering how the old adapters worked so he could build his own. His ultimate goal was to read 40 pin EPROMs on the 32 pin Dataman S4, but in the end he says the information he gathered should be applicable for building other adapters if you ever find yourself in need of such things.

As you might expect, there’s a bit more to the project than a simple pin adapter. [Jelmer] assumed some kind of shift register or latching arrangement would be required to make up for the shortage of pins on the Dataman S4’s ZIF socket. It was just a matter of figuring out how it all went together.

Luckily, [Jelmer] found that the programmer would happily attempt to perform operations on a 16 bit EPROM even though no adapter was physically present. This gave him a chance to probe around with a logic analyzer to figure out what it was trying to accomplish. The trick turned out to be splitting the 16 bit bus into two 8 bit buses which are requested sequentially.

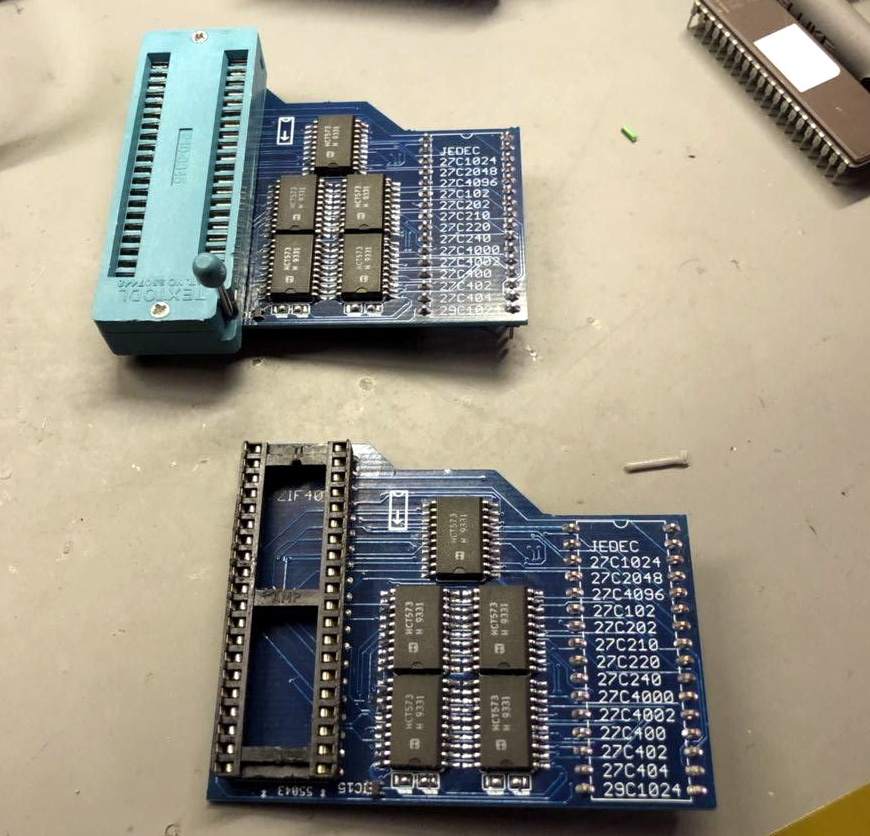
With careful observation, close studying of 16 bit chip datasheets, and much brow furrowing, he was eventually able to come up a design that used five 74xx573 latches and put a schematic together in Eagle. There were a few kinks to iron out when the boards finally arrived, but ultimately the design worked on the first try. [Jelmer] says the same technique should work for 42 pin EPROMs, but as Dataman still actually sell adapters for those he decided not to supply schematics for it.

[Jelmer] tells us that he was inspired to send this success story our way after reading how our very own [Elliot Williams] took the long away around to erase a couple UV EPROMs recently While this isn’t the first time we’ve seen somebody have to hack support for 16 bit EPROMs into their programmer, it’s good to see that the manufacturer at least had the customer’s back in this case.