Easy Access Point Configuration On ESP8266

One of the biggest advantages of using the ESP8266 in your projects is how easy it is to get WiFi up and running. Just plug in the WiFi library, put the SSID and encryption key in your source code, and away you go. It authenticates with your network in seconds and you can get on with building your project. But things get a little trickier if you want to take your project someplace else, or distribute your source code to others. Quickly we learn the downside of using static variables for authentication.

While there are already a few solutions to this problem out there, [Martin Raynsford] wasn’t too thrilled with them. Usually they put the ESP8266 in Access Point mode, allow the user to connect, and then ask which network they should authenticate with. But he didn’t want his projects to require an existing network, and figured he could do just as well making a field-configurable AP.

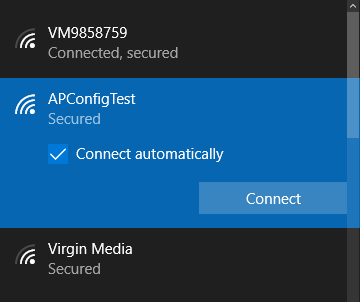
Using it is simple. Once the ESP8266 starts up it will create a new network in the form of “APConfig XXXXXX”, which should be easy enough to find from your client side device. Once connected, you can go to a simple administration page which allows you to configure a new AP name and encryption key. You even have the option to create an open AP by leaving the “Password” field blank. Once rebooted, the ESP8266 will create a new network with the defined parameters.

[Martin] has also included a “backdoor” to let anyone with physical access to the ESP8266 board create a new open AP that can be used to reconfigure the network settings. During boot up there is a brief period, indicated with specific blinks of the LED, wherein you can hit the reset button and trigger the open AP. This keeps you from getting locked out of your own project if you forget what key you gave it.

If you’re not one to go the austere route, take a look at some of the more robust solutions we’ve seen for easier end-user setup of the ESP8266.

Keep ‘Em Flying With This Monster DIY Battery

If you’ve spent an afternoon at the sticks of a remote-controlled aircraft, you’re probably well aware of the great limiter for such exploits: battery life. In the days when most RC aircraft were gas powered it was easy to cart along some extra fuel to keep the good times rolling, but now that everything except big scale models are using electric motors, RC pilots are looking for better ways to charge their batteries in the field.

Though it might seem counter-intuitive, [Adam Pyschny] is of the opinion that the best way to keep his quadcopter batteries charged is to simply use another, much bigger, battery. Rather than mess around with inverters or generators, he can simply use a DC-to-DC battery charger and his huge custom-built battery pack to keep flying.

The pack contains 36 Samsung INR18650-35E 3500mAh cells, which gives it a total capacity of 454Wh. At 1965 grams (4.3 lbs) the pack isn’t exactly a featherweight, but it’s significantly lighter than carting a small generator or even a lead-acid battery to the field.

[Adam] designed a slick case in FreeCAD and printed it in Minadax ASA-X filament, which is specifically designed for outdoor use. A particularly nice detail in the case is that the balance connector (used to charge the cells) is cleanly integrated into the side of the pack, rather than just flapping around in the breeze; which annoyingly seems the norm even on commercially produced batteries.

An interesting next step for this project would be the addition of a solar panel and charge controller to help recover in-between charges. Beyond an automated platform to swap the batteries for you, a DIY pack like this might be the easiest way to maximize the amount of time your RC aircraft are in the air where they belong.

A New Take On Building A Portable N64

When home consoles go mobile, whether in the form of modded original hardware or emulation, they usually take a pretty standard shape. A screen in the middle, with buttons either on the sides or below it. Basically the same layout Nintendo popularized with born-handheld systems such as the Game & Watch series and original Game Boy. Like the saying goes, if it ain’t broke…

But [Le Nerdarto] had a different idea. He came across a broken N64 and wanted to turn it into a portable console, but not necessarily a handheld one. Noticing the cartridge was about the perfect size to contain a small LCD and in an ideal position, he set out to make what is arguably the most literal interpretation of “portable N64” we’ve ever seen. It might not be the most practical iteration of this concept, but it definitely gets extra points for style.

After he stripped the N64 of its original hardware, he installed a Raspberry Pi 3 and an RC battery eliminator circuit (BEC) to get 5V out of the internal 6200 mAh 7.4V battery. [Le Nerdarto] says this provides power for the Pi, the LCD, and the various lighting systems for up to 10 hours. He’s also added USB ports in the front of the system for controllers, and an HDMI port on the back so he can still connect the system up to a TV when not on the move.

The 3.5 inch LCD in the cartridge is arguably the centerpiece of the build, and while it might be on the small side, we can’t deny it’s a clever idea. [Le Nerdarto] had the good sense to tilt the it back a few degrees to put the display at a more comfortable angle, but otherwise it looks stock since he was able to fit everything in without cutting the back of his donor cartridge out. For those who might be wondering, the “cartridge” can’t be removed, but we’ll admit that would have been a killer feature to add especially with the HDMI port on the back.

Of course, since it’s running emulators on a Raspberry Pi, this isn’t only a portable N64. The front mounted USB ports allow him to plug in all sorts of controllers and emulate classics from pretty much any console that’s older than the N64 itself. Ironically the Raspberry Pi 3 isn’t exactly an ideal choice for N64 emulation, but a good chunk of titles are at least playable.

If you’re more of a purist and want a true portable N64, we’ve covered plenty of those over the years to get you inspired.

Continue reading “A New Take On Building A Portable N64”

High Detail 3D Printing With An Airbrush Nozzle

On a fused deposition modeling (FDM) 3D printer, the nozzle size dictates how small a detail you can print. Put simply, you can’t print features smaller than your nozzle for the same reason you’d have trouble signing a check with a paint roller. If the detail is smaller than the diameter of your tool, you’re just going to obliterate it. Those who’ve been around the block a few times with their desktop 3D printer may have seen this come up in practice when their slicer refused to print lines which were thinner than the installed nozzle (0.4mm on the vast majority of printers).

Smaller nozzles exist for those looking to improve their printer’s detail on small objects, but [René Jurack] wasn’t happy with just putting a finer nozzle on a stock E3D-style hotend. In his opinion it’s still a hotend and arrangement intended for 0.4mm printing, and doesn’t quite fully realize the potential of a smaller diameter nozzle. After some experimentation, he thinks he’s found the solution by using airbrush nozzles.

As [René] sees it, the hotend is too close to the subject being printed when using nozzles finer than 0.4mm. Since you’re working on tiny objects, the radiant heat from the body of the hotend being only a few millimeters away is enough to deform what you’re working on. But using the long and tapered airbrush nozzle, the hotend is kept at a greater distance from the print. In addition, it gives more room for the part cooling fan to hit the print with cool air, which is another critical aspect of high-detail FDM printing.

Of course, you can’t just stick an airbrush nozzle on your E3D and call it a day. As you might expect, they are tiny. So [René] designed an adapter that will let you take widely available airbrush nozzles and thread them into an M6 threaded hotend. He’s now selling the adapters, and judging by the pictures he posted, we have to say he might be onto something.

If you’re more about brute strength than finesse, you might be interested in outfitting your E3D with a ruby nozzle instead.

Continue reading “High Detail 3D Printing With An Airbrush Nozzle”

Maker Faire NY: Getting Physical With Minecraft

If you’ve been hanging around Hackaday for a while, you’ve likely seen a few attempts to bridge the real world with the voxel paradise that is Minecraft. In the past, projects have connected physical switches to virtual devices in the game, or took chunks of the game’s blocky landscape and turned it into a 3D printable file. These were interesting enough endeavors, but fairly limited in their scope. They assumed you had an existing world or creation in Minecraft that you wanted to fiddle with in a more natural way, but didn’t do much for actually playing the game.

But “Physical Minecraft” presented at the 2018 World Maker Faire in New York, offered a unique way to bring players a bit closer to their cubic counterparts. Created by [Manav Gagvani], the physical interface has players use a motion detecting wand in combination with an array of miniature Minecraft blocks to build in the virtual world.

The wand even detects various gestures to activate an array of “Spells”, which are effectively automated build commands. For example, pushing the wand forward while making a twisting motion will automatically create a tunnel out of the selected block type. This not only makes building faster in the game, but encourages the player to experiment with different gestures and motions.

A Raspberry Pi 3 runs the game and uses its onboard Bluetooth to communicate with the 3D printed wand, which itself contains a MetaWear wearable sensor board. By capturing his own moves and graphing the resulting data with a spreadsheet, [Manav] was able to boil down complex gestures into an array of integer values which he plugged into his Python code. When the script sees a sequence of values it recognizes, the relevant commands get passed onto the running instance of Minecraft.

You might assume the wand itself is detecting which material block is attached to it, but that bit of magic is actually happening in the base the blocks sit on. Rather than trying to uniquely identify each block with RFID or something along those lines, [Manav] embedded an array of reed switches into the base which are triggered by the presence of the magnet hidden in each block.

These switches are connected directly to the GPIO pins of the Raspberry Pi, and make for a very easy way to determine which block has been removed and installed on the tip of the wand. Things can get tricky if the blocks are put into the wrong positions or more than one block are removed at a time, but for the most part it’s an effective way to tackle the problem without making everything overly complex.

We’ve often talked about how kid’s love for Minecraft has been used as a way of getting them involved in STEM projects, and “Physical Minecraft” was a perfect example. There was a line of young players waiting for their turn on the wand, even though what they were effectively “playing” was the digital equivalent of tossing rocks. [Manav] would hand them the wand and explain the general idea behind his interface, reminding them that the blocks in the game are large and heavy: it’s not enough to just lower the wand, it needs to be flicked with the speed and force appropriate for the hefty objects their digital avatar is moving around.

Getting kids excited about hardware, software, and performing physically demanding activities at the same time is an exceptionally difficult task. Projects like “Physical Minecraft” show there can be more to playing games than mindless button mashing, and represent something of a paradigm shift for how we handle STEM education in an increasingly digital world.

Turn A Cheap 3D Printer Into A Cheap Laser Cutter

We know it’s hard to hear it, but the days of you being a hotshot at the local Hackerspace because you’ve got a 3D printer at home are long gone. While they’re still one of the most persnickety pieces of gear on the hacker’s bench, they’re certainly not the rarest anymore. Some of these printers are so cheap now they’re almost impulse buys. Like it or not, few people outside of your grandmother are going to be impressed when you tell them you’ve got a personal 3D printer anymore; and we wouldn’t be surprised if even granny picked up a Monoprice Mini during the last open box sale.

But while 3D printer ownership isn’t the pinnacle of geek cred it once was, at least there’s a silver lining: cheap motion platforms we can hack on. [squix] writes in to tell us about how he added a laser to his $200 USD Tevo Tarantula 3D printer, greatly expanding the machine’s capabilities without breaking the bank. The information in his write-up is pretty broadly applicable to most common 3D printer designs, so even if you don’t have a Tarantula it shouldn’t be too hard to adapt the concept.

The laser is a 2.5 W 445 nm module which is very popular with low-cost laser cutter setups. It’s a fully self-contained air cooled unit that just needs a source of 12 V to fire up. That makes it particularly well suited to retrofitting, as you don’t need to shoehorn in any extra support electronics. [squix] simply connected it to the existing power wires for the part cooling fan he added to the Tarantula previously.

You may want to check the specs for your 3D printer’s control board before attaching such a high current device to the fan connector. Best case it just overloads the board’s regulator and shuts down, worst case the magic smoke might escape. A wise precaution here might be to put a MOSFET between the board’s fan output the and the laser, but we won’t tell you how to live your life. As far as laser safety, this device should probably work inside an opaque box, or behind closed doors.

Once the laser is hanging off the fan port of your printer’s controller, you can turn it on with the normal GCode commands for fan control, M106 and M107 (to turn it on and off, respectively). You can even control the laser’s power level by adding an argument to the “on” command like: M106 S30.

Then you just need to mount the laser, and it’s more or less business as usual. Controlling a laser engraver/cutter isn’t really that different from controlling a 3D printer, so [squix] is still using OctoPrint to command the machine; the trick is giving it a “3D model” that’s just a 2D image with no Z changes to worry about. We’ve seen the process for doing that in Inkscape previously.

With this laser module going for as little as $60 USD (assuming you’ve got a 3D printer or two laying around to do the conversion on), this is a pretty cheap way to get into the subtractive manufacturing game. Next stop from there is getting one of those K40’s everyone’s talking about.

Continue reading “Turn A Cheap 3D Printer Into A Cheap Laser Cutter”

Maker Faire NY: Cocoa Press Chocolate Printer

If you haven’t figured it out by now, the hype over desktop filament printers is pretty much over. But that doesn’t mean there aren’t new avenues worth exploring that use the basic FDM printer technology. If anything, the low cost and high availability of 3D printer parts and kits makes it easier to branch off into new territory. For example, experimenting with other materials which lend themselves to being “printed” layer by layer like a thermoplastic. Materials such as cement, clay, or even chocolate.

[Ellie Weinstein] brought her Cocoa Press printer to the 2018 World Maker Faire in New York, and we have to say it’s a pretty impressive piece of engineering. Hackers have been known to throw a syringe-based paste extruder onto a regular 3D printer and try their luck with squirting out an edible object from time to time, but the Cocoa Press is truly a purpose built culinary machine.

Outwardly it features the plywood case and vaguely Makerbot-looking layout that we’ve seen plenty of times before in DIY 3D printers. It even uses the same RAMPS controller running Marlin that powers your average homebrew printer. But beyond these surface similarities, the Cocoa Press has a number of purpose-built components that make it uniquely qualified to handle the challenges of building with molten chocolate.

For one, beyond the nozzle and the walls of the syringe, nothing physically comes into contact with the chocolate to be printed; keeping the mess and chance of contamination to a minimum. The leadscrew actuated plunger used in common paste extruders is removed in favor of a purely air powered system: a compressor pumps up a small reservoir tank with filtered and dried air, and the Marlin commands which would normally rotate the extruder stepper motor are intercepted and used to trigger an air valve. These bursts of pressurized air fill the empty area above the chocolate and force it out of the 0.8 mm nozzle.

In a normal 3D printer, the “melt zone” is tiny, which allows for the heater itself to be relatively small. But that won’t work here; the entire chocolate load has to be liquefied. It’s a bit like having to keep a whole roll of PLA melted during the entire print. Accordingly, the heater on the Cocoa Press is huge, and [Ellie] even had a couple spare heaters loaded up with chocolate syringes next to the printer to keep them warm until they’re ready to get loaded up.

Of course, getting your working material hot in a 3D printer is only half the battle, you also need to rapidly cool it back down if you want it to hold its shape as new layers are placed on top of it. A normal 3D printer can generally get away with a little fan hanging next to the nozzle, but [Ellie] found the chocolate needed a bit of a chill to really solidify.

So she came up with a cooling system that makes use of water-cooled Peltier units. The cold side of the Peltier array is inside a box through which air is forced, which makes its way through an insulated hose up to the extruder, where a centrifugal fan and 3D printed manifold direct it towards the just-printed chocolate. She reports this system works well under normal circumstances, but unusually high ambient temperatures can overwhelm the cooler.

While “the man” prevented show goers from actually eating any of the machine’s creations (to give out food in New York, you must first register with the city), they certainly looked fantastic, and we’re interested in seeing where the project goes from here.